
Firebase Setup for Web Push Notifications
When choosing Push Notification as your 2FA verification channel, the extension dispatches real-time OTP popups directly to shoppers' desktop and mobile browsers via Google Firebase Cloud Messaging (FCM).
Step 1: Create a Project in Firebase Console
- Navigate to the Firebase Console.
- Click Add project (or Get started by setting up a Firebase project).
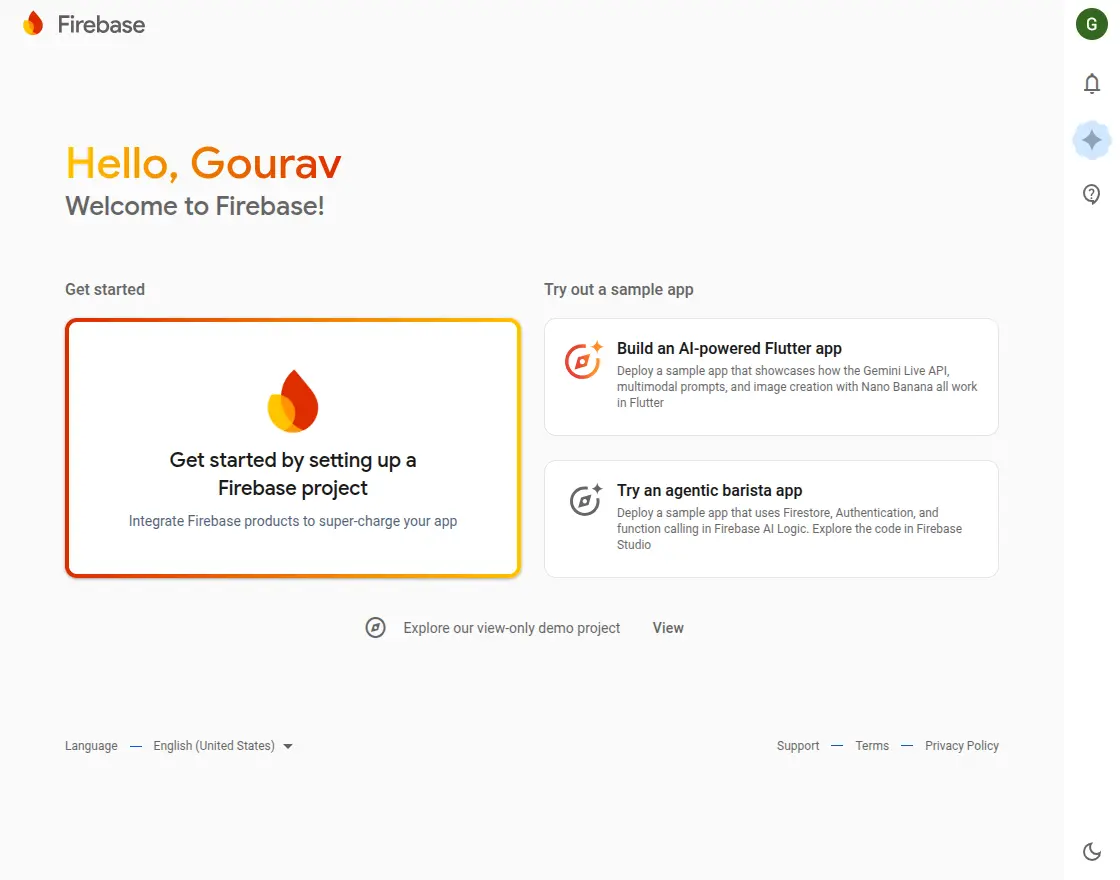
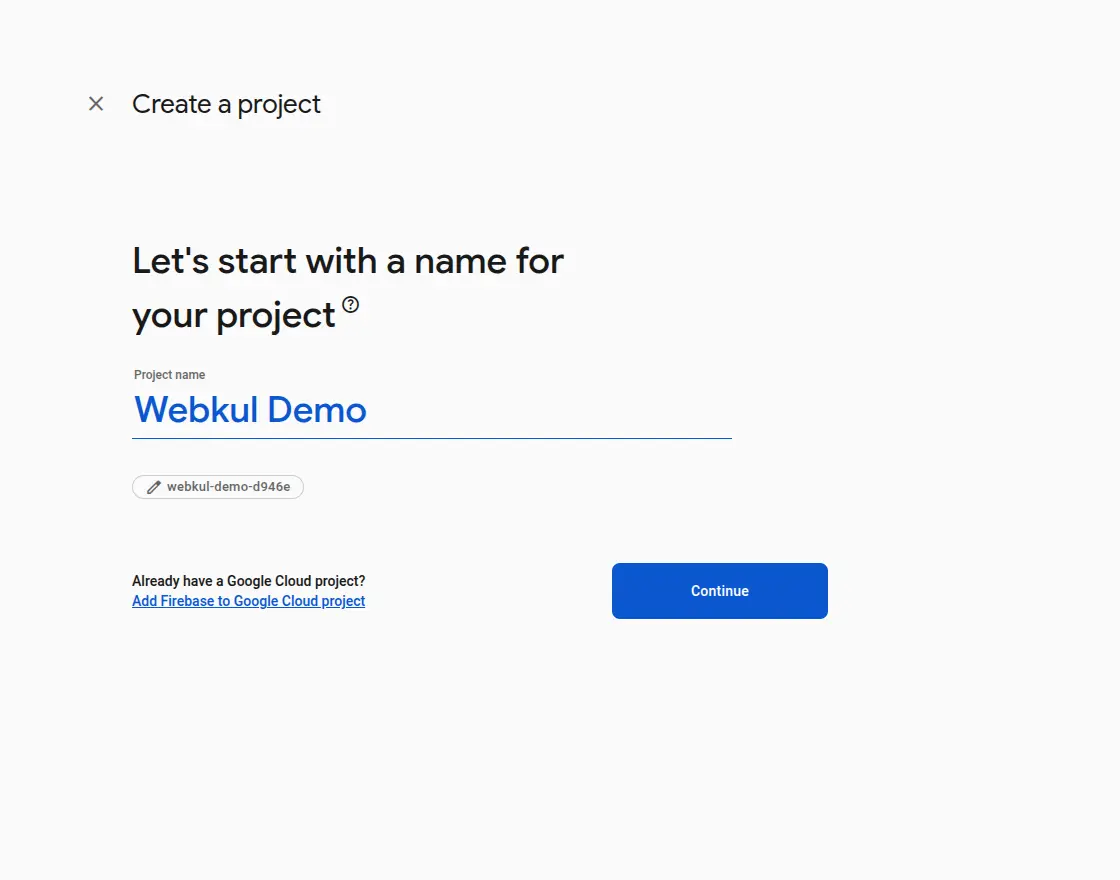
- Enter a descriptive project name (e.g.,
M customer 2FA) and click Continue.
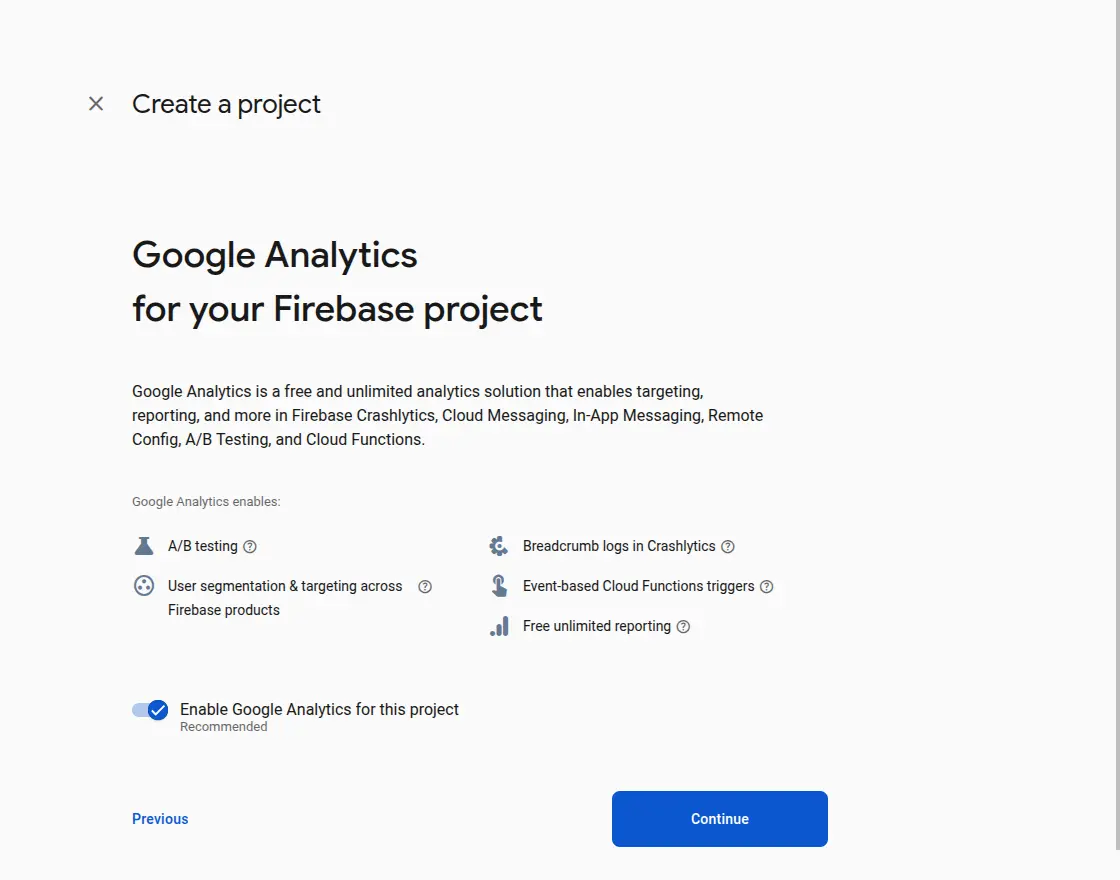
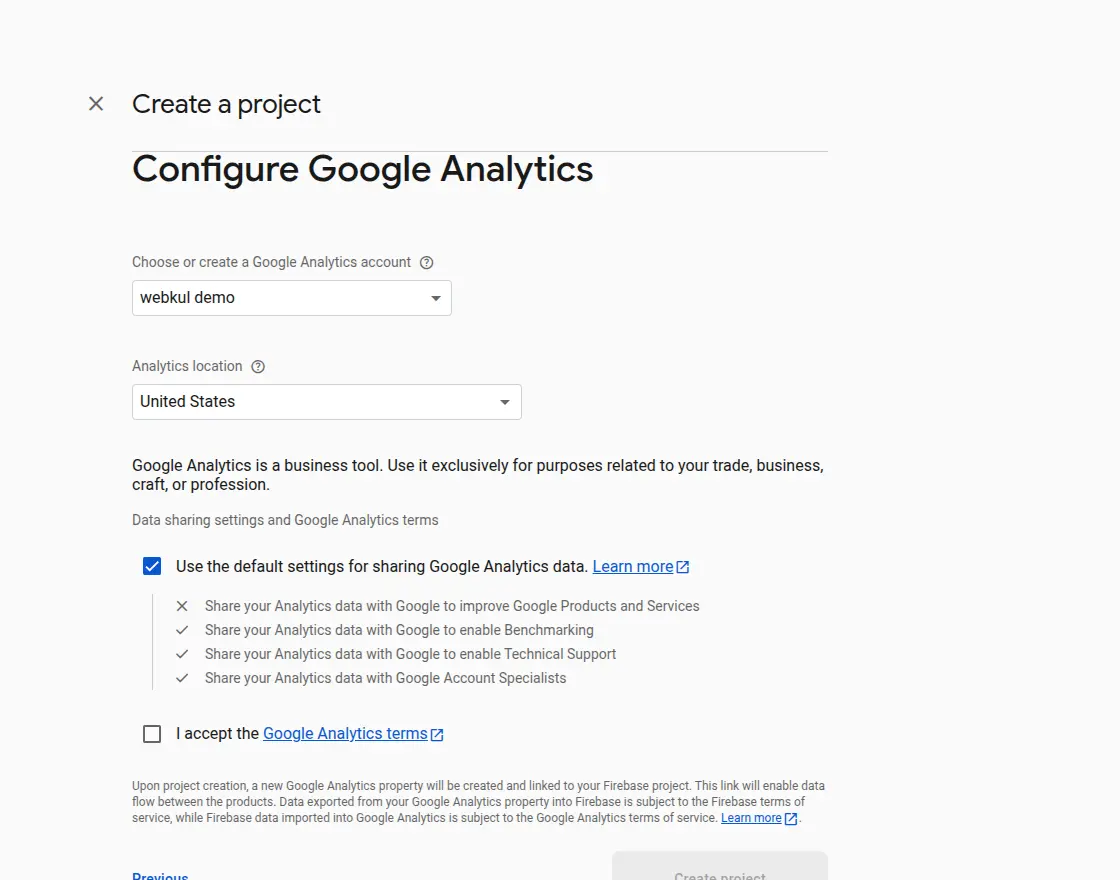
- Configure Google Analytics settings as needed and click Continue.
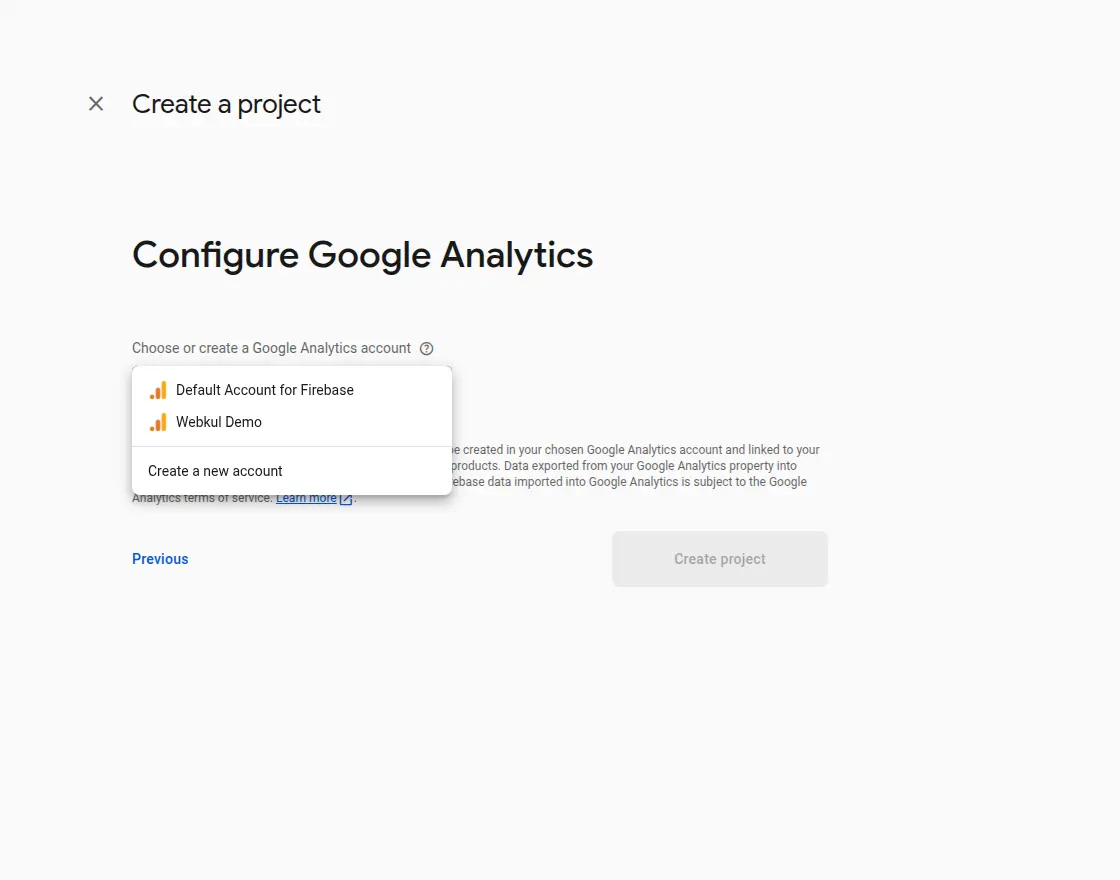
- Select or create an Analytics account, accept terms, and click Create project.
- Wait for project provisioning to complete, then click Continue.
Step 2: Retrieve Cloud Messaging Credentials
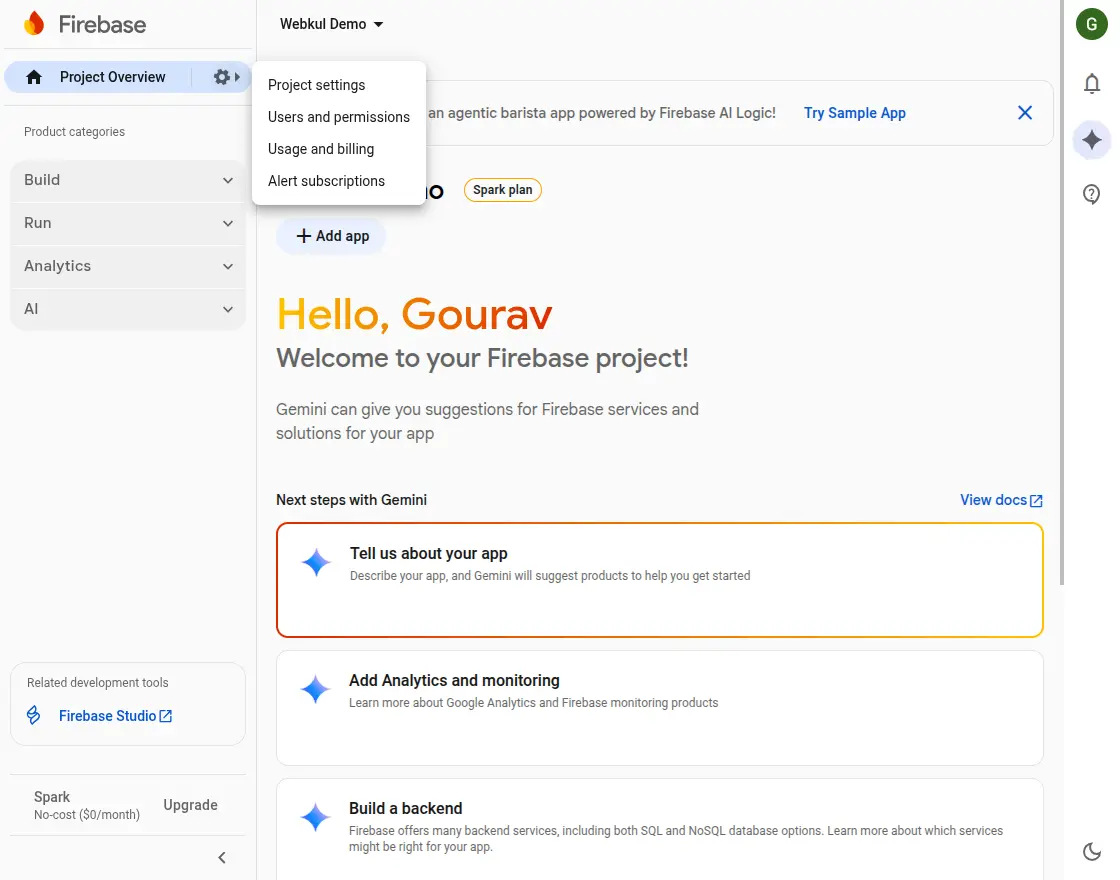
- In the left navigation bar, click the Settings (gear) icon and choose Project settings.
- Navigate to the Cloud Messaging tab:
- Copy your Server Key.
- Copy your Sender ID (Messaging Sender Id).
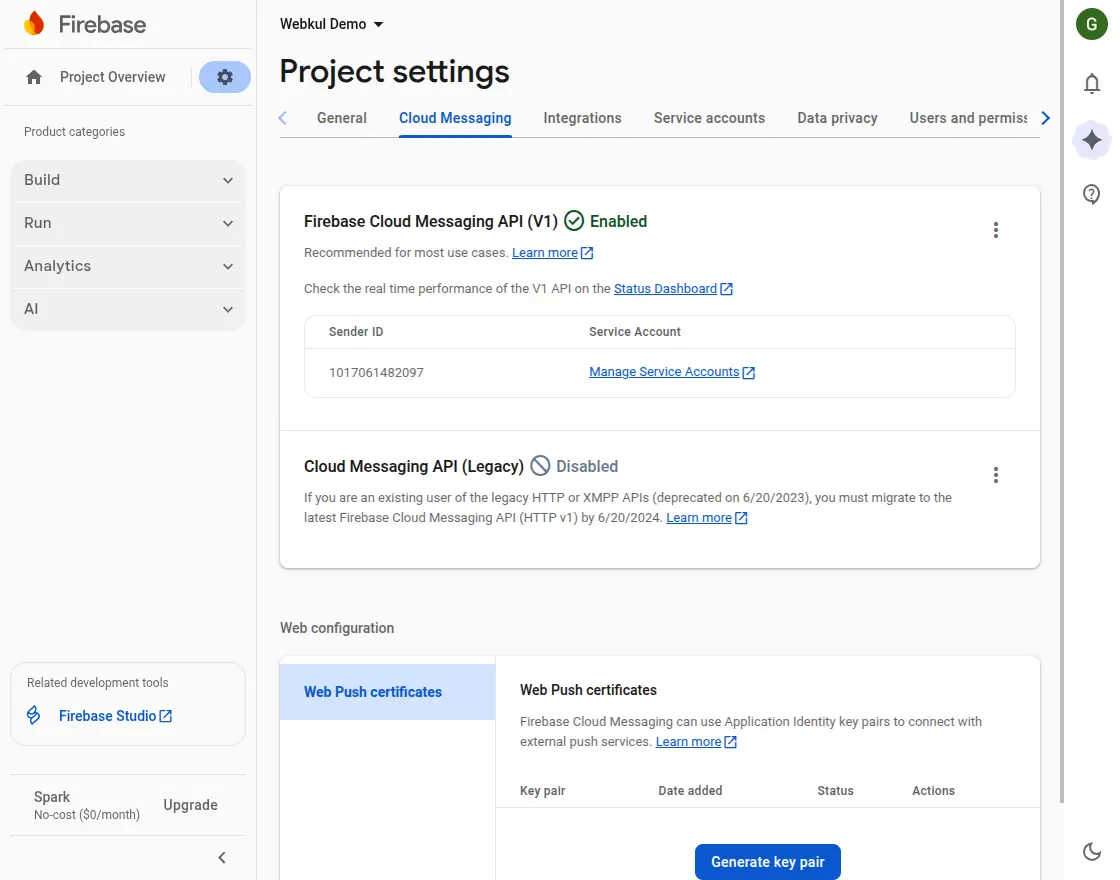
- Under Web configuration > Web Push certificates, click Generate key pair to generate your Public Key (VAPID key).
Step 3: Register Web App & Get Web SDK Config
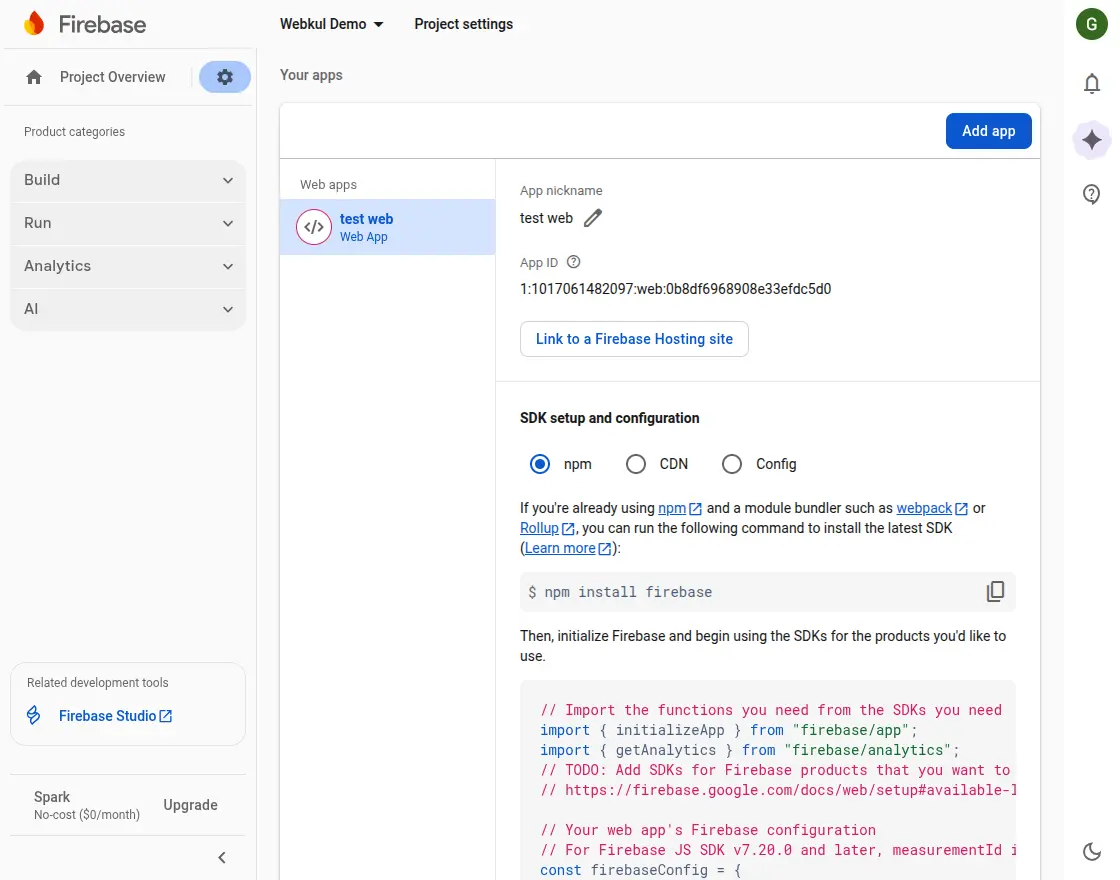
- Go to Project settings > General.
- Under the Your apps section, click the Web icon (
</>) to register a new Web App. - Enter an app nickname and click Register app.
- Firebase displays your web app configuration:
apiKey(Web API Key)authDomain(FCM Auth Domain)projectId(FCM Project Id)storageBucket(FCM Storage Bucket)messagingSenderId(Messaging Sender Id)appId(FCM App Id)measurementId(Measurement Id)
Step 4: Generate Service Account JSON Key
- In Project settings, go to the Service accounts tab.
- Ensure Firebase Admin SDK is selected with Node.js/PHP.
- Click Generate new private key and confirm by clicking Generate key.
- Save the downloaded
.jsonfile securely on your computer. This file will be uploaded under Firebase Auth JSON File in Magento Admin configuration.
HTTPS Requirement
Browser push notifications and service workers require your storefront to run on a secure HTTPS connection.