
Admin Configuration
Configure two-factor authentication rules, verification channels, account lockout settings, and IP whitelisting in the Magento 2 Admin Panel.
Navigating to Module Settings
- Log in to the Magento Admin Panel.
- Go to Stores > Configuration.
- In the left navigation, click Webkul > Two Factor Auth.
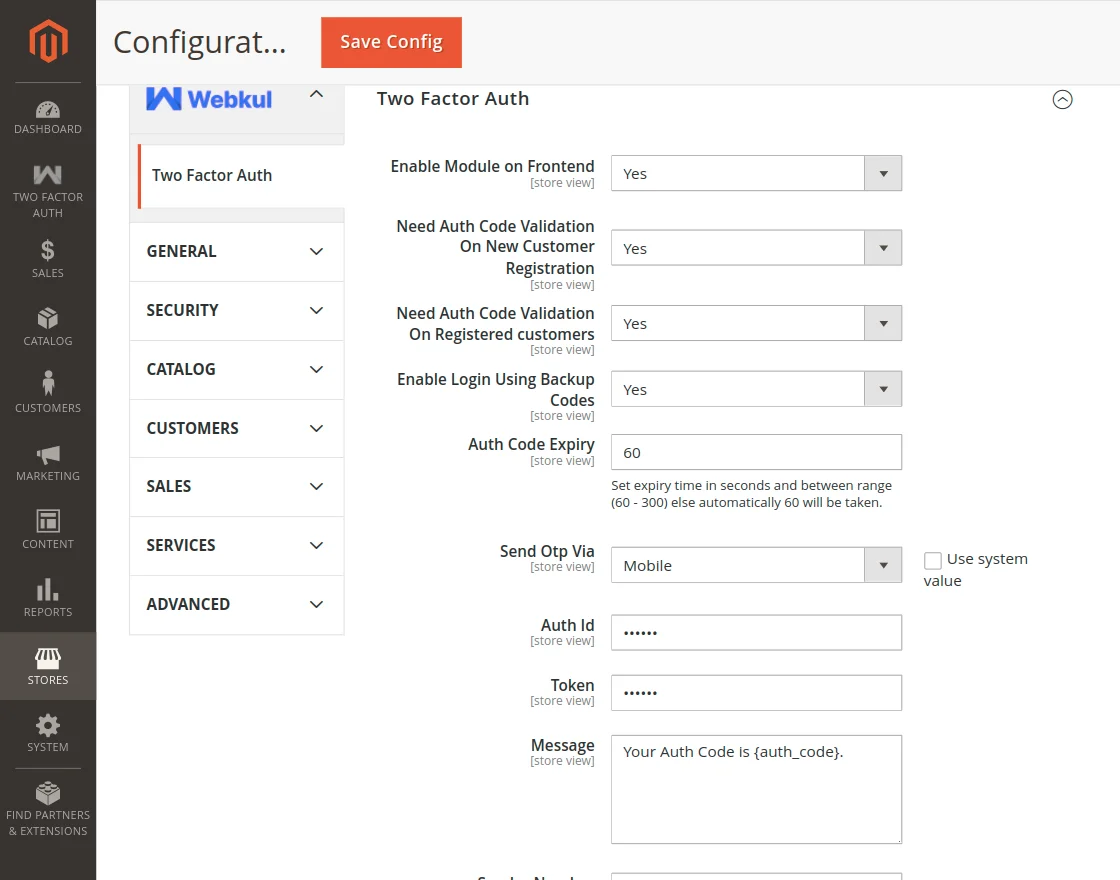
General Configuration Fields
| Setting | Type / Options | Description | Default |
|---|---|---|---|
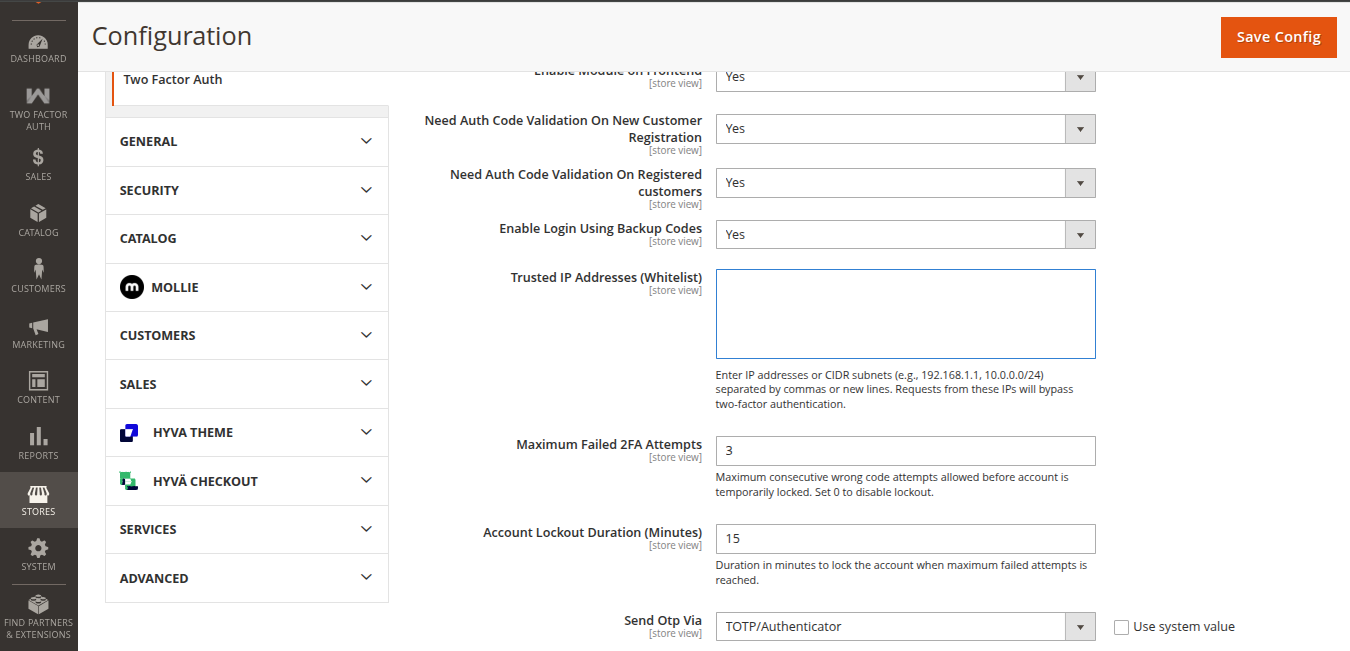
| Enable Module on Frontend | Yes / No | Master switch to enable or disable storefront 2FA verification. | Yes |
| Need Auth Code Validation On New Customer Registration | Yes / No | Require 2FA verification during account creation. | Yes |
| Need Auth Code Validation On Registered customers | Yes / No | Require 2FA verification when existing customers sign in. | Yes |
| Enable Login Using Backup Codes | Yes / No | Allows customers to authenticate using 12 single-use recovery codes if primary 2FA is unavailable. | Yes |
| Trusted IP Addresses (Whitelist) | Textarea | Comma-separated or line-separated list of IPv4 / IPv6 addresses or CIDR subnets (e.g. 115.241.28.98, 127.0.0.1, 2405:203:982:7a8::2, 10.0.0.0/24) that bypass 2FA. | Empty |
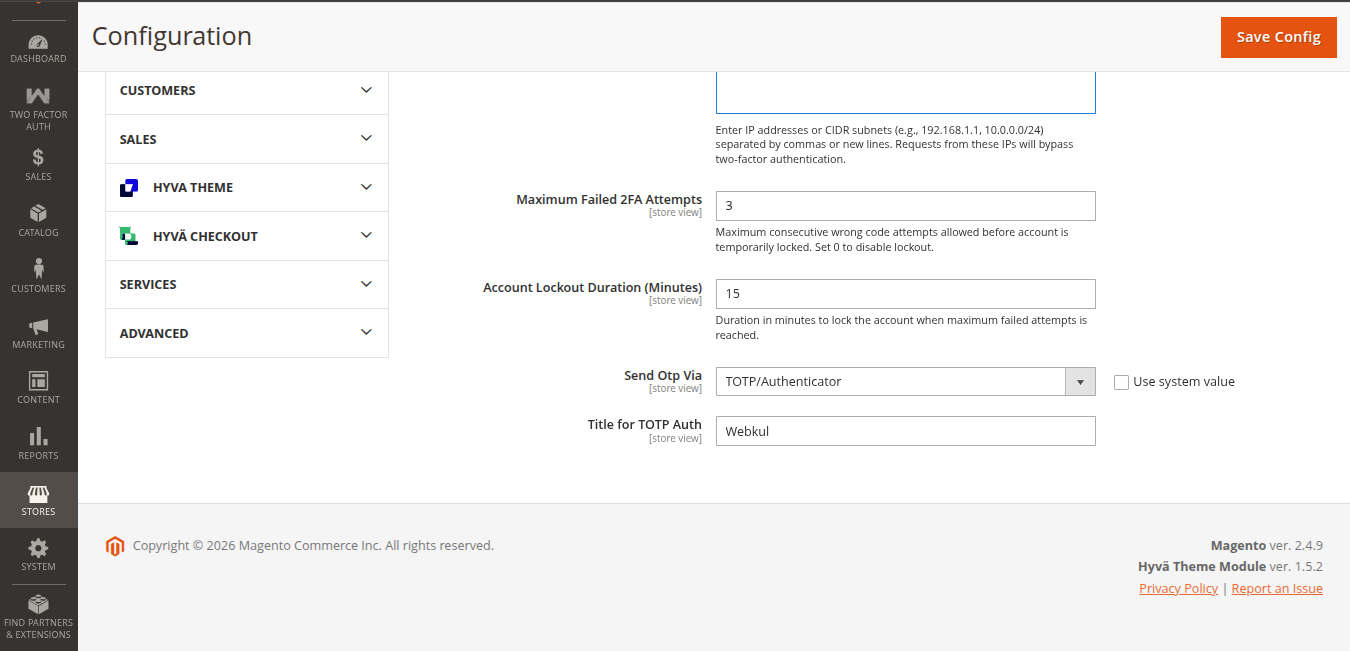
| Maximum Failed 2FA Attempts | Integer | Number of consecutive failed attempts allowed before the account is temporarily locked (e.g. 3). Set to 0 to disable lockout. | 3 |
| Account Lockout Duration (Minutes) | Integer | Number of minutes the account remains locked upon reaching max failures (e.g. 15). | 15 |
| Auth Code Expiry | Integer (Seconds) | Lifespan of the OTP code in seconds (must be within 60 to 300 seconds). | 60 |
| Send Otp Via | Dropdown | Select the active 2FA channel: Mobile, Email, Sending Email Link, Push Notification, or TOTP/Authenticator. | Email |
| Title for TOTP Auth | Text | Displayed issuer name in customer's Authenticator App (e.g., Webkul). | Webkul |
Channel-Specific Settings
Depending on the selection made in Send Otp Via, configure the corresponding sub-section below:
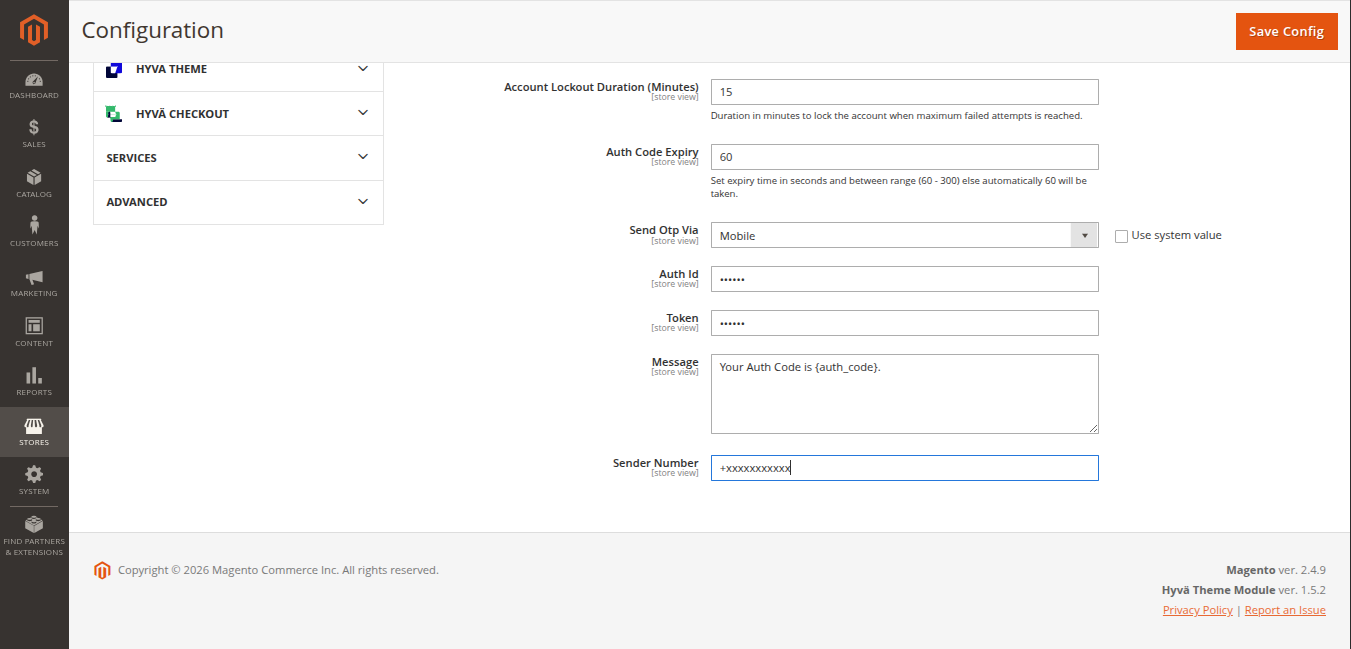
1. Mobile (Twilio SMS) Settings
When Send Otp Via is set to Mobile:
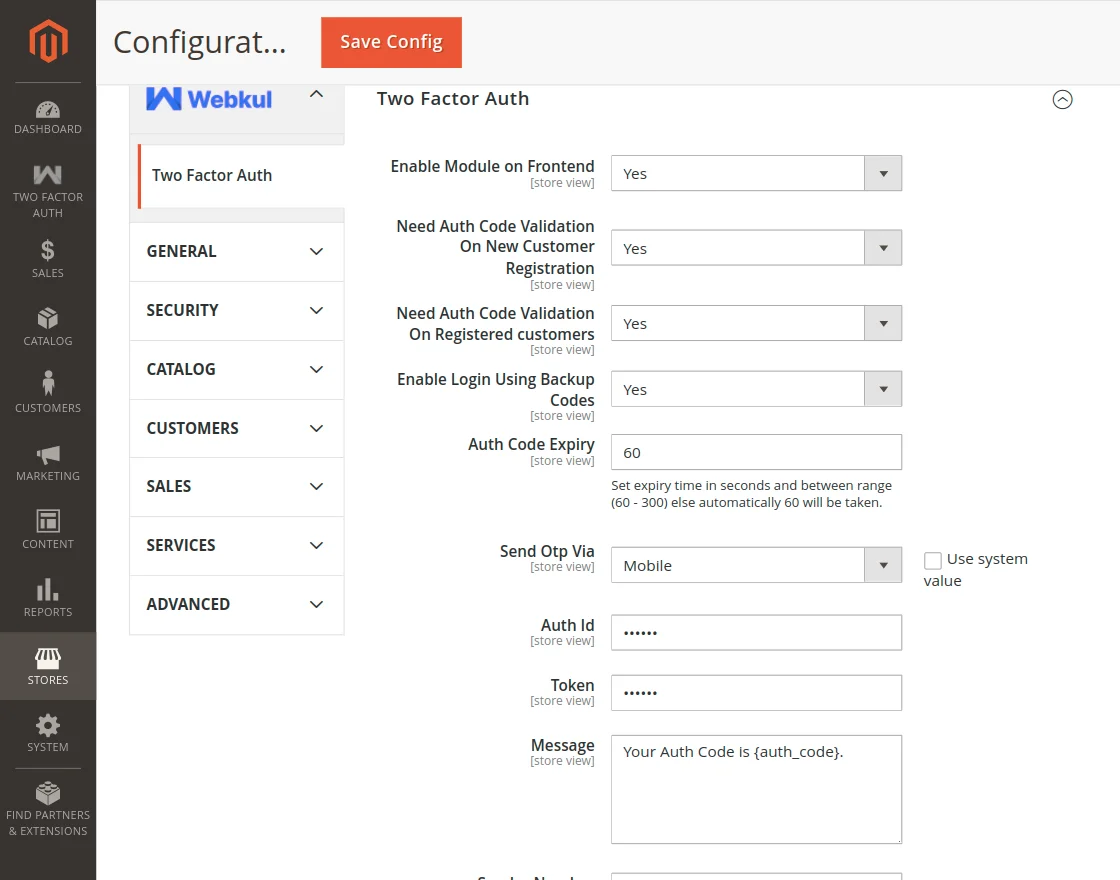
- Auth ID: Your Twilio Account SID.
- Token: Your Twilio Auth Token.
- Message: Custom SMS template. Use
{auth_code}as the replacement placeholder (e.g.,Your Auth Code is {auth_code}.). - Sender Number: Your registered Twilio phone number in international format.
2. Email / Email Link Settings
When Send Otp Via is set to Email or Sending Email Link:
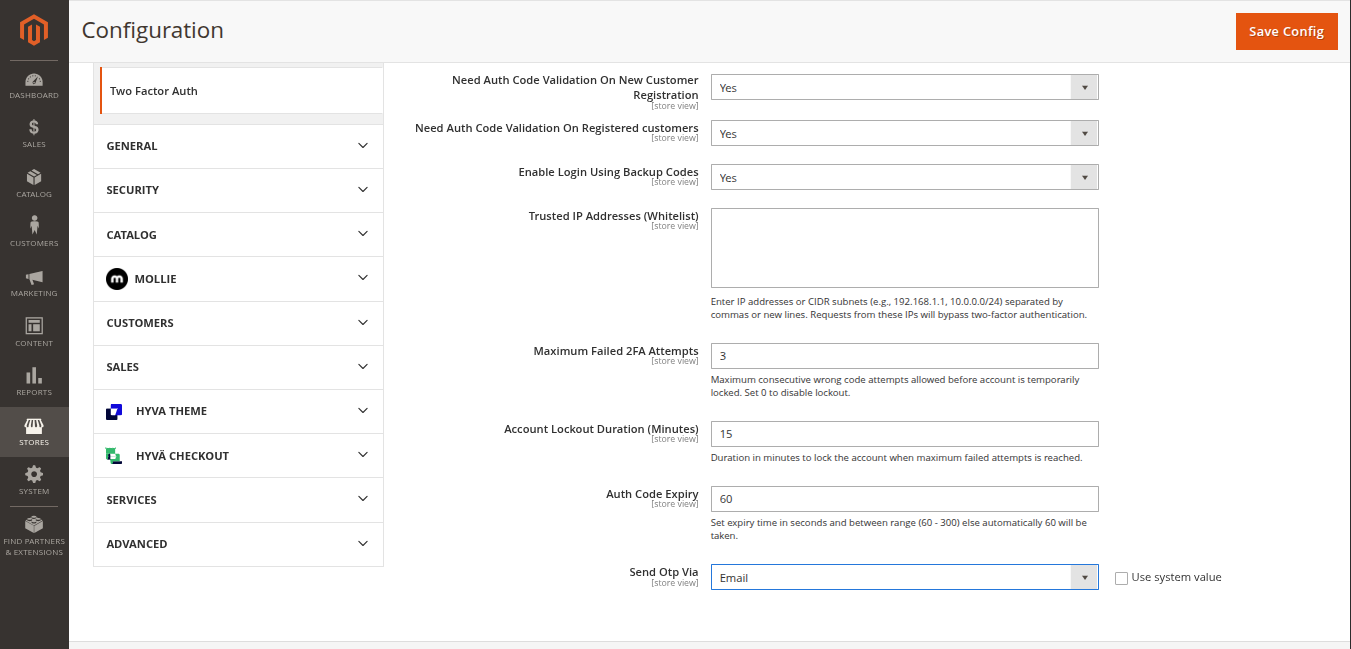
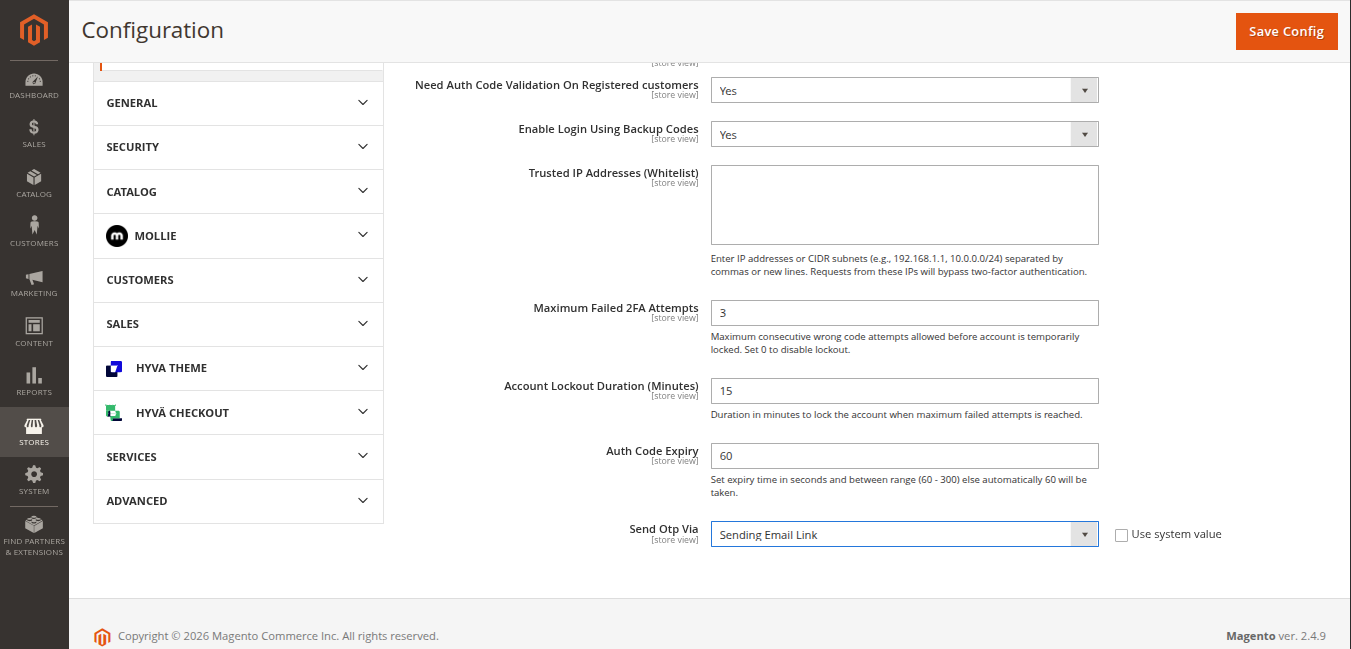
The extension utilizes standard Magento transactional email templates to dispatch verification codes or one-click verification magic links.
3. Push Notification (Firebase FCM) Settings
When Send Otp Via is set to Push Notification:
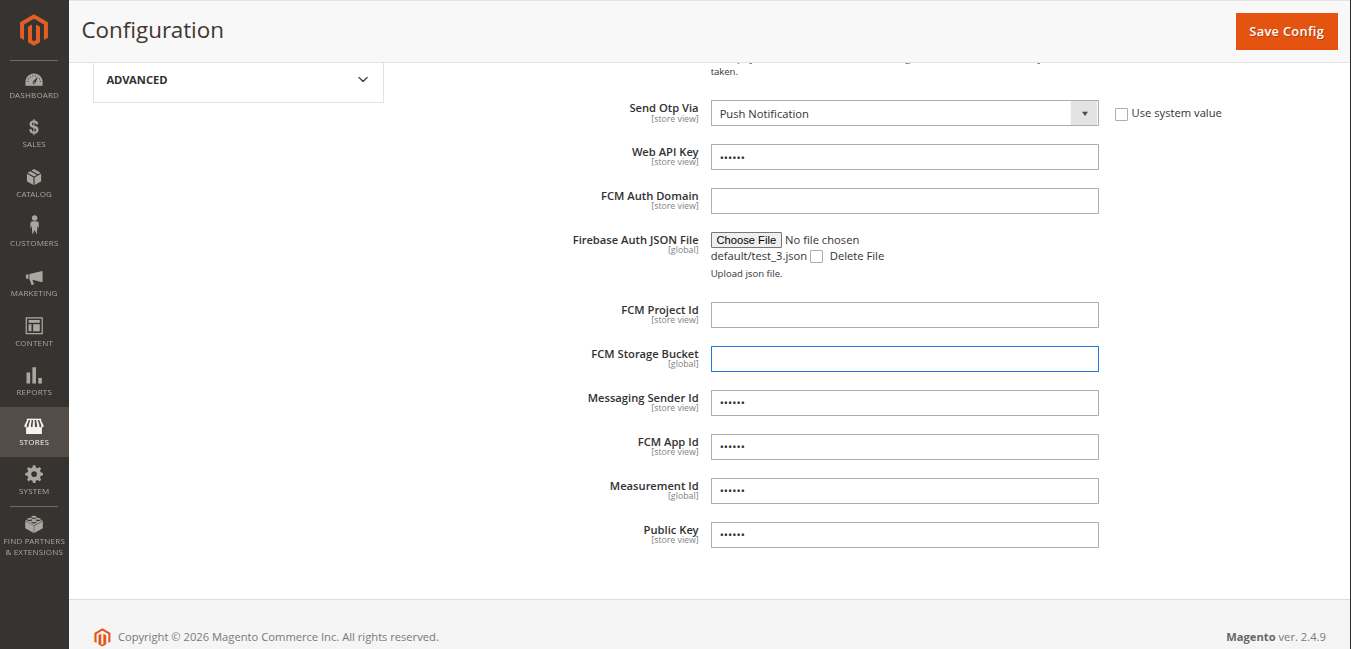
- Web API Key: Web API key from Firebase Project Settings.
- FCM Auth Domain:
project-id.firebaseapp.com. - Firebase Auth JSON File: Upload your downloaded Service Account
.jsonprivate key file. - FCM Project Id: Your Firebase project identifier.
- FCM Storage Bucket:
project-id.appspot.com. - Messaging Sender Id: Your Firebase Sender ID.
- FCM App Id: Your Firebase Web App ID.
- Measurement Id: Optional Google Analytics Measurement ID.
- Public Key: VAPID Web Push certificate public key.
4. TOTP / Authenticator Settings
When Send Otp Via is set to TOTP/Authenticator:
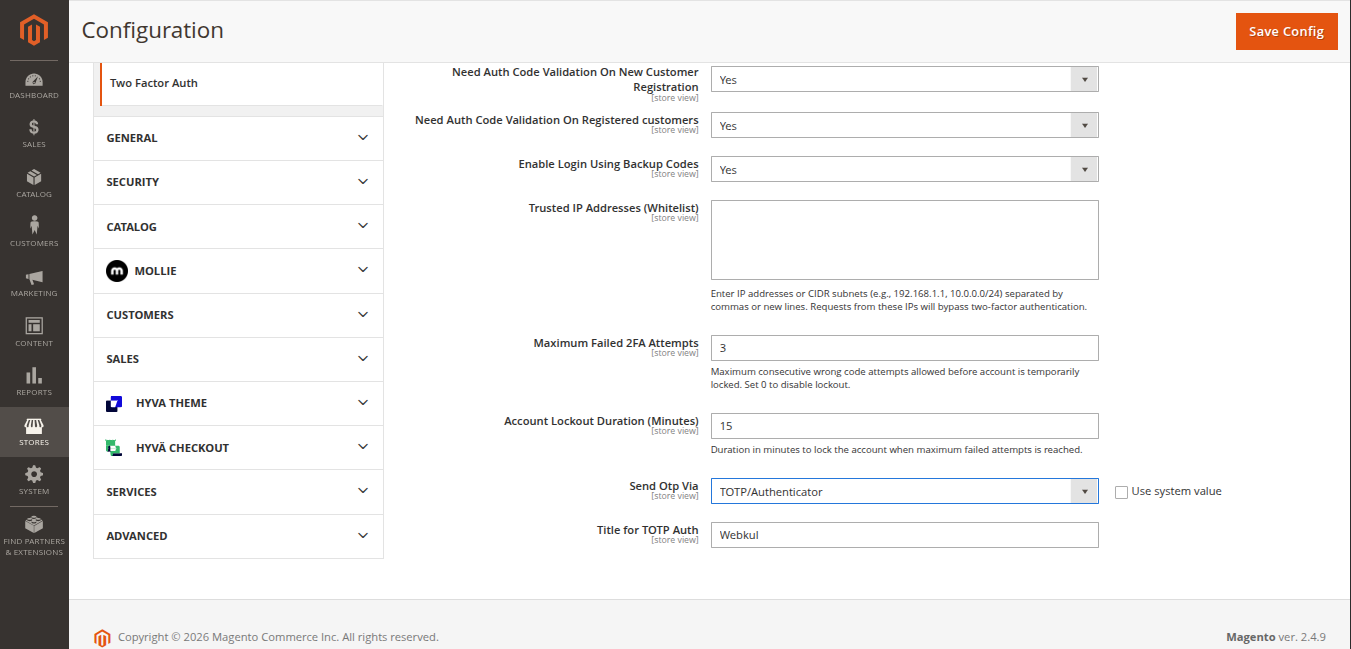
- Title for TOTP Auth: Enter an issuer name that appears in the customer's authenticator app (e.g.,
Webkul Two Factor Author your store name).
Saving and Applying Changes
After updating your settings:
- Click Save Config in the top-right corner.
- Flush the Magento cache:
php bin/magento cache:flush