
Installation Guide
Follow these steps to install the Magento 2 Multi Vendor Mass Upload module on your server.
Step 1: Unzip & File Transfer
- Extract the downloaded zip folder on your local system.
- Inside the extracted folder, locate the
srcdirectory containing theappfolder. - Transfer the
appfolder into the Magento 2 root directory on your server via FTP/SFTP or SSH.
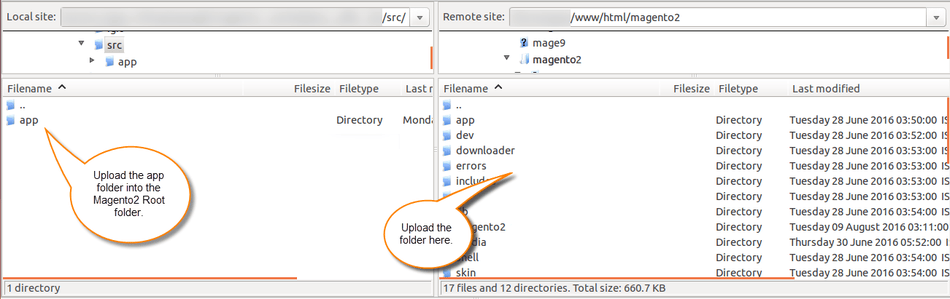
Step 2: Install Composer Dependency
The Mass Upload module relies on phpoffice/phpspreadsheet to read .xls and .xlsx files. Run the following command in your Magento 2 root folder:
composer require phpoffice/phpspreadsheet
Step 3: Run Deployment Commands
Open your terminal, navigate to the Magento 2 root directory, and execute the standard deployment CLI commands in sequence:
# Upgrade database setup and register module
php bin/magento setup:upgrade

# Compile dependency injection code
php bin/magento setup:di:compile

# Deploy static content assets
php bin/magento setup:static-content:deploy -f

# Reindex all search and catalog indexers
php bin/magento indexer:reindex

# Flush Magento cache storage
php bin/magento cache:flush
Step 4: Verify Installation
Log in to your Magento Admin Panel and navigate to Stores > Configuration > Marketplace. You should see the Mass Upload Manager and Seller Product's Settings options available.