Installation Guide
Follow these steps to install and set up the Magento 2 Multi Vendor Dropship extension on your server.
Step 1: Extract and Upload Extension Files
- Download the extension ZIP archive from your Webkul Store Account.
- Extract the archive onto your computer. You will obtain a directory containing a
srcfolder. - Inside the
srcfolder, find theappfolder. - Upload the contents of the
appfolder into your Magento 2 root directory on your remote server via SFTP or SSH.
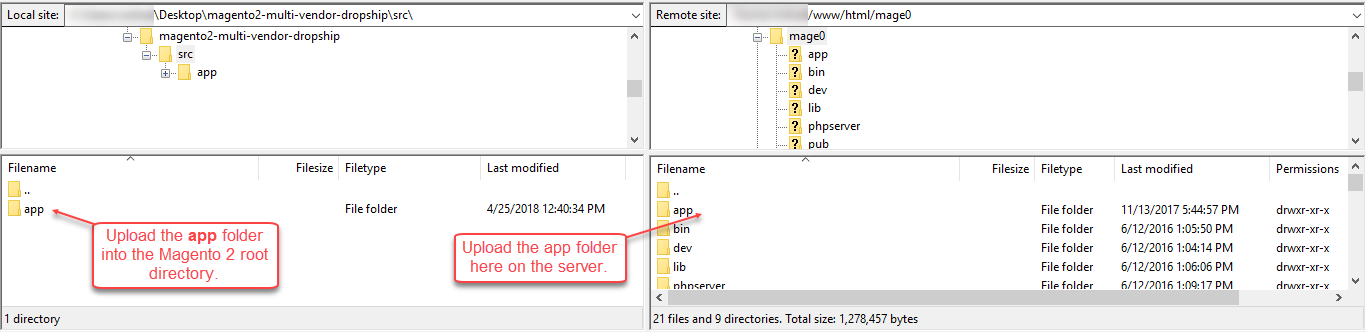
Verify that the files reside in the following directory path:
<Magento_Root>/
└── app/
    └── code/
        └── Webkul/
            └── VendorDropship/
Step 2: Run Deployment CLI Commands
Connect to your server via SSH terminal, switch to your Magento filesystem owner user (e.g. www-data or your developer user), navigate to the Magento 2 installation root, and run the following commands:
1. Upgrade Database Schema & Modules
Registers Webkul_VendorDropship and creates all required database tables:
php bin/magento setup:upgrade
2. Compile Dependency Injection
Generates interceptors, proxies, and repositories:
php bin/magento setup:di:compile
3. Deploy Static View Assets
Deploys frontend and adminhtml themes, templates, and styles:
php bin/magento setup:static-content:deploy -f
Step 3: Flush Magento Cache
Clear all application caches using the command line:
php bin/magento cache:flush
Or log in to your Magento 2 Admin Panel, navigate to System > Cache Management, and click Flush Magento Cache.
Step 4: Verification in Admin Panel
To verify successful installation:
- Log in to the Magento Admin Panel.
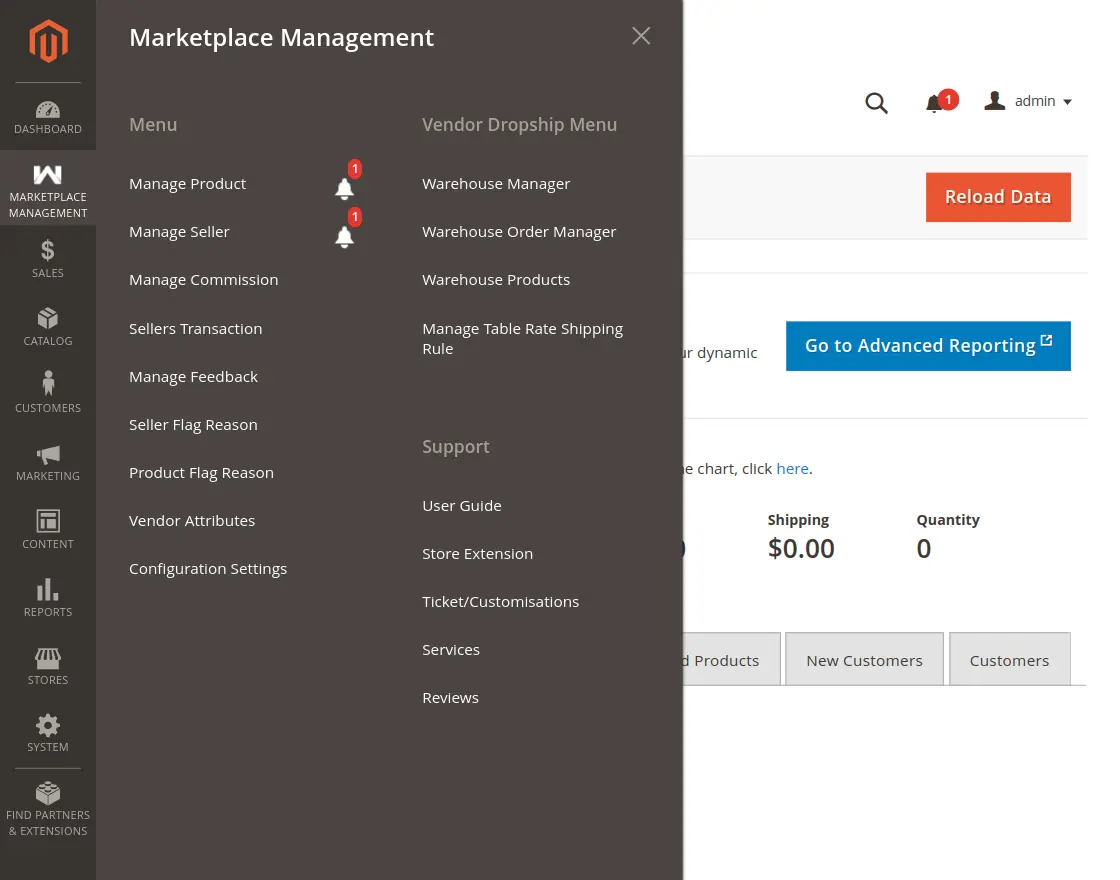
- In the left navigation menu, locate Marketplace Management > Vendor Dropship Menu.
- Confirm the presence of the following menus:
- Warehouse Manager
- Warehouse Order Manager
- Warehouse Products
- Manage Table Rate Shipping Rule