Manage Campaigns
Admin guide to creating, editing, and managing marketplace promotional campaigns.
Accessing Campaign Manager
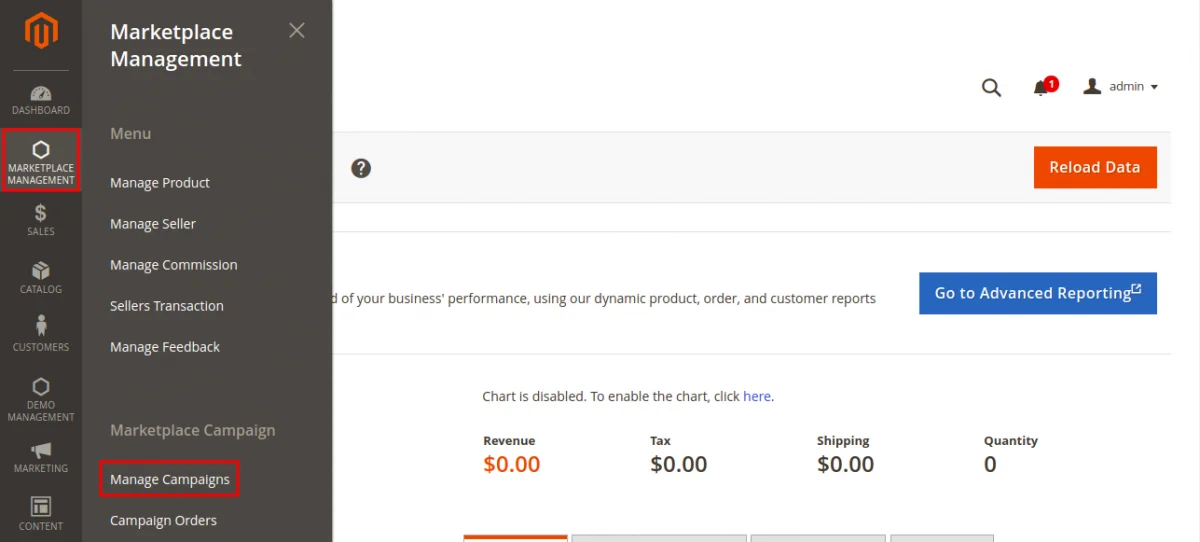
Navigate to Marketplace Management > Manage Campaigns.
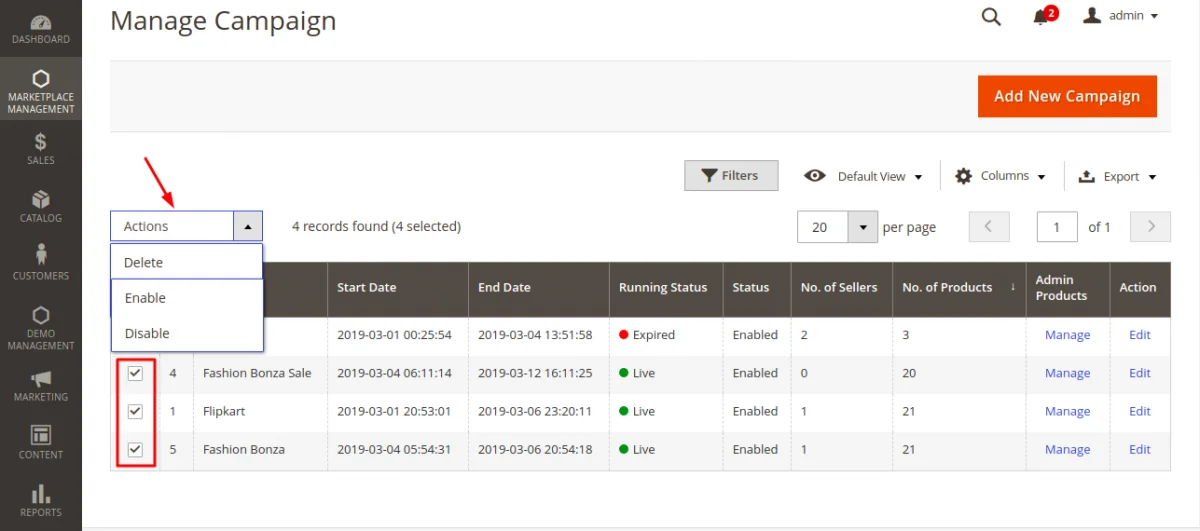
The campaign grid displays all campaigns along with their Title, Status, Start Date, End Date, Website, and Action.
Creating a New Campaign
Click Add New Campaign to open the creation form. The form is structured into five configuration sections:
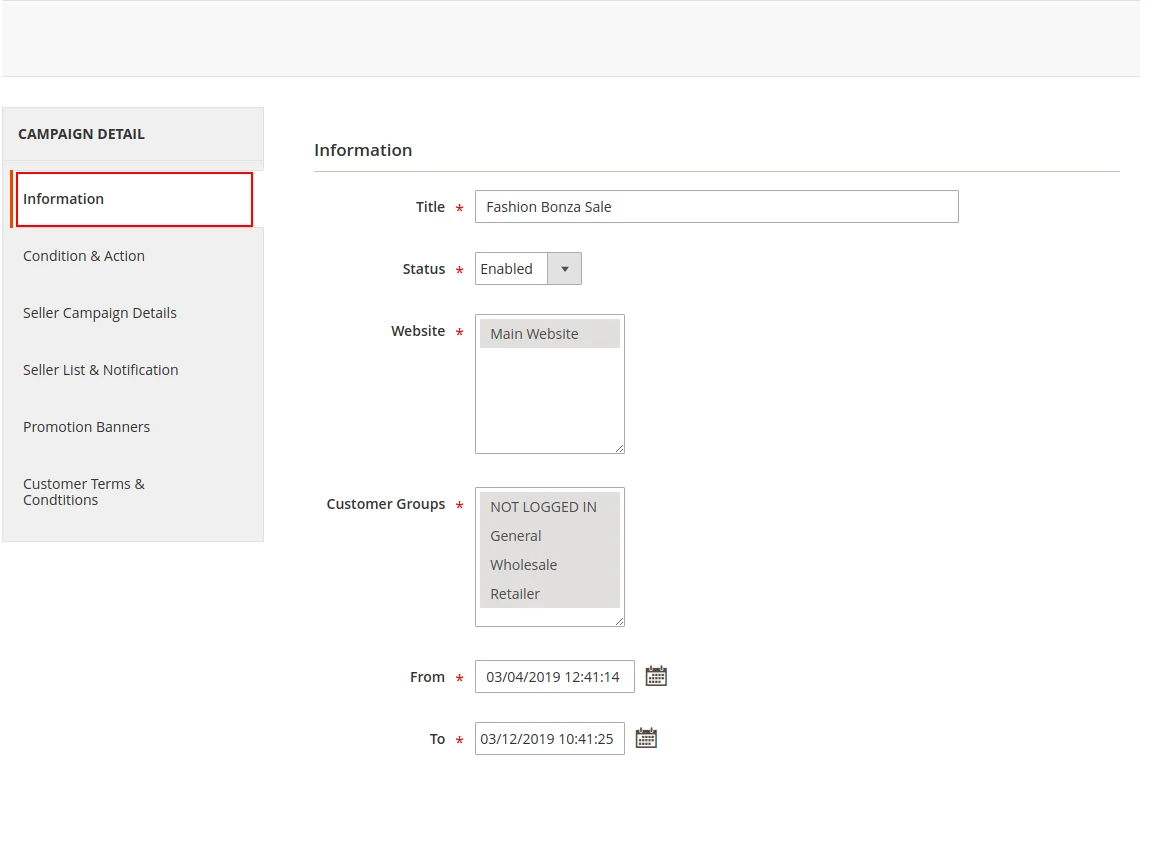
1. Information Section
- Title: Name of the campaign displayed in admin and customer views.
- Status: Enable or Disable the campaign.
- Website: Select the target store website(s).
- Customer Group: Choose target customer groups (e.g., General, Wholesale, NOT LOGGED IN).
- From / To: Set campaign starting and ending dates.
2. Condition & Action Section
Set rule conditions and discount calculations:
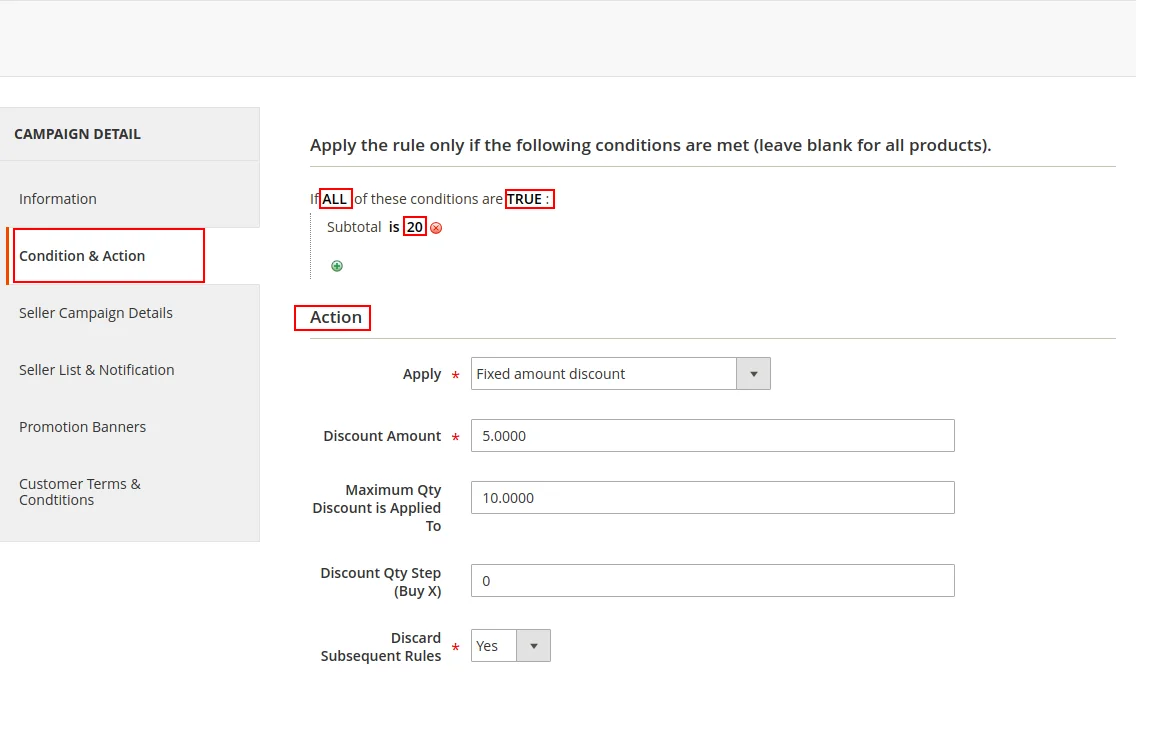
- Apply: Select discount action type:
- Percent of product price discount: Subtracts a percentage off original price.
- Fixed amount discount: Subtracts a fixed monetary amount per item.
- Fixed amount discount for whole cart: Applies a fixed discount to total cart amount.
- Buy X get Y Free: Offers free items when purchasing a specific quantity.
- Discount Amount: Numeric value for discount.
- Maximum Qty Discount is Applied to: Limit the number of eligible items per purchase.
- Discount Qty Steps (Buy X): Sets quantity required to trigger Buy X Get Y rule.
- Discard Subsequence Rules: Set to Yes to prevent other promotional rules from stacking.
3. Seller Campaign Details Section
Configure seller participation rules:
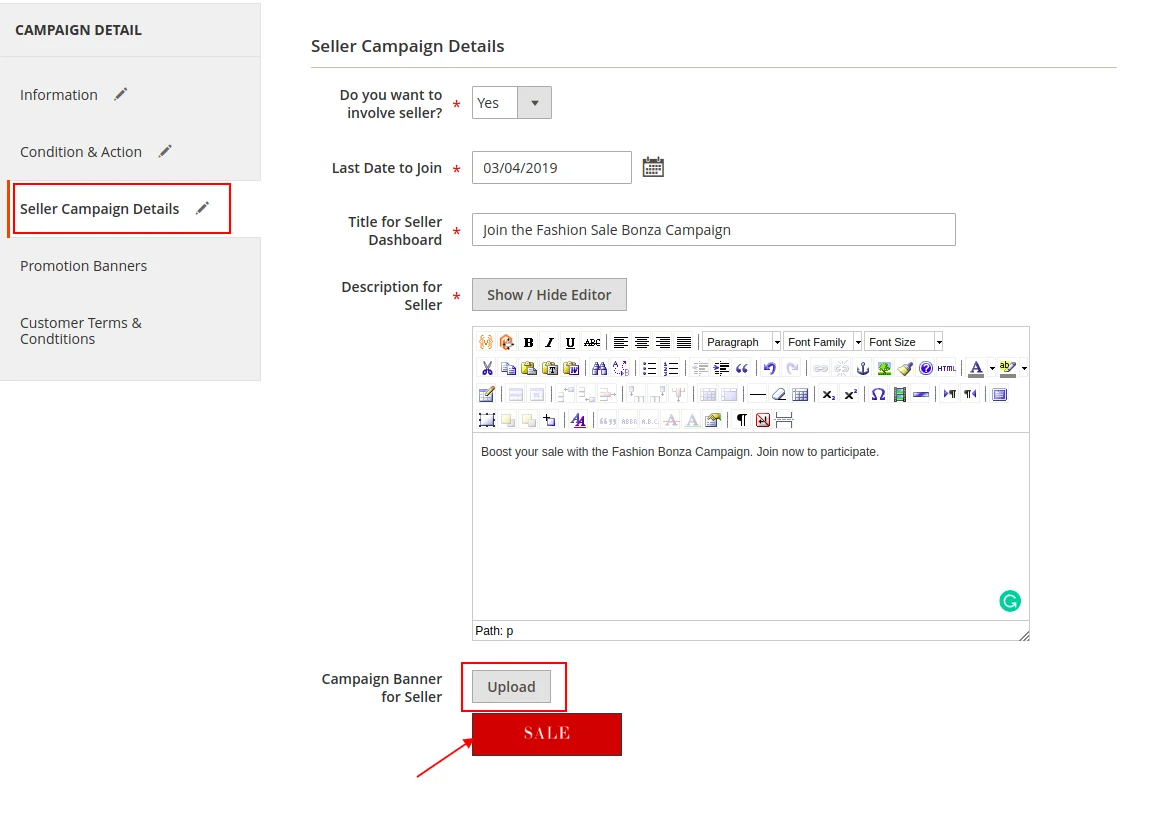
- Involve Seller: Enable to allow marketplace sellers to participate.
- Last Date to Join: Cutoff date for seller registration.
- Title for Seller Dashboard: Custom title displayed in the seller portal.
- Description for Seller: Campaign details and instructions for sellers.
- Campaign Banner for Seller: Upload a promotional banner image for sellers.
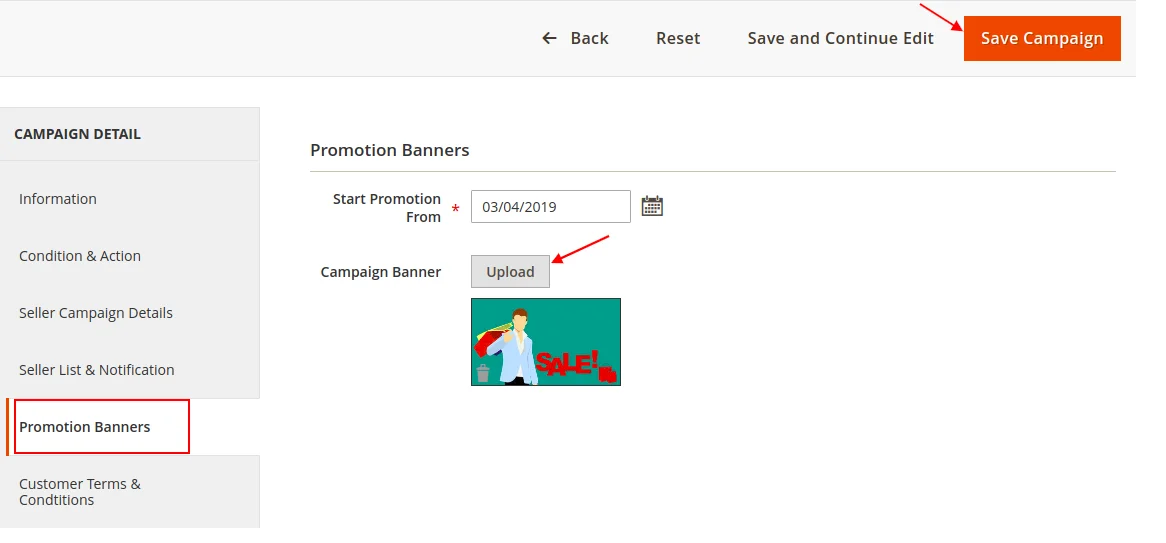
4. Promotion Banners Section
- Start Promotion From: Date when promotional banners become visible on storefront.
- Campaign Banner: Upload customer-facing storefront banner.
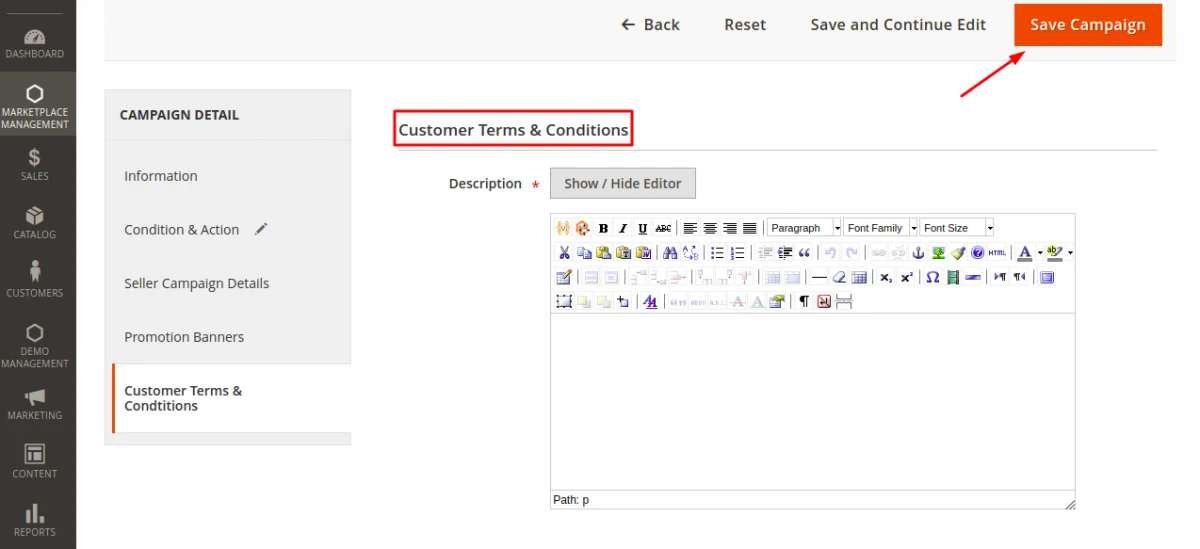
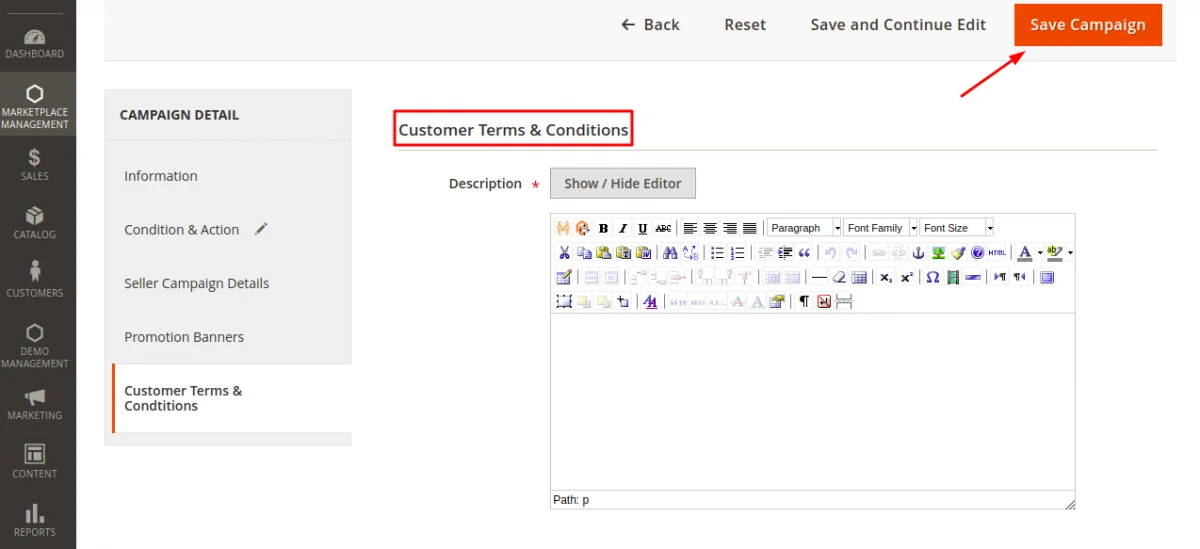
5. Customer Terms & Conditions Section
Provide full terms and conditions text for buyers using the text editor.
Seller Invites & Notifications
Open any campaign, click Edit, and select the Seller List & Notification tab.
- Select target sellers from the grid.
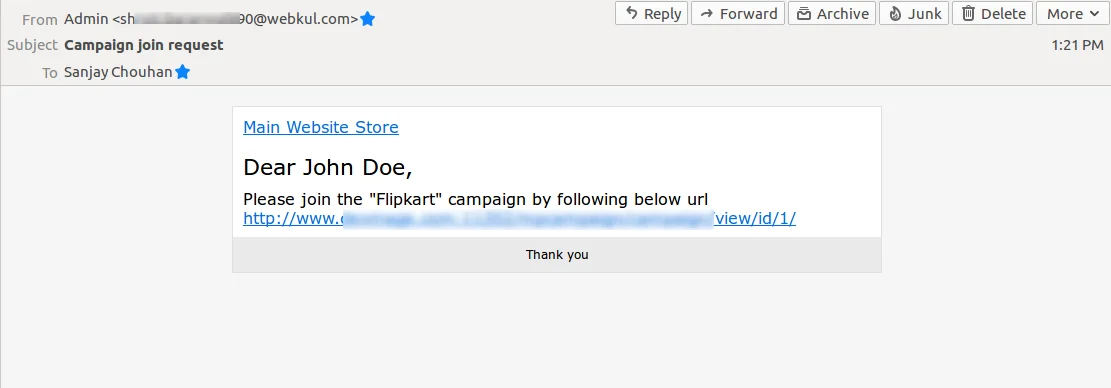
- In Actions, choose Request to Join or Remove from Campaign.
- Click Save Changes to send automated email invitations.
Campaign Orders Tracking
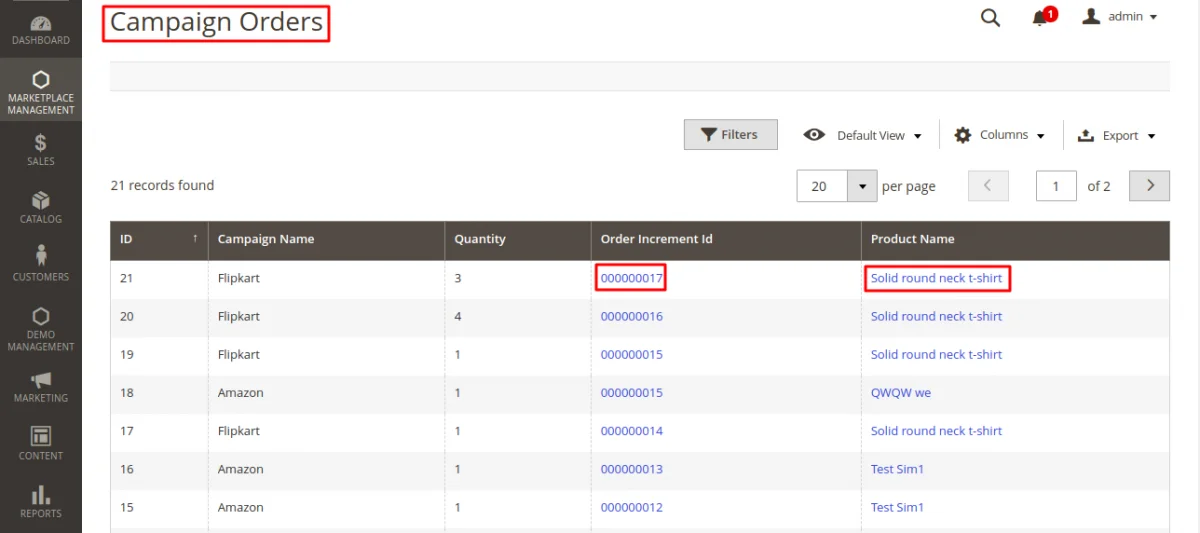
Track sales generated through campaigns under Marketplace Management > Campaign Orders.
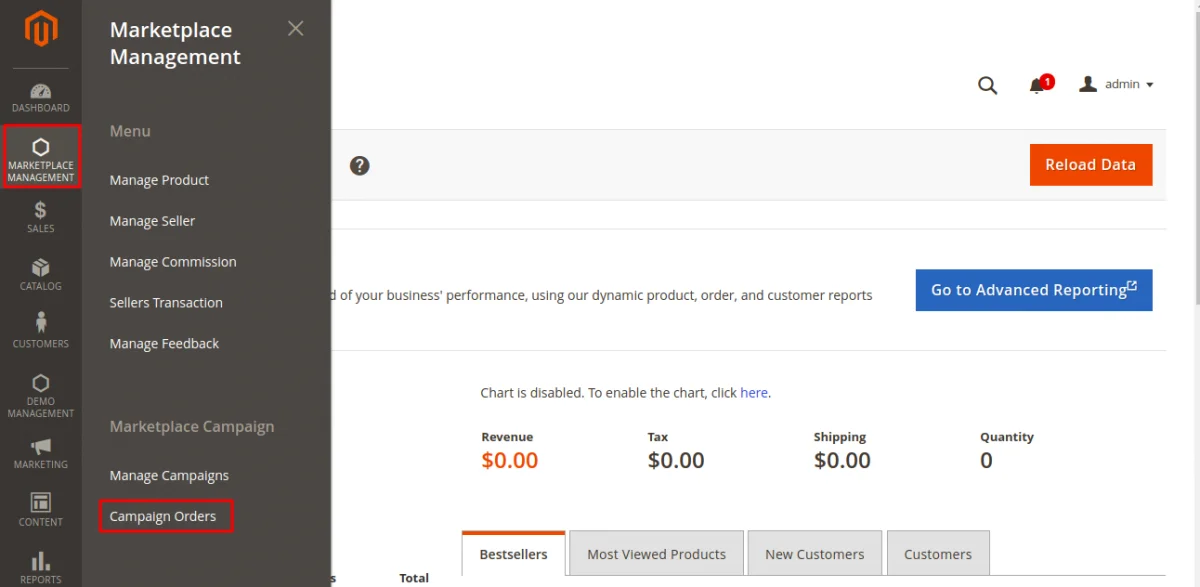
View campaign names, order IDs, product details, and ordered quantities in the grid.