
Seller Registration Flow
This page details the storefront experience and technical lifecycle across all registration scenarios: general public visitors, invited new merchants, and existing registered customers.
Scenario A: General Public Access (Module Enabled)
When the Seller Invitation module is enabled (marketplace/sellerinvitation/status = 1):
- A visitor navigates to the customer registration page (
customer/account/create/). - The template layout override suppresses the standard Webkul Marketplace prompt:
- "Do You Want To Become A Seller / Vendor?" radio options are hidden.
- The visitor fills out first name, last name, email address, and password.
- The visitor is registered strictly as a Standard Retail Customer.
- No marketplace seller profile is created.
Scenario B: New Vendor Registration via Invite Link
When a prospective vendor receives an invitation email, they click the Register Now call-to-action button containing their unique invitation code:
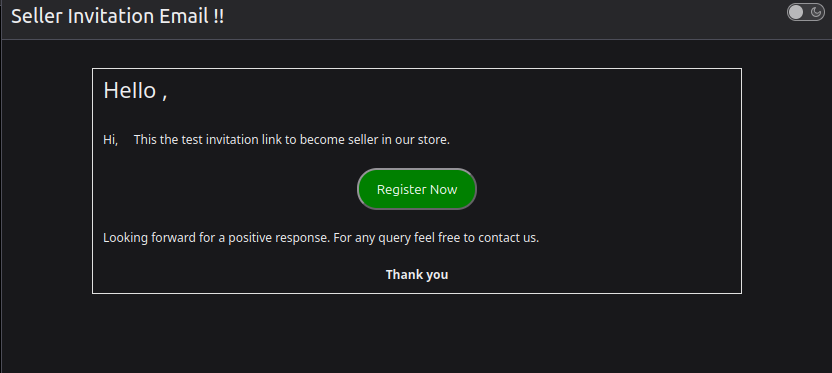
https://<store-domain>/customer/account/create/?inviteCode=aBcDeF1234567890
1. Link Validation & Form Pre-population
Before rendering the page, the SellerRegisterBefore observer validates the request:
- Checks if
inviteCodeexists inwk_mp_invitation. - Verifies that
status == 0(token has not been previously consumed). - If Link Expiration is enabled, calculates whether the elapsed time is within
link_expiryhours. - If valid, the system retrieves the
nameandemailassociated with that invitation code and pre-populates the registration form:- First Name: Populated from invitation name.
- Email Address: Populated from invitation email.
- Injects a hidden parameter:
<input type="hidden" id="wantpartner" class="wantpartner" name="is_seller" value="1" />
<input type="hidden" name="inviteCode" value="aBcDeF1234567890" />
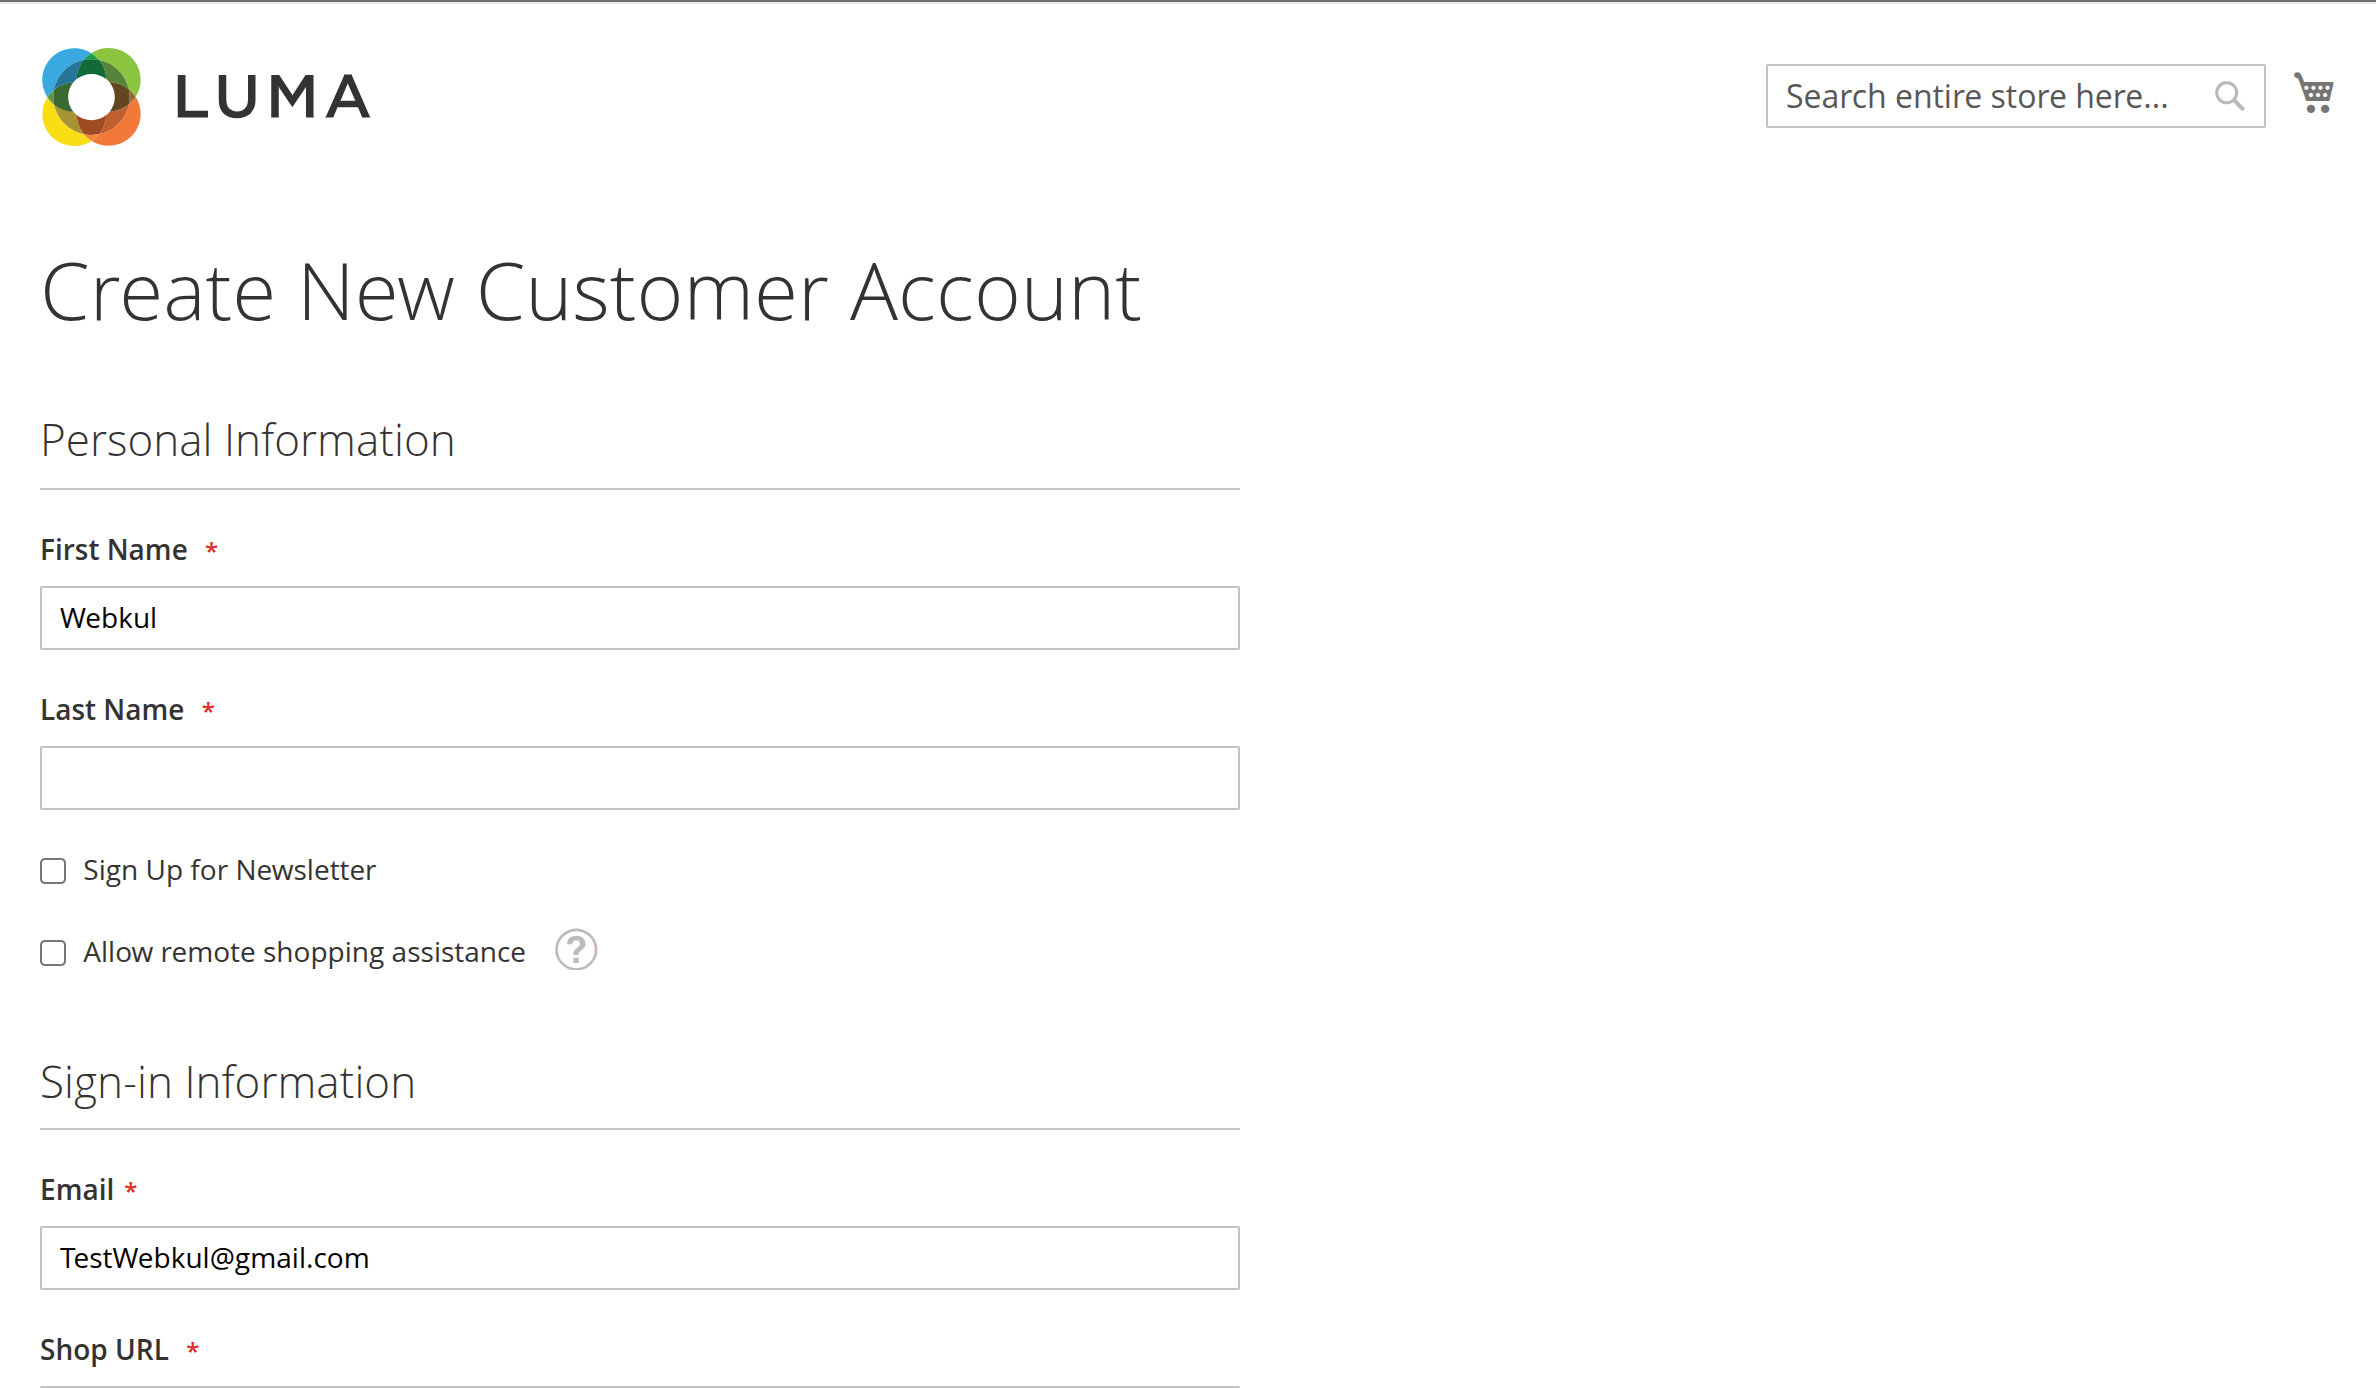
2. Live AJAX Shop URL Verification
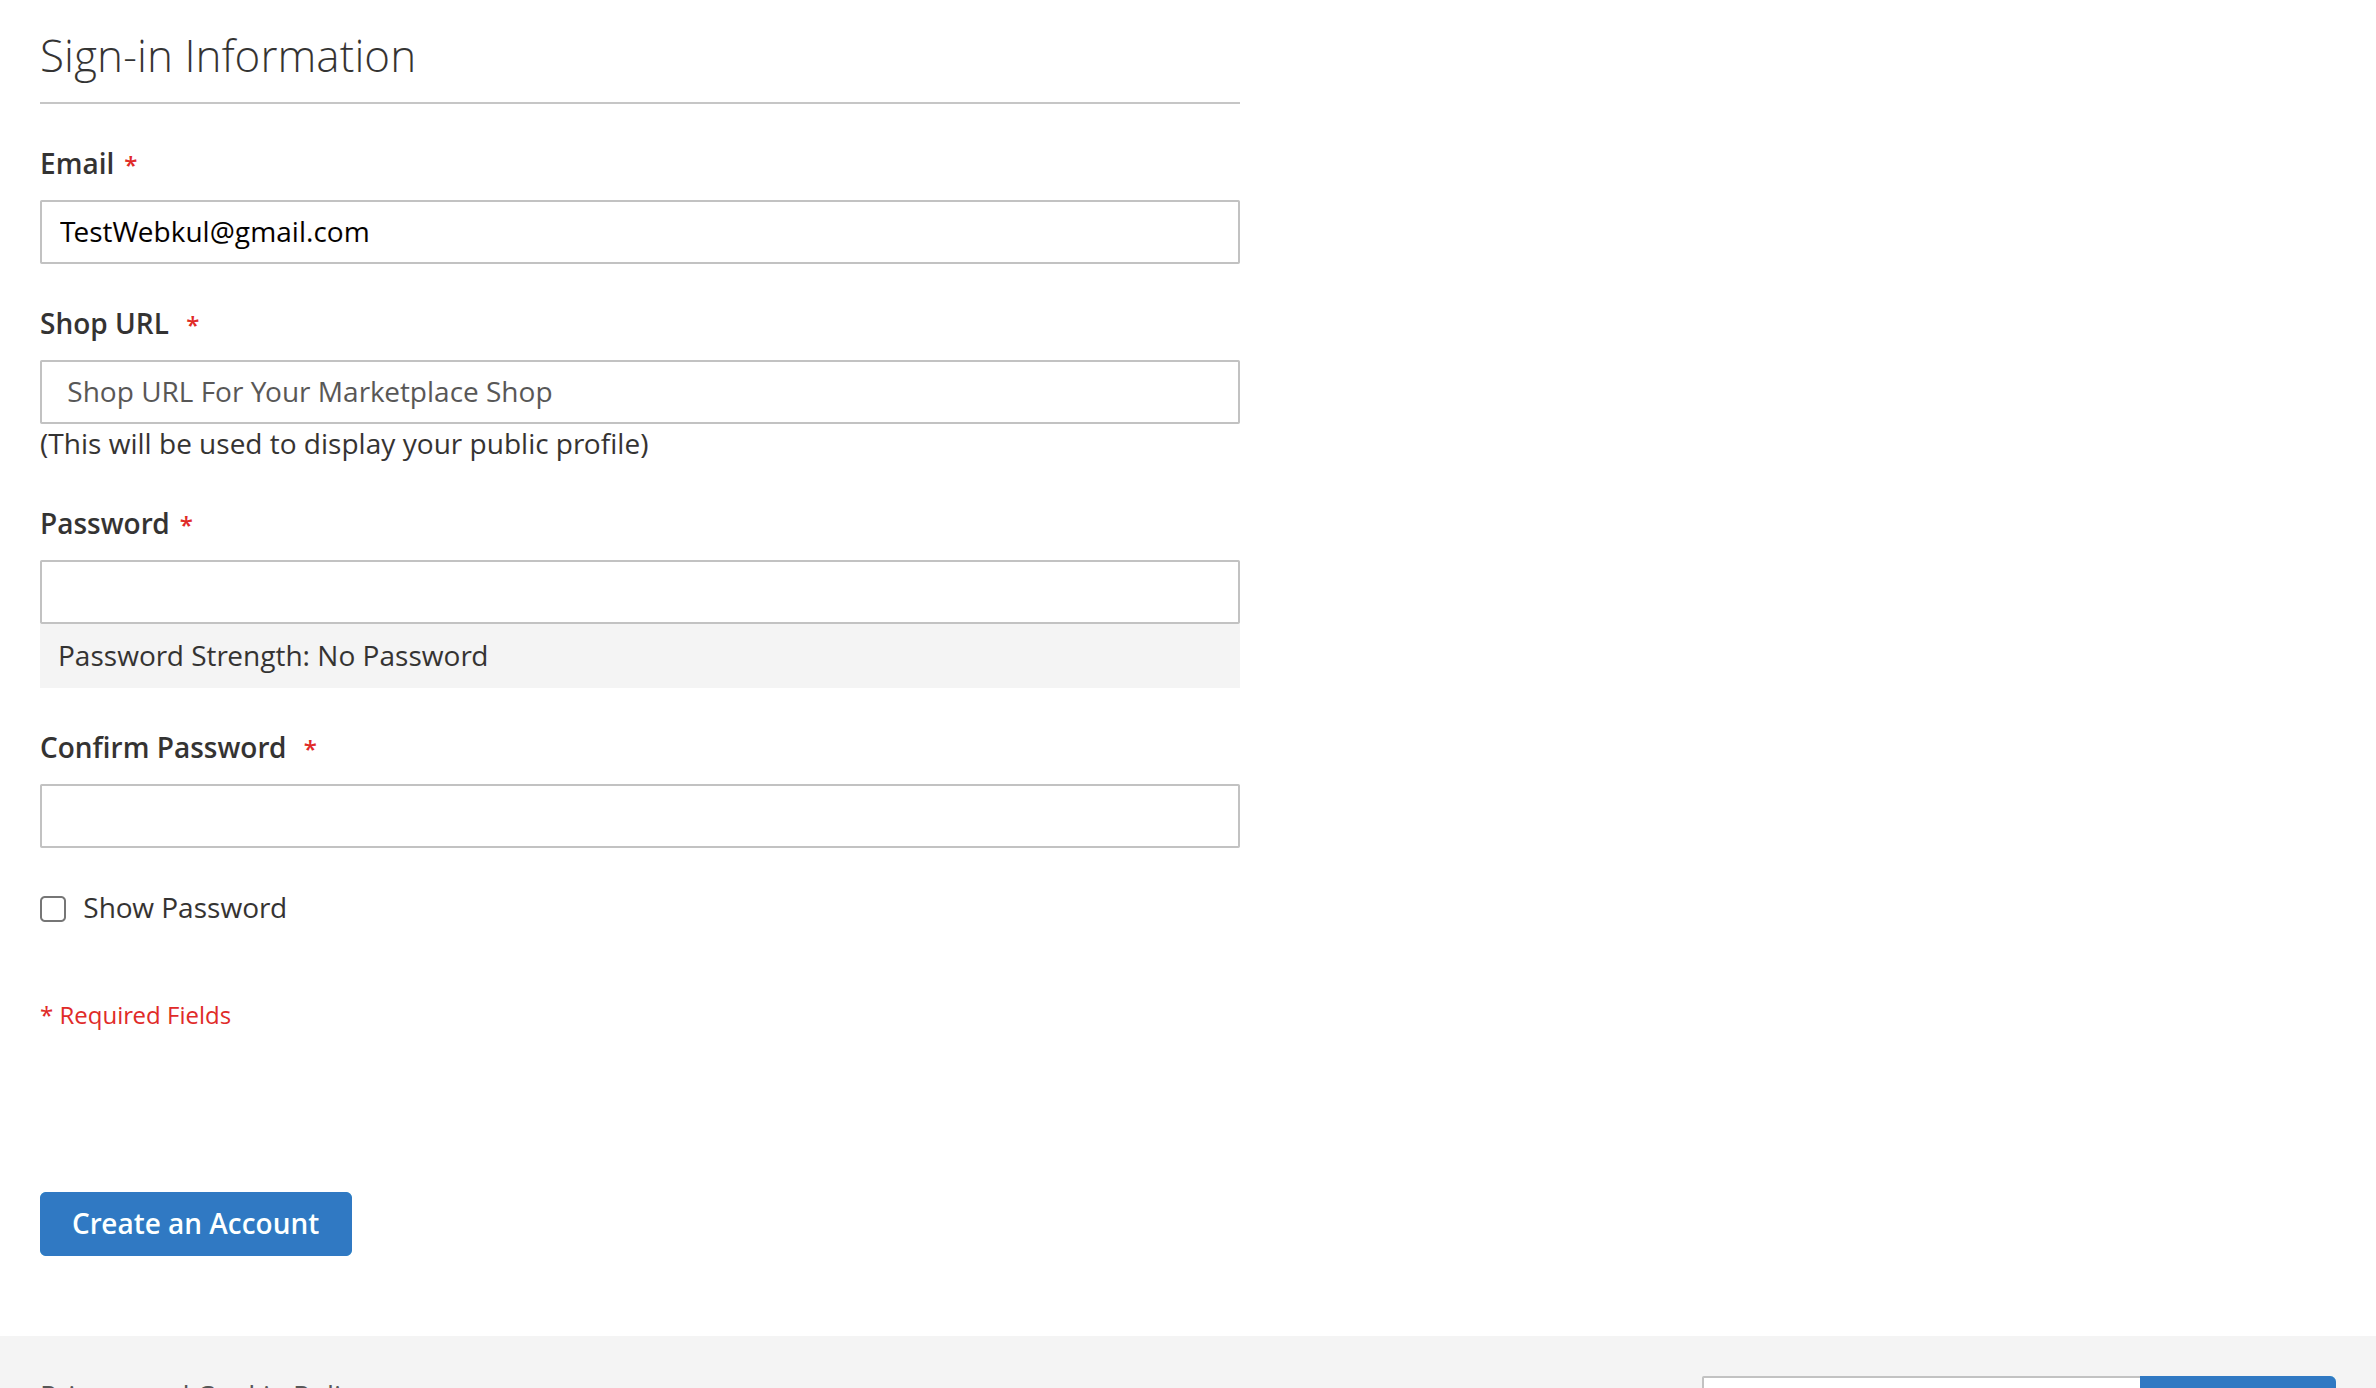
The Shop URL input field automatically renders on the registration form:
- As the vendor types their desired shop handle (e.g.,
modern-crafts), the JavaScript component (Webkul_SellerInvitation/js/verifySellerShop) sends asynchronous verification queries tomarketplace/seller/usernameverify. - A loading spinner displays while checking availability.
- Dynamic feedback appears in real time:
- Available: "Congratulations! Shop name is available." (Green highlight; submit button remains enabled).
- Unavailable: "Sorry! But this shop name is not available, please set another shop name." (Red highlight; submit button is temporarily disabled).
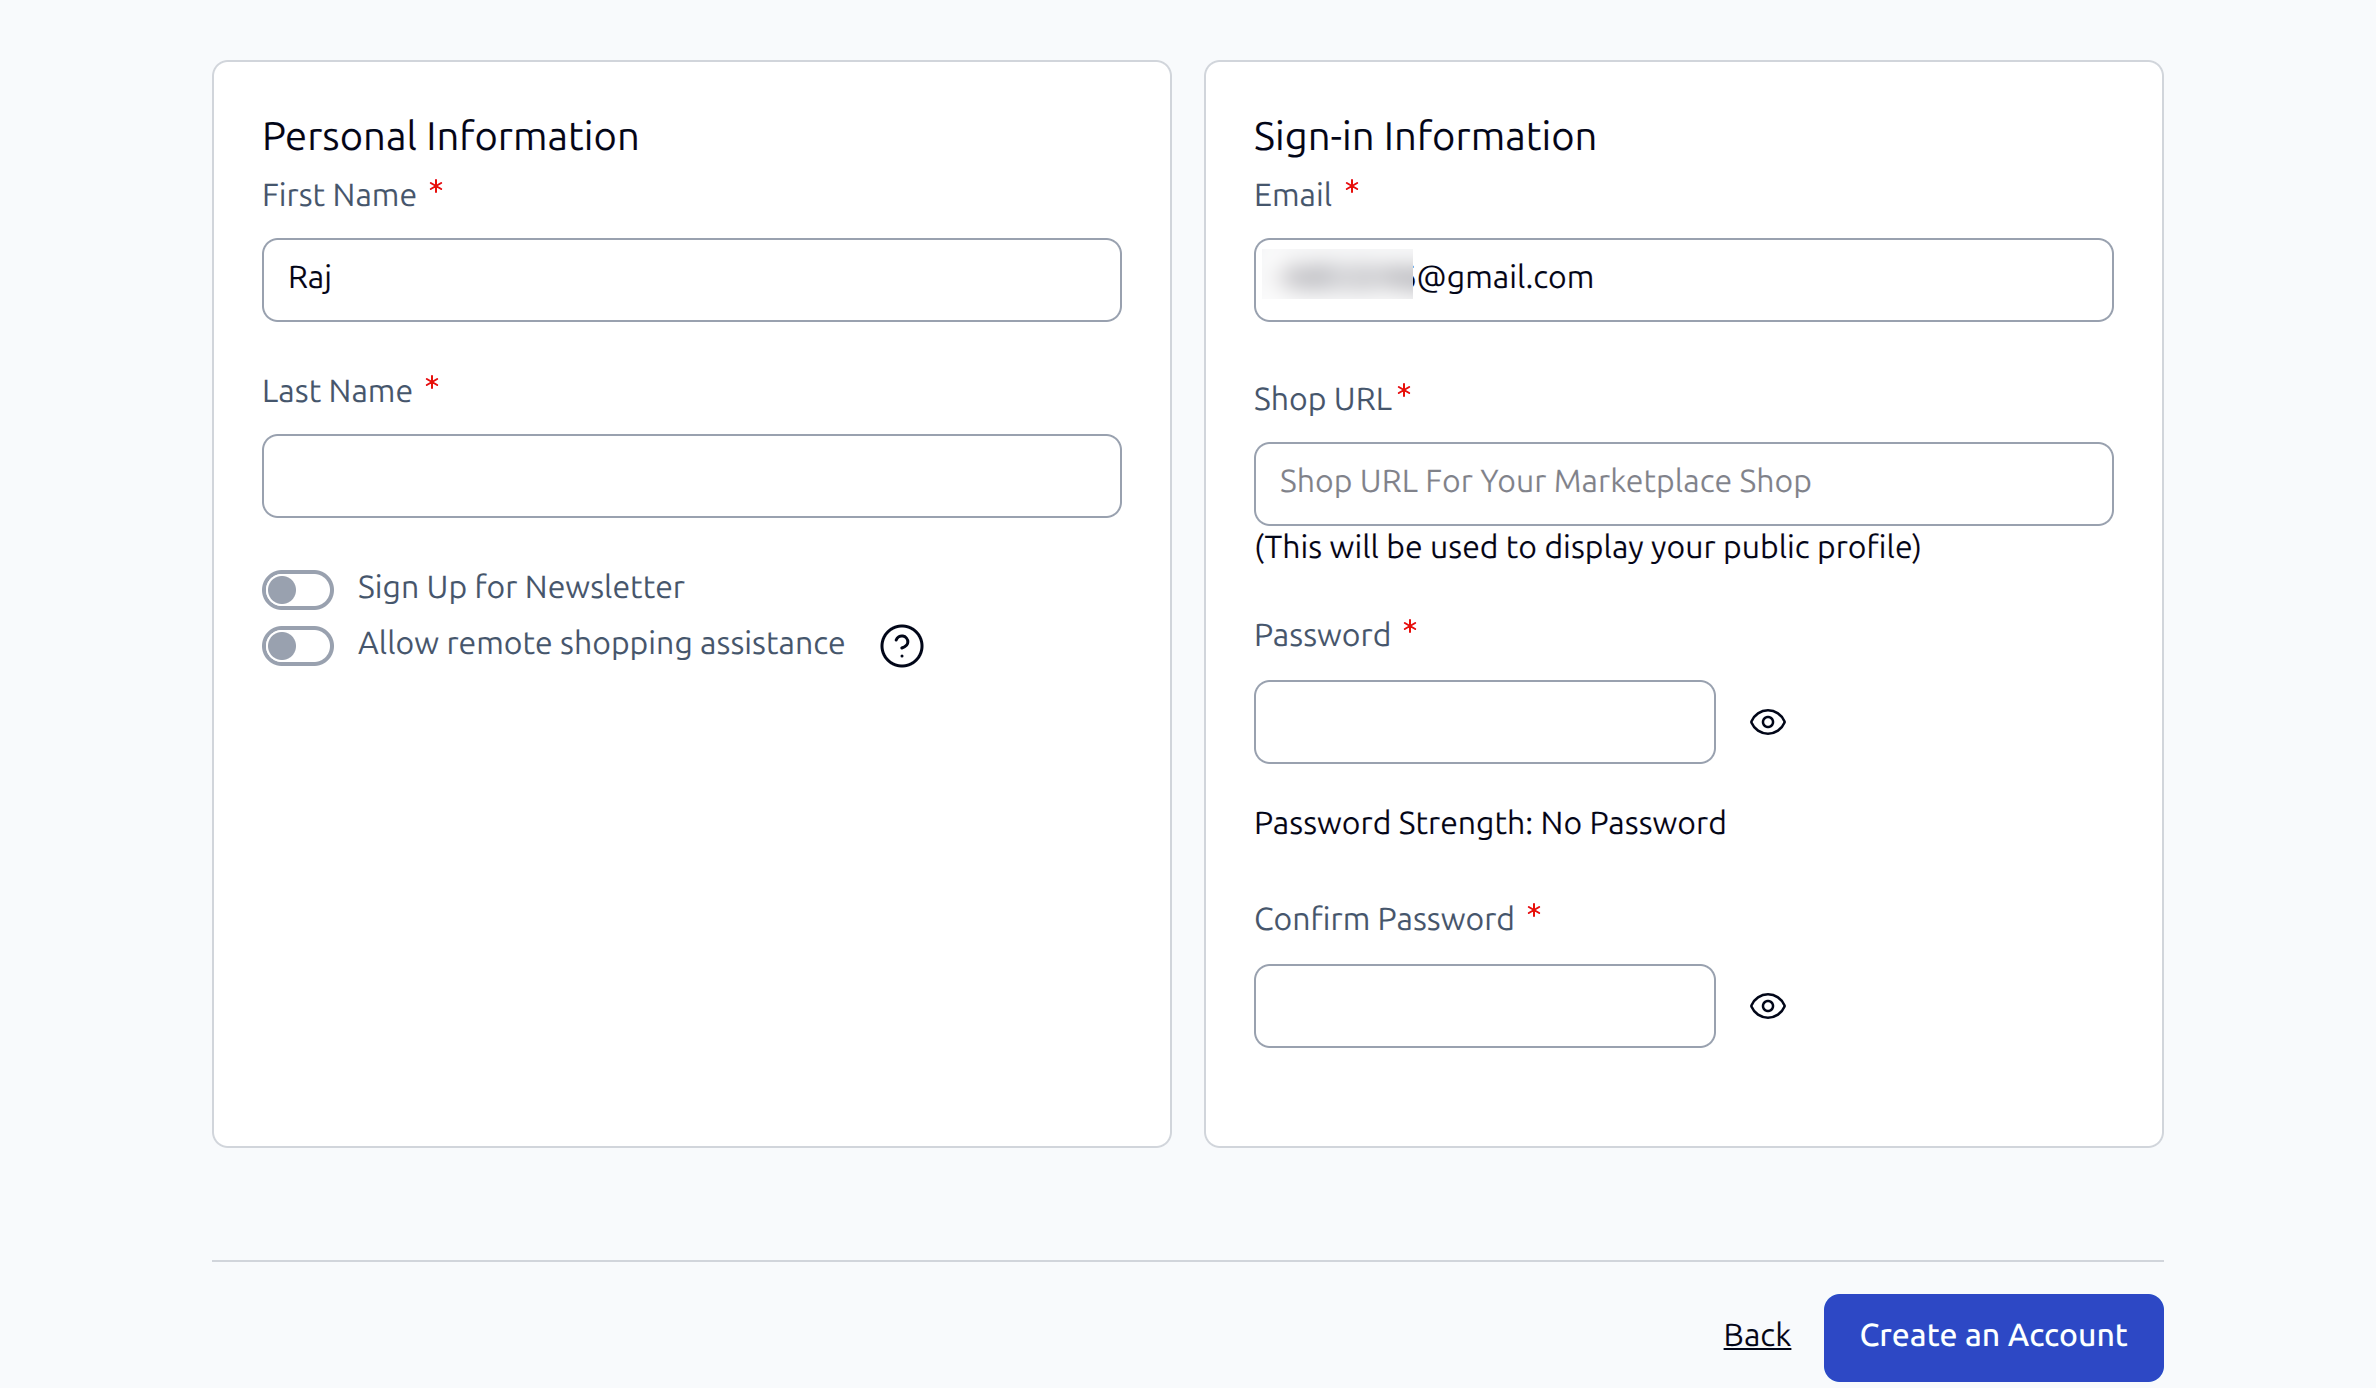
3. Hyvä Theme Storefront Support
The module is also fully compatible with stores running the Hyvä Theme. When an invitee accesses the invitation link on a Hyvä storefront, the modern Alpine.js / Tailwind CSS registration layout seamlessly renders the pre-populated name and email, alongside the Shop URL verification interface:
4. Submission & Security Validation
When the vendor submits the registration form:
- Email Integrity Check (
CheckCustomerBeforeSave):- The observer checks that the submitted email exactly matches the invitation record tied to
inviteCode. - If a malicious user attempts to alter the pre-filled email address to another account, the submission is halted:
"This invite Code belong to another Email ID, please check your mail"
- The observer checks that the submitted email exactly matches the invitation record tied to
- Account Creation: Magento registers the customer and initiates Webkul Marketplace seller creation.
- Token Invalidation (
CustomerRegisterSuccessObserver):- The observer updates the matching row in
wk_mp_invitation:$dataModel->setStatus(1); $this->invitationDataRepo->save($dataModel); - The token status is permanently converted to Registered (1).
- Any future attempt to register with this token produces:
"Invalid Invitation Code for Seller Registration."
- The observer updates the matching row in
Scenario C: Existing Customer Account Upgrade
For prospective sellers who already have a customer account on the store, they receive an invitation email directing them to log in to their existing account rather than registering a new one:
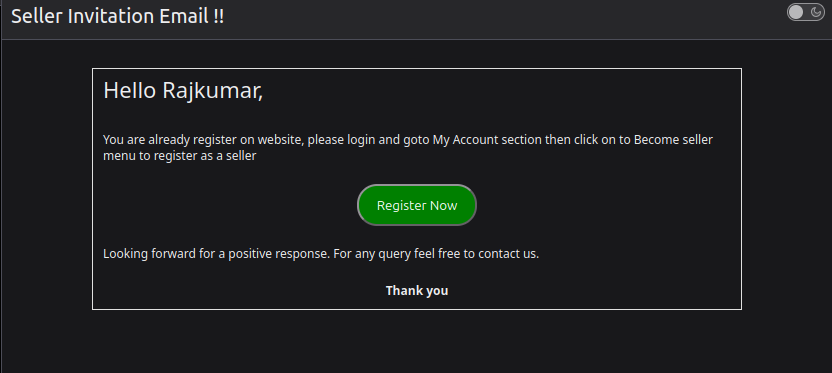
1. Accessing the "Become Seller" Panel
When an existing customer logs in and visits My Account → Become Seller (marketplace/account/becomeseller):
- The template (
account/becomeseller.phtml) invokescheckInvitationCodeExpired():- Fetches the customer's email from the active session.
- Checks
wk_mp_invitationfor a matching record. - If no invitation exists or the invitation link has expired:The submission form is suppressed, preventing unauthorized seller requests.
<div class="wk-invite-seller"> <span>Please ask admin to send Invitation URL to register as a seller.</span> </div> - If a valid, unexpired invitation exists: The Seller Request Panel displays the Shop URL input with live username verification and injects the customer's active
invitation_codeas a hidden field.
2. Processing the Request
When the customer clicks Save:
- Webkul Marketplace's
BecomesellerPostcontroller handles seller profile generation. - The
BecomeSellerPostPluginexecutes:- Retrieves
invitation_codefrom post data. - Updates the corresponding record in
wk_mp_invitationtostatus = 1.
- Retrieves
- The customer is now registered as a marketplace vendor (pending admin approval based on store marketplace settings).
Next Step
Review complete version update details in Release Notes & Changelog.