
Activation & Setup
After completing installation, follow this guide to verify your Webkul license, enable the Seller Invitation module in Magento System Configuration, and confirm administrative access permissions.
Step 1: License Key Verification (Module License Tracker)
Webkul extensions utilize the Webkul Module License Tracker (powered by Webkul_Base) to authenticate authorized module installations and unlock technical support and upgrades.
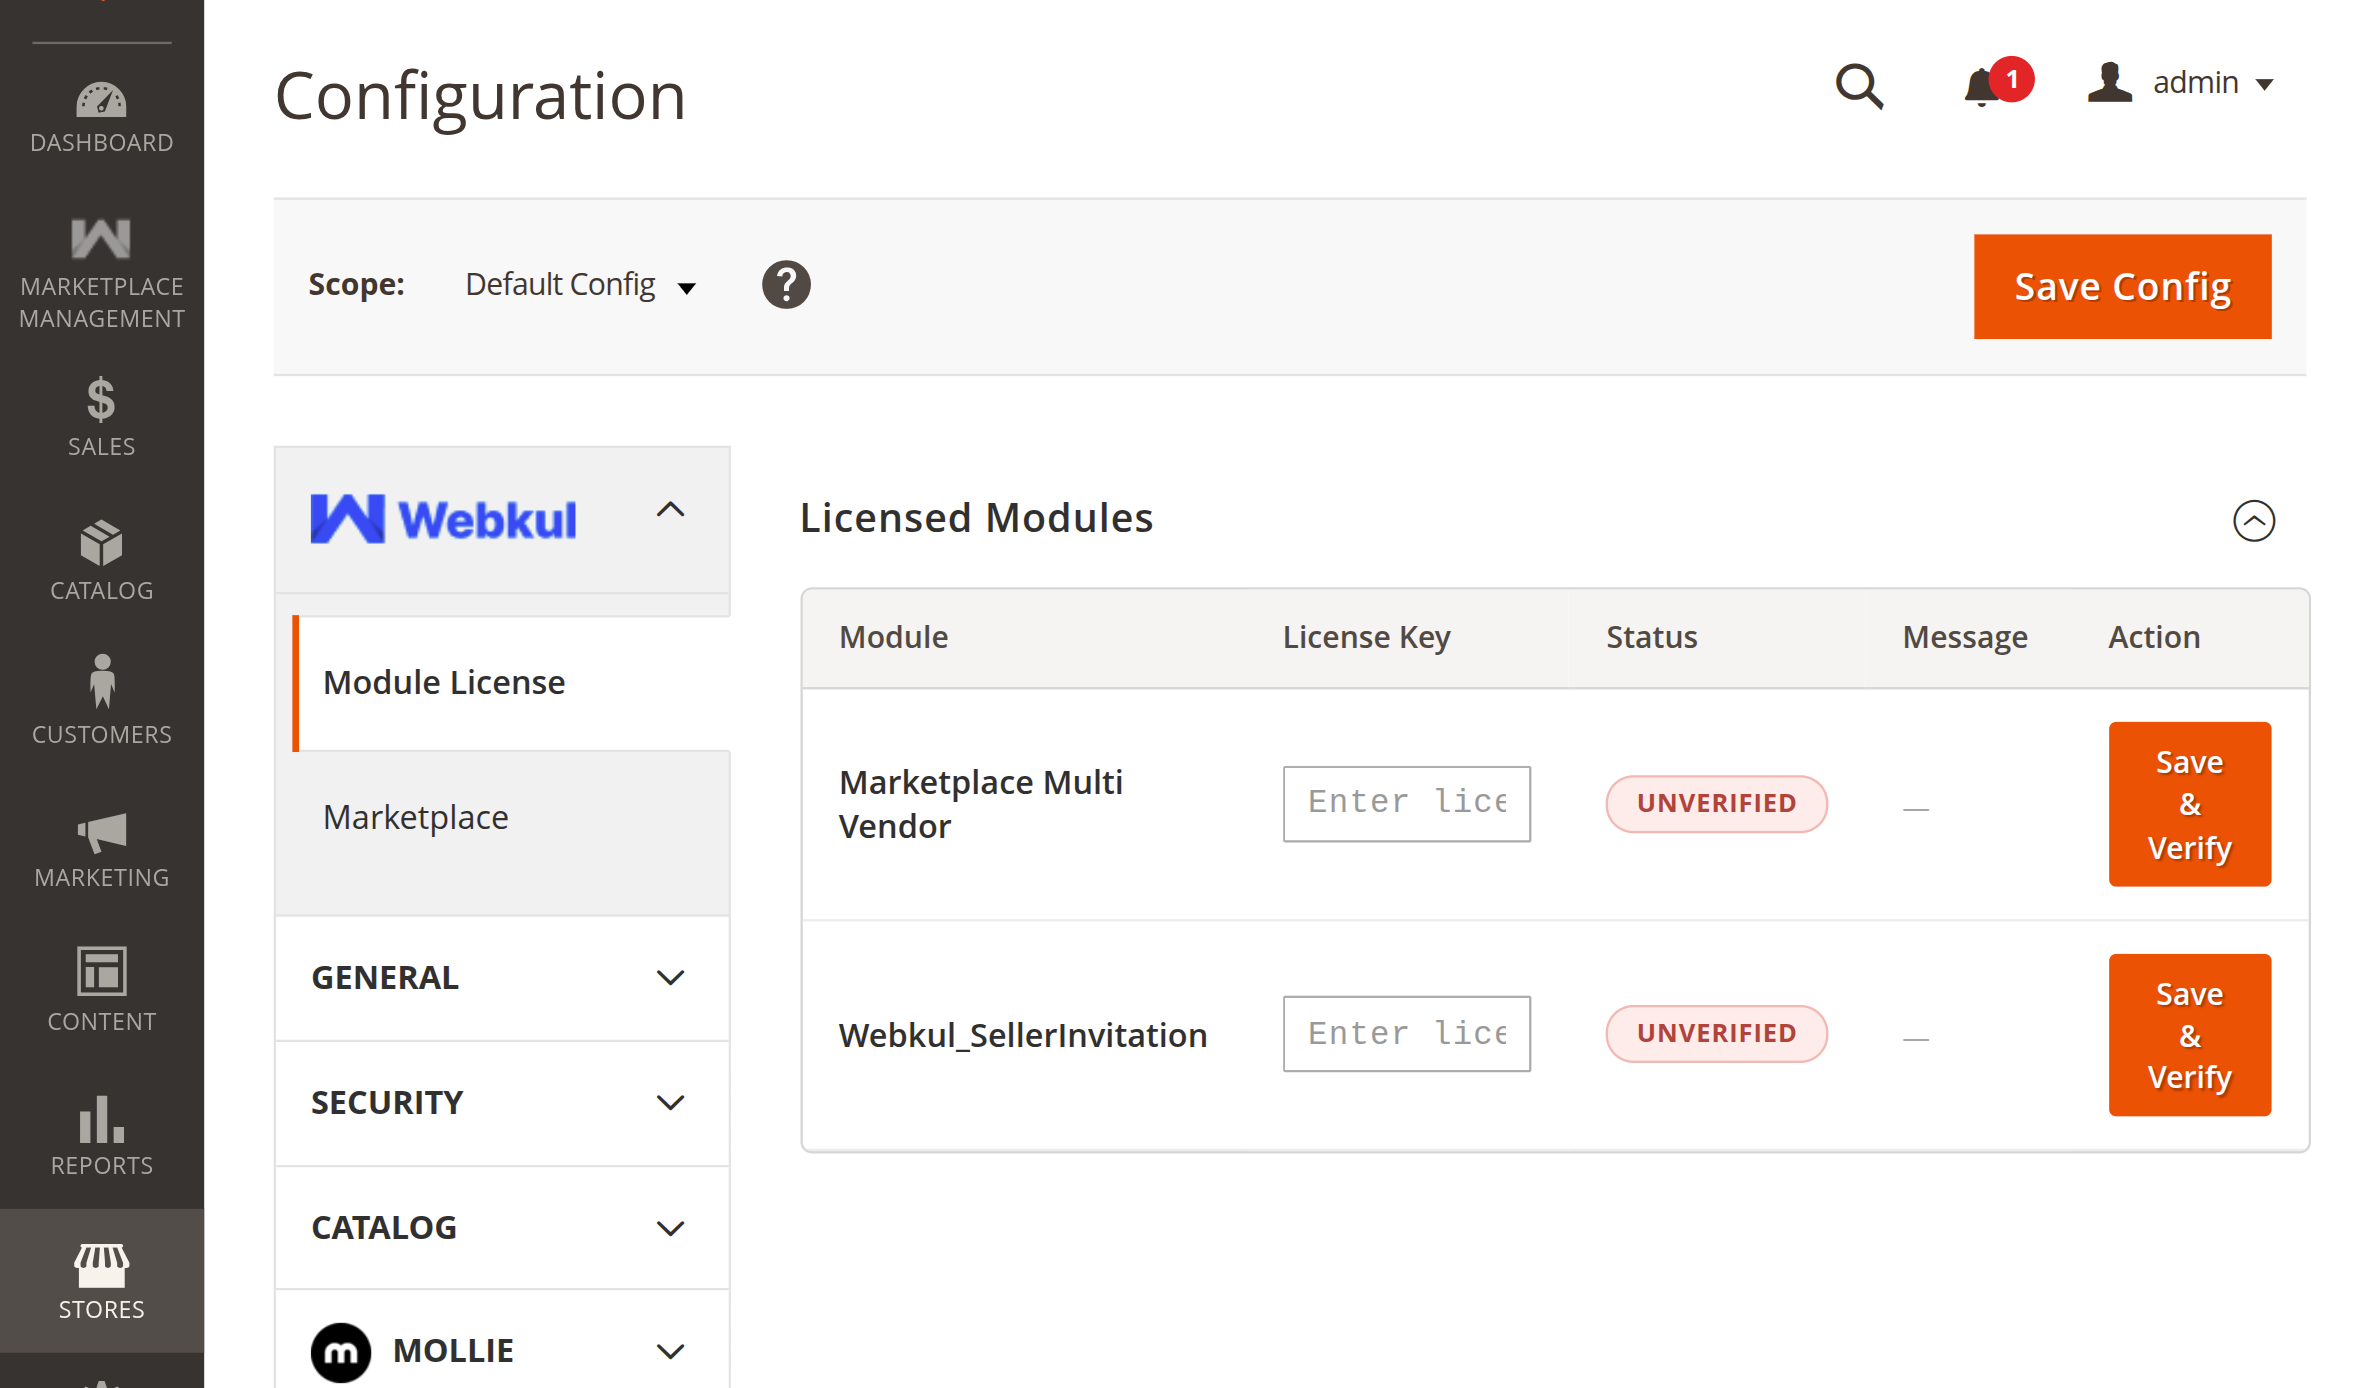
Verification Steps:
- Log in to your Magento Admin Panel.
- Navigate to Stores → Configuration → Webkul → Module License.
- Under the Licensed Modules table:
- Locate the row for Webkul_SellerInvitation (along with Marketplace Multi Vendor).
- The initial status will display as
UNVERIFIED.
- Enter the valid License Key corresponding to your purchase (retrievable from your Webkul Store account under your order downloads).
- Click the orange Save & Verify button in that row.
- The system connects to Webkul's license verification server. Once validated, the status changes from
UNVERIFIEDtoVERIFIED.
Step 2: Enable the Module in System Configuration
- In the Magento Admin Panel, navigate to Stores → Configuration → Marketplace.
- In the left configuration panel, expand the Marketplace group and select Seller Invitation.
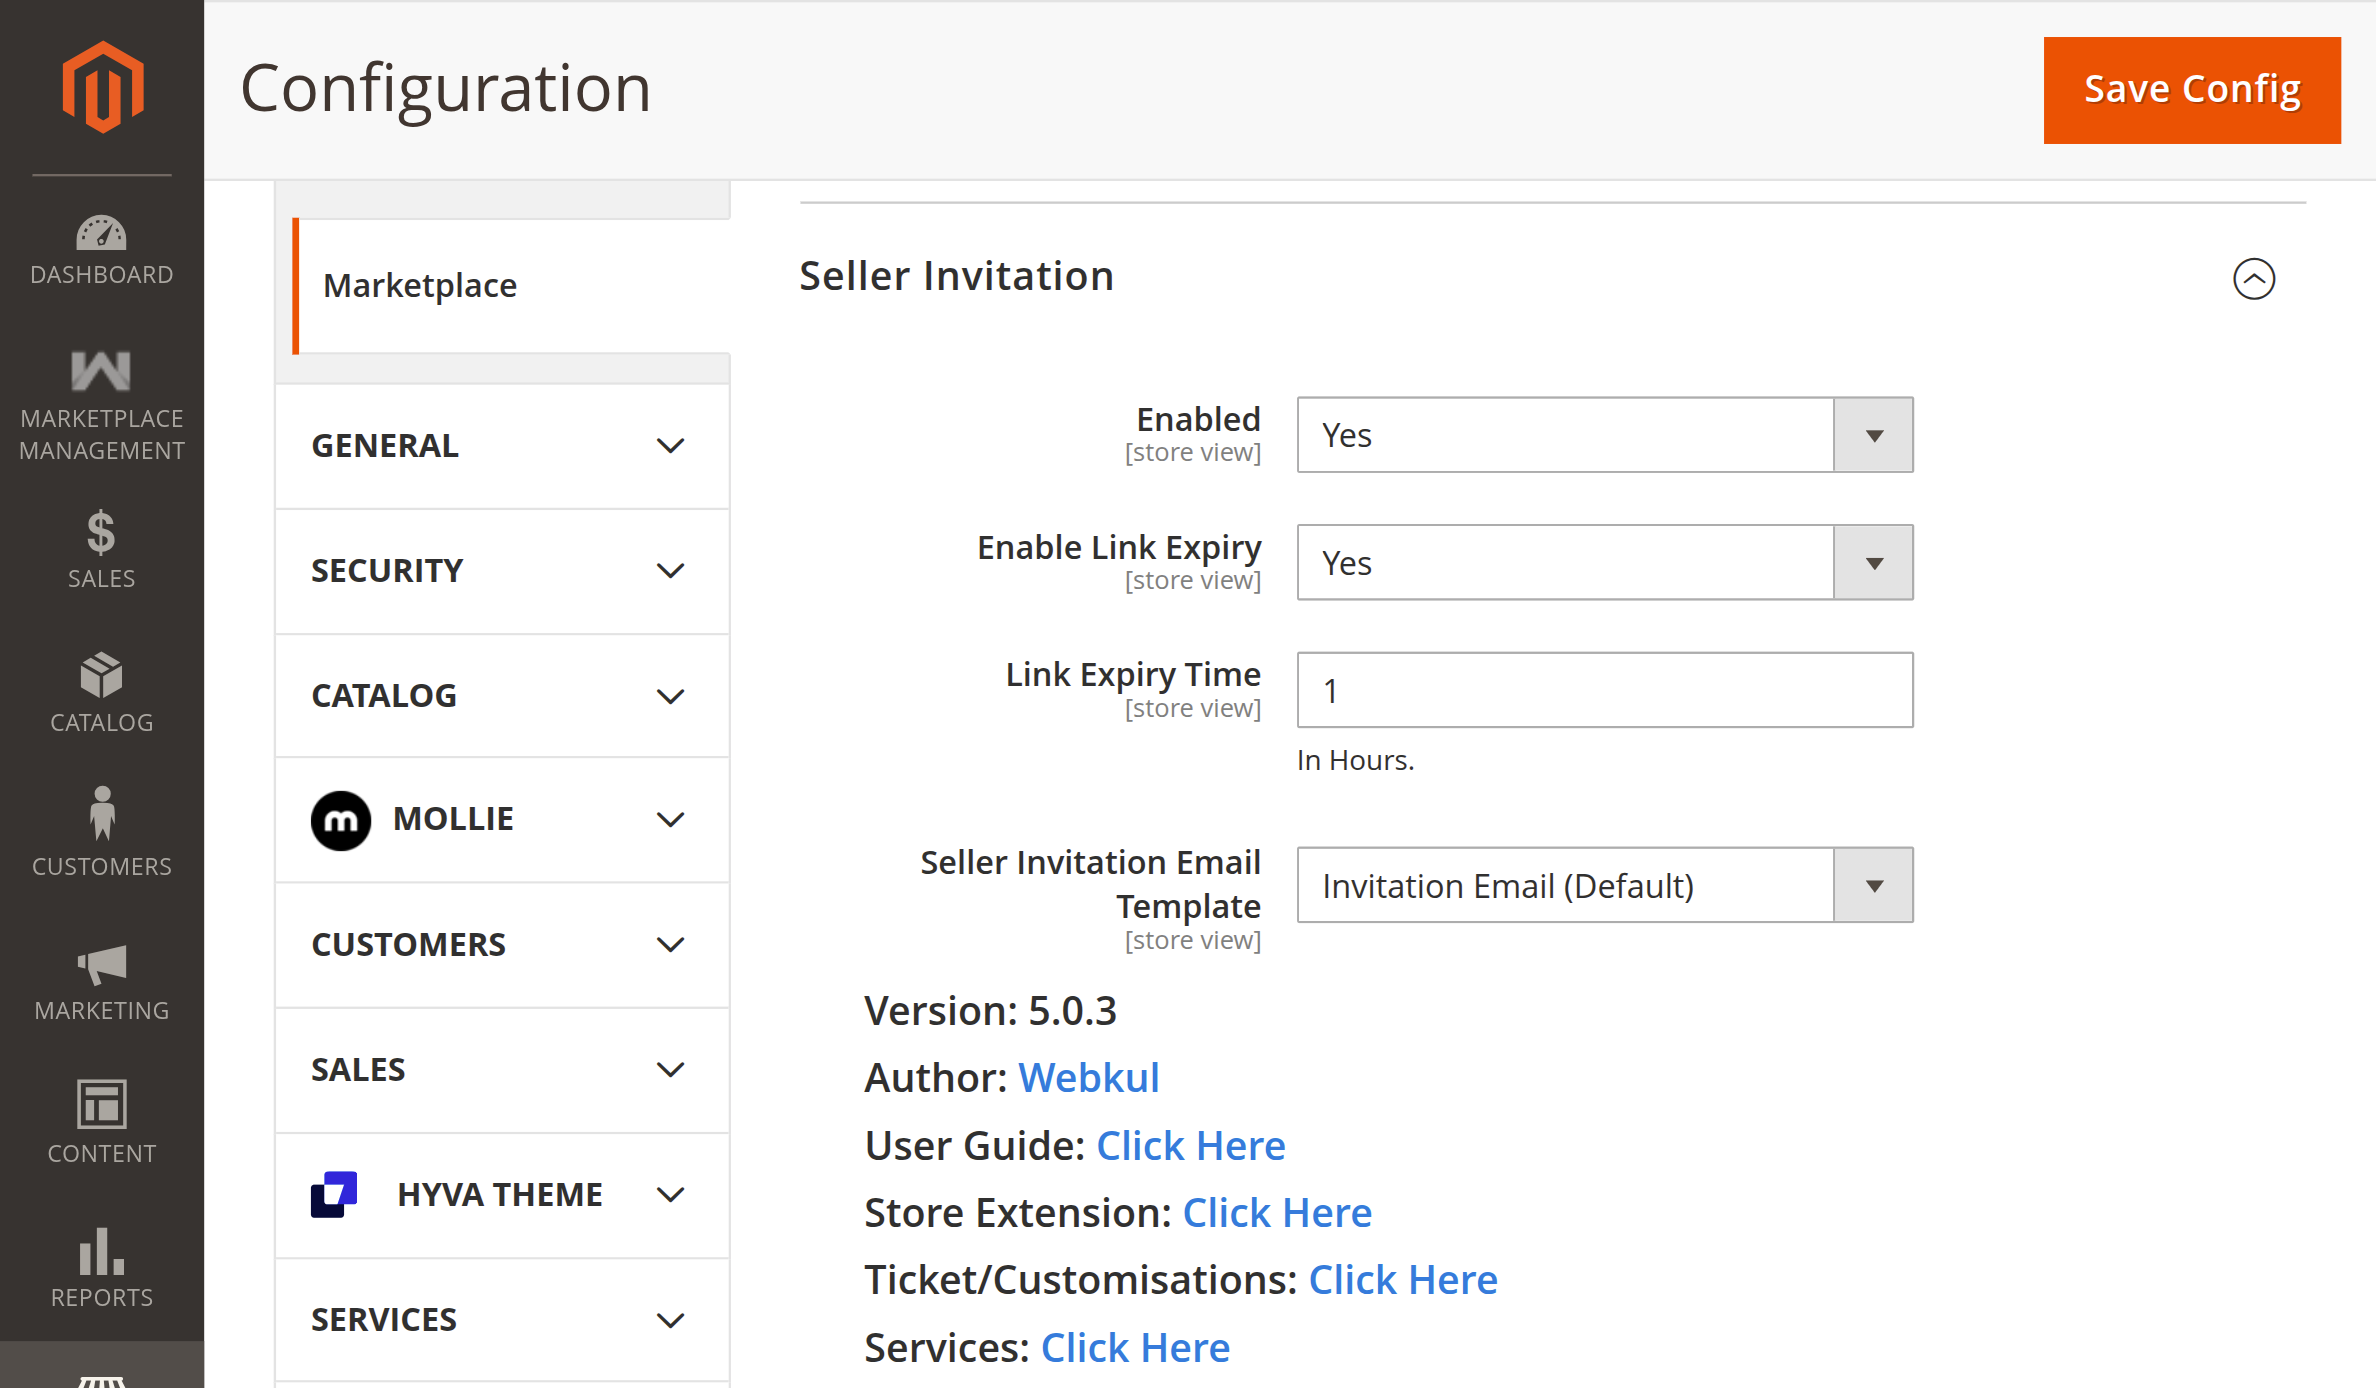
- Under the Seller Invitation settings:
- Enabled: Set to Yes to activate invite-only seller registration.
- Enable Link Expiry: Set to Yes if you wish to enforce an expiration time limit on invitation links.
- Link Expiry Time: Specify the duration in hours (e.g.,
1or24) before an unused invitation link becomes invalid. - Seller Invitation Email Template: Choose your preferred email template (Default: Invitation Email (Default)).
- Click Save Config in the upper right corner.
- Flush the configuration cache:
php bin/magento cache:clean config
Step 3: Verify Admin Menu Navigation
Once enabled, confirm that the administrative menu items appear in the backend sidebar:
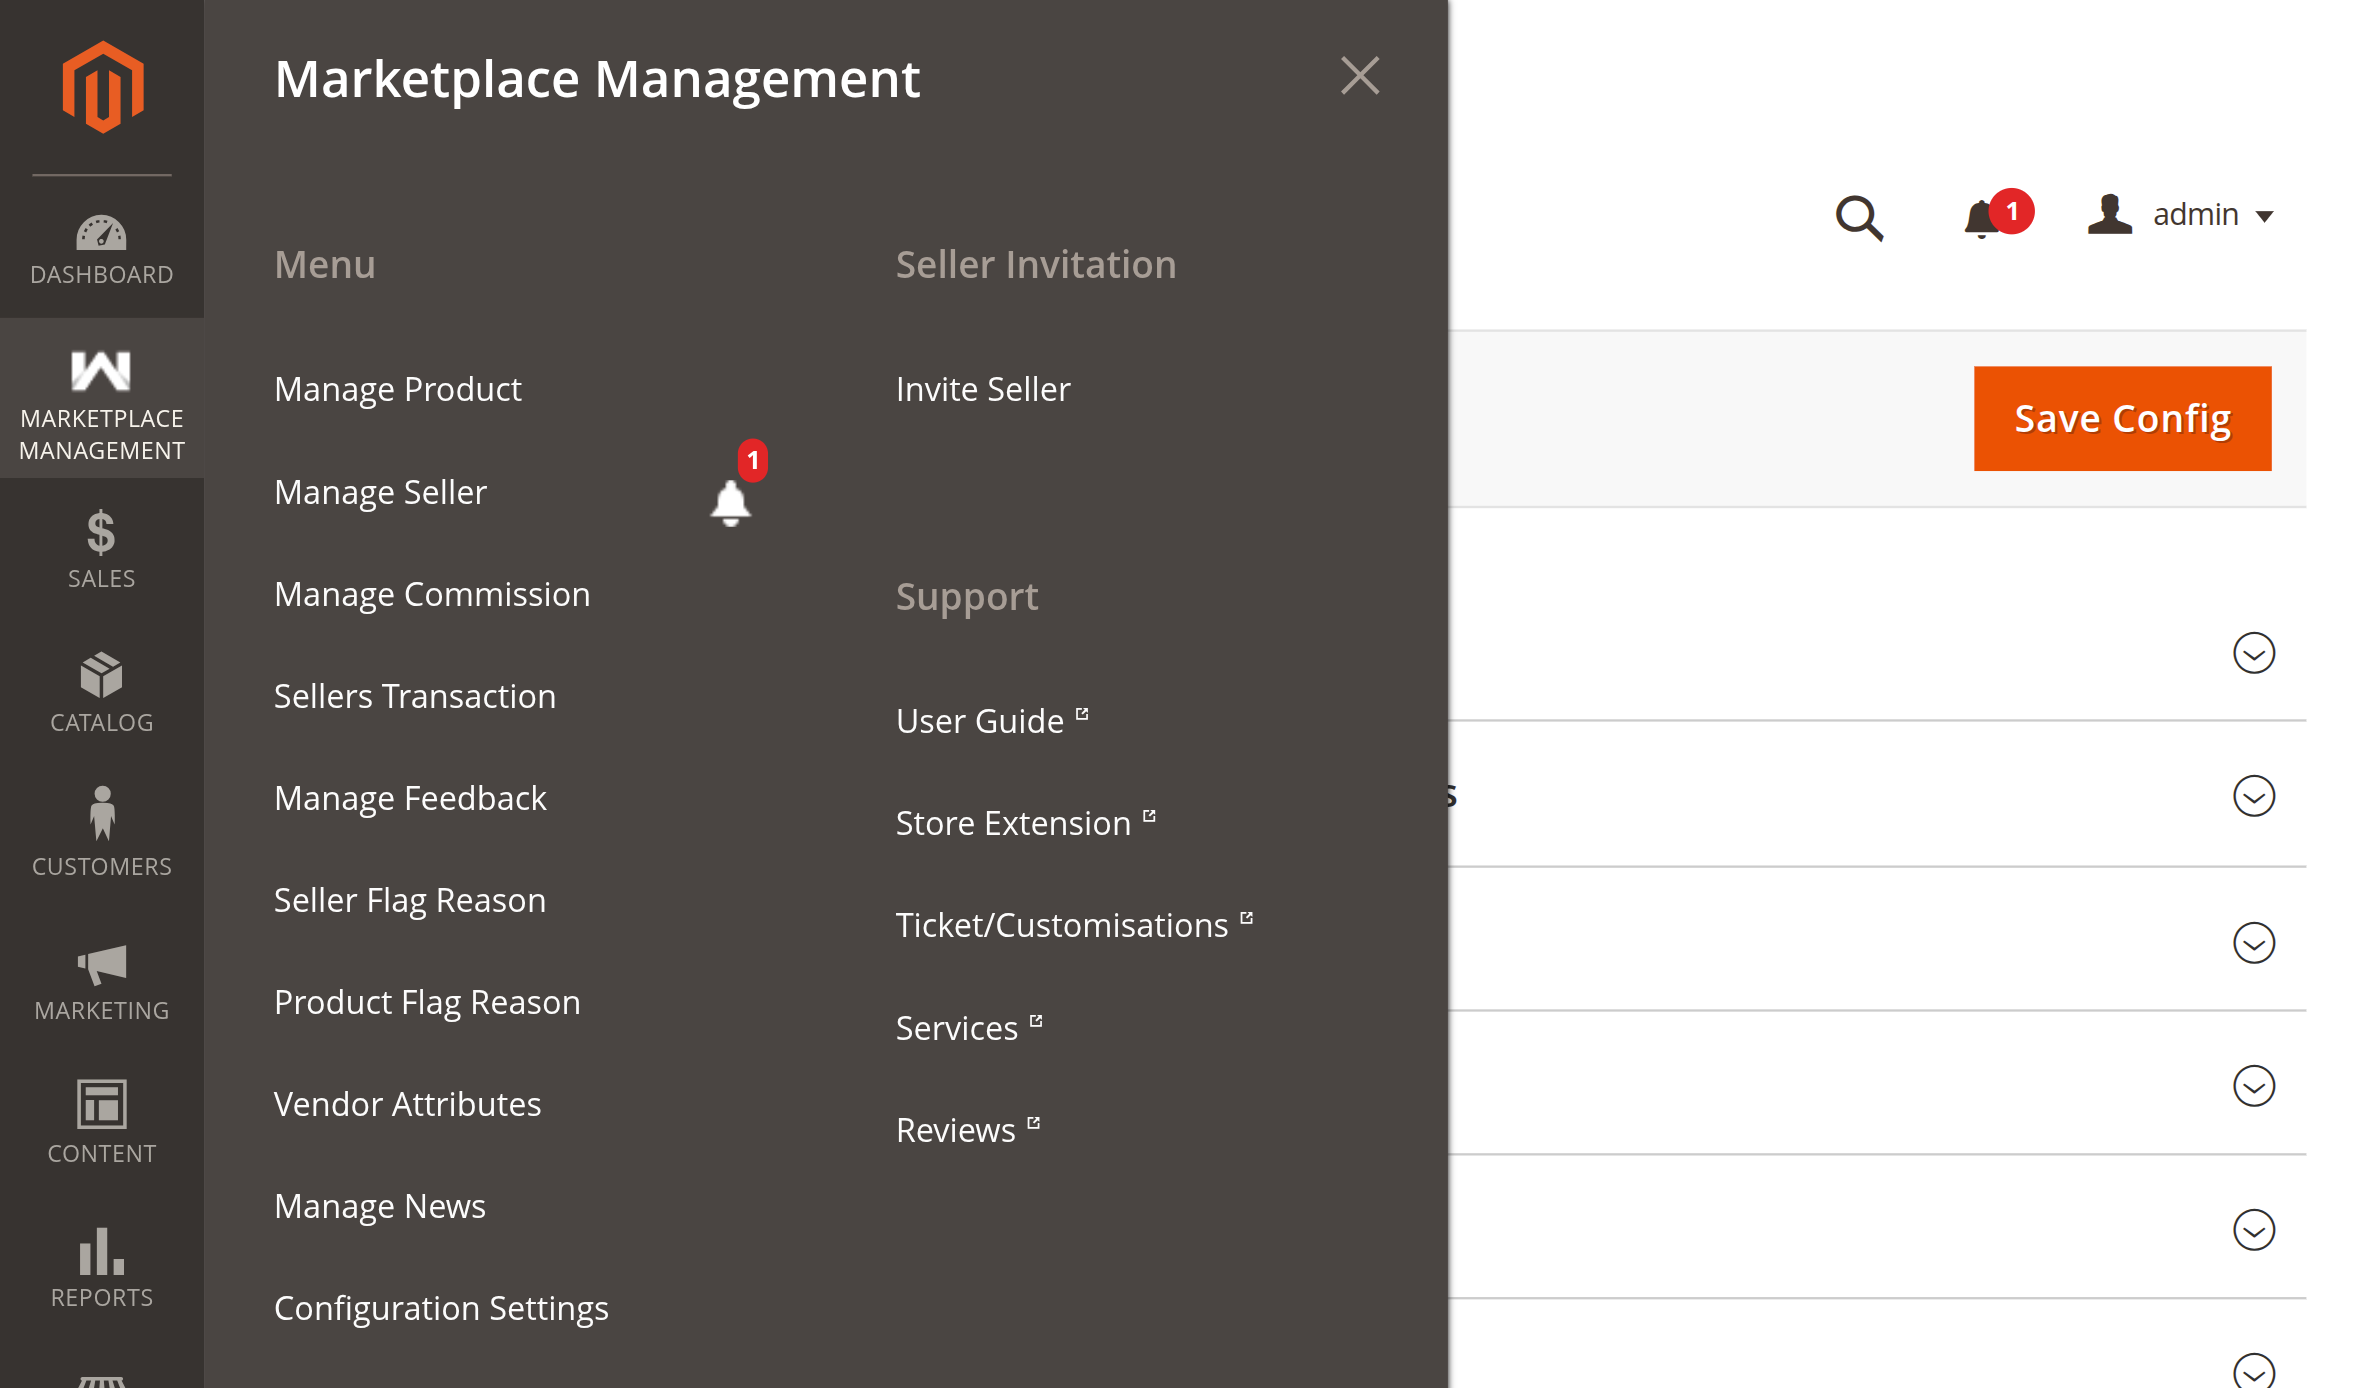
- Click on the Marketplace Management top-level menu icon in the left admin sidebar.
- Under the Seller Invitation subgroup, locate:
- Invite Seller: Direct link to the seller invitation management grid and invite dispatch form (
sellerinvitation/menu/index).
- Invite Seller: Direct link to the seller invitation management grid and invite dispatch form (
Config Dependency
The admin menu item depends on marketplace/sellerinvitation/status. If the module is disabled in System Configuration, the Seller Invitation menu item automatically hides from the admin menu.
Step 4: Verify Admin Roles & Permissions (ACL)
If your store uses restricted administrator roles, ensure the relevant roles have permission to view and dispatch seller invitations:
- Navigate to System → User Roles.
- Select the administrator role you want to manage.
- Switch to the Role Resources tab.
- Set Resource Access to Custom and locate the Marketplace tree:
- Locate Seller Invitation (
Webkul_SellerInvitation::mpsellerinvitation). - Ensure the sub-resource Invite Seller (
Webkul_SellerInvitation::invite) is checked.
- Locate Seller Invitation (
- Click Save Role.
Step 5: Test Frontend Registration Page
Verify that the module has restricted direct public seller sign-up:
- Open an incognito browser window (or log out of any customer account).
- Visit the standard Magento customer registration page:
https://<your-store>/customer/account/create/. - Verify that the radio button "Do You Want To Become A Seller / Vendor?" is no longer visible to regular visitors.
- Visitors can now register only as standard retail customers.
Next Step
Explore the module architecture and operational workflows in Module Overview & Workflow.