
Multi-Step Seller Registration
For marketplaces that require an extensive onboarding process, the module integrates directly with the Webkul Marketplace Landing Page multi-step registration forms (Layout 2 and Layout 3).
Configuration Overview
To enable the dedicated seller registration workflow on the marketplace sell page:
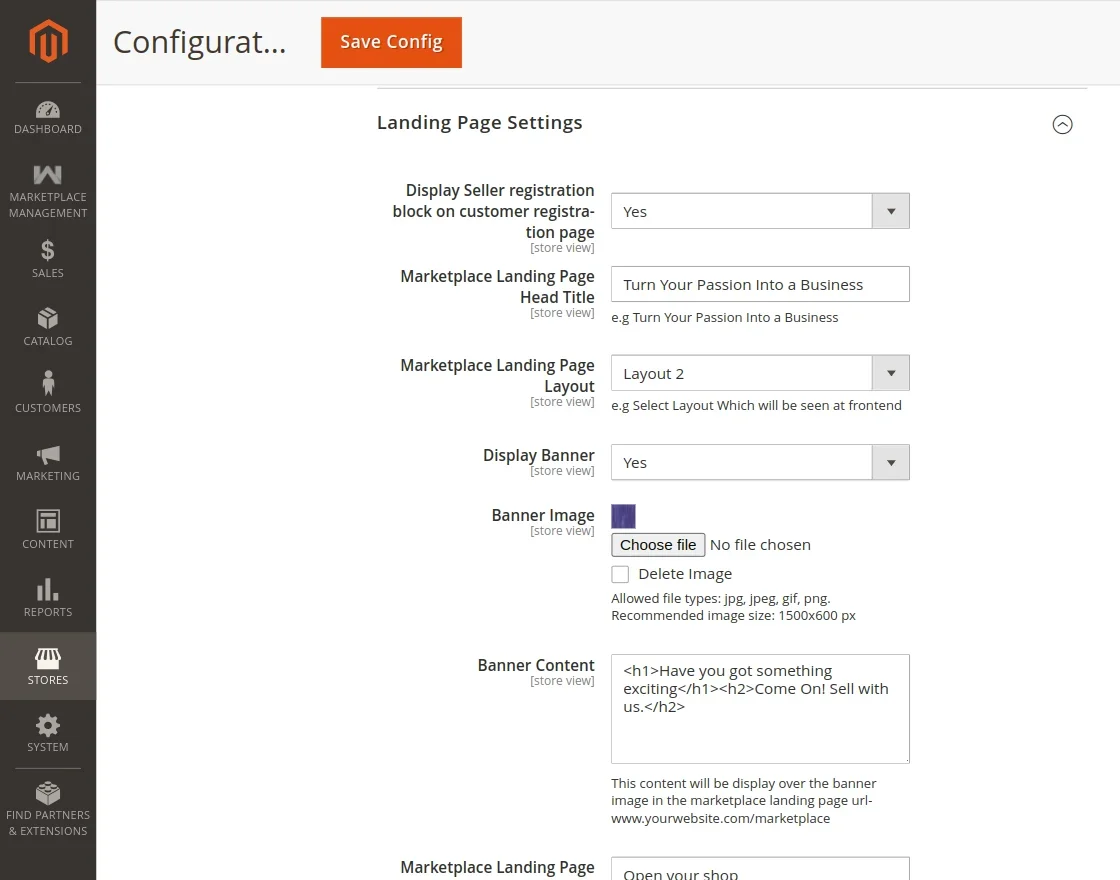
- Navigate to Stores > Configuration > Marketplace > Landing Page Settings.
- Locate the Marketplace Landing Page Layout setting.
- Choose either Layout 2 or Layout 3.
Case 1 — Multi-Step Onboarding with Layout 2
When Layout 2 is selected in Landing Page Settings:
Prospective sellers navigating to the marketplace sell page experience a progressive 3-step registration wizard:
Step 1 — Basic Credentials & Shop URL
The seller enters their personal identity details, contact email, desired public Shop URL, and password.
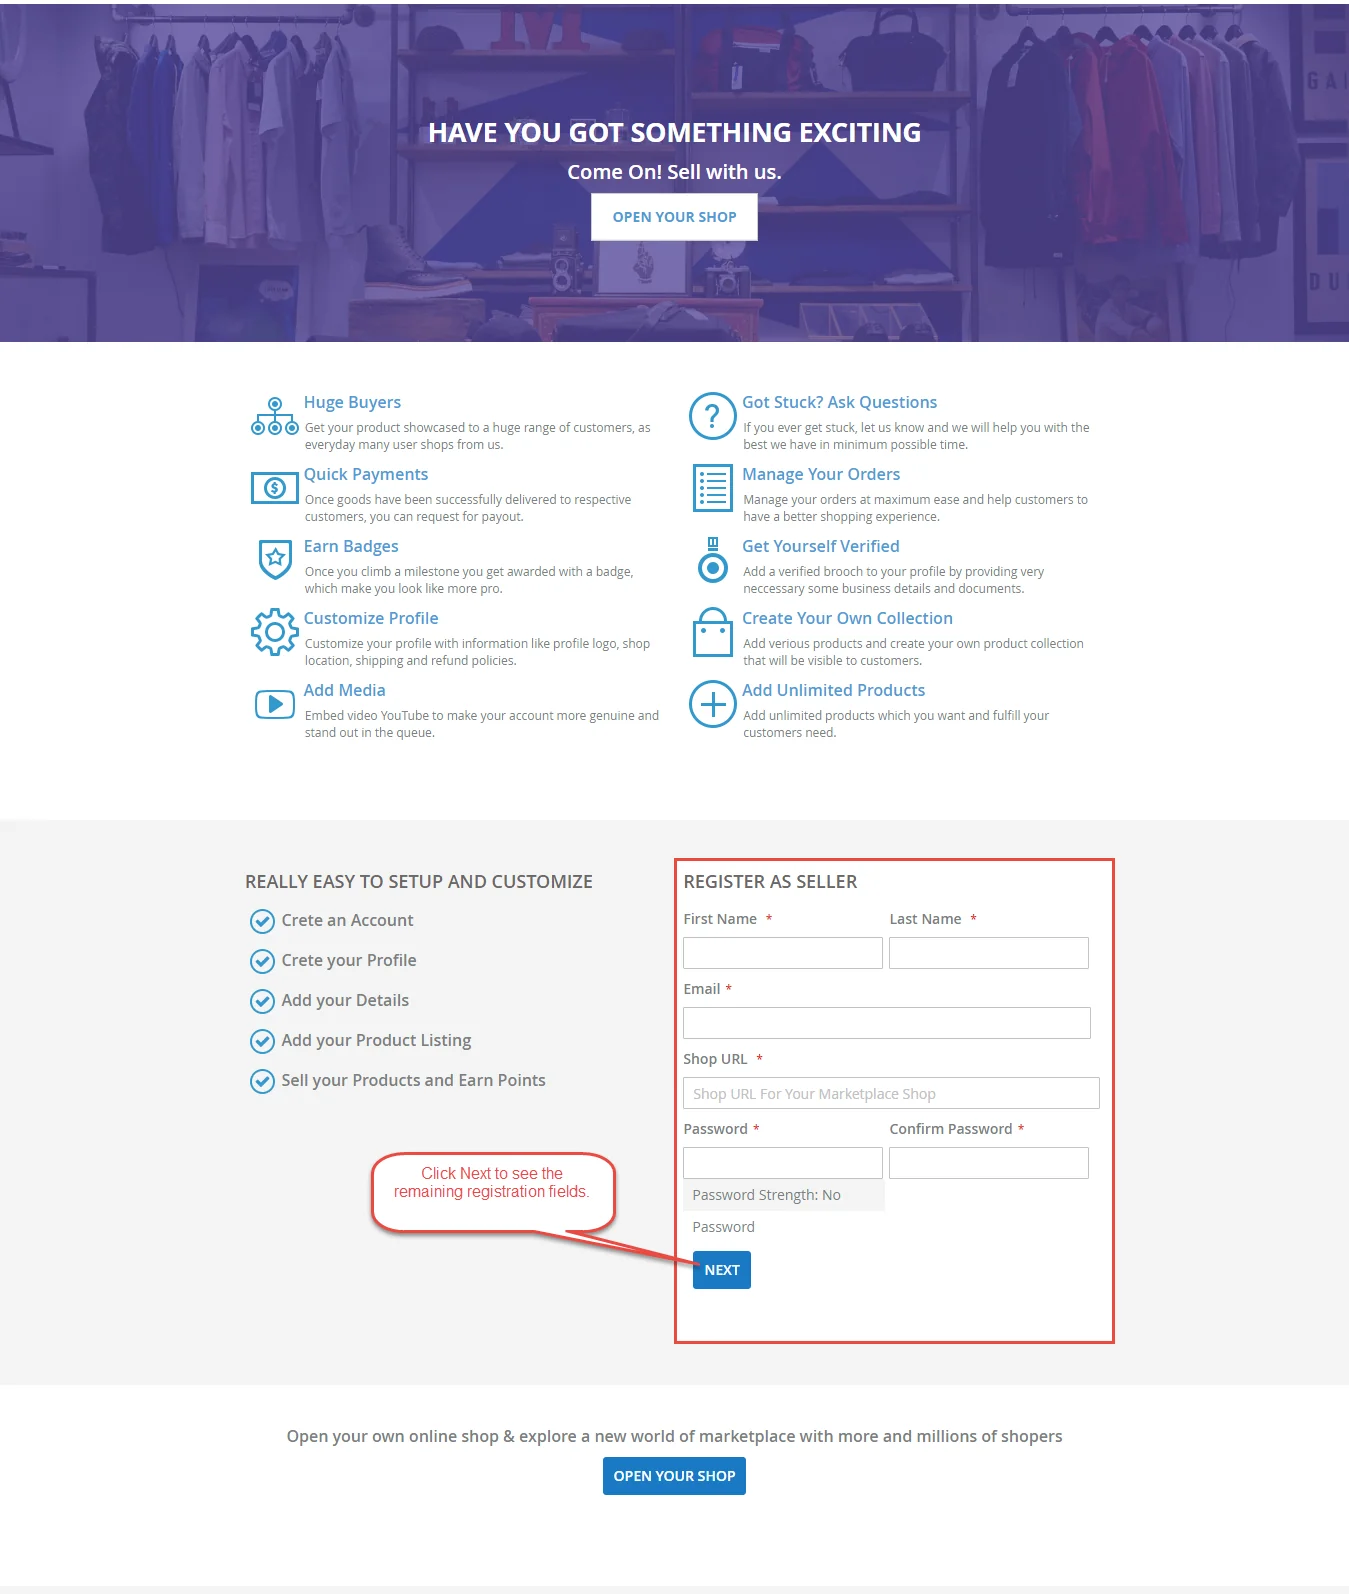
Clicking Next moves the seller forward without submitting prematurely.
Step 2 — Company & Custom Information
In the second stage, custom vendor attributes—such as Company Name, About Company, Joining Date, and custom questionnaire fields—are gathered.
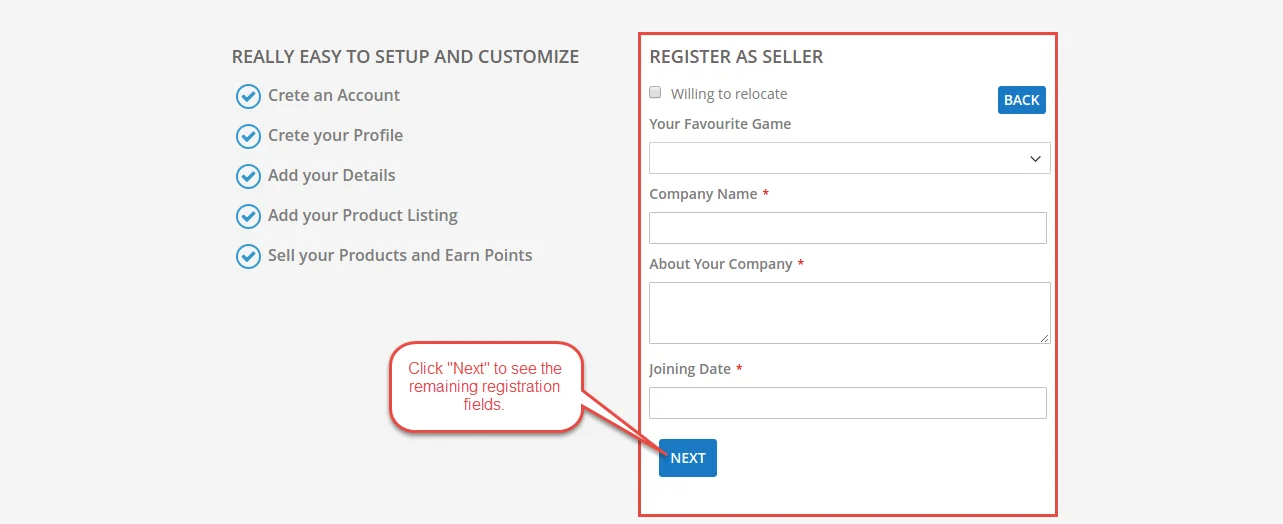
Clicking Next progresses to final verification.
Step 3 — Designation, Media Upload & Legal Agreement
In the final step, the seller provides their job designation, uploads identity or facility images, selects their location, and accepts the required Terms & Conditions and Privacy & Cookie Policy.
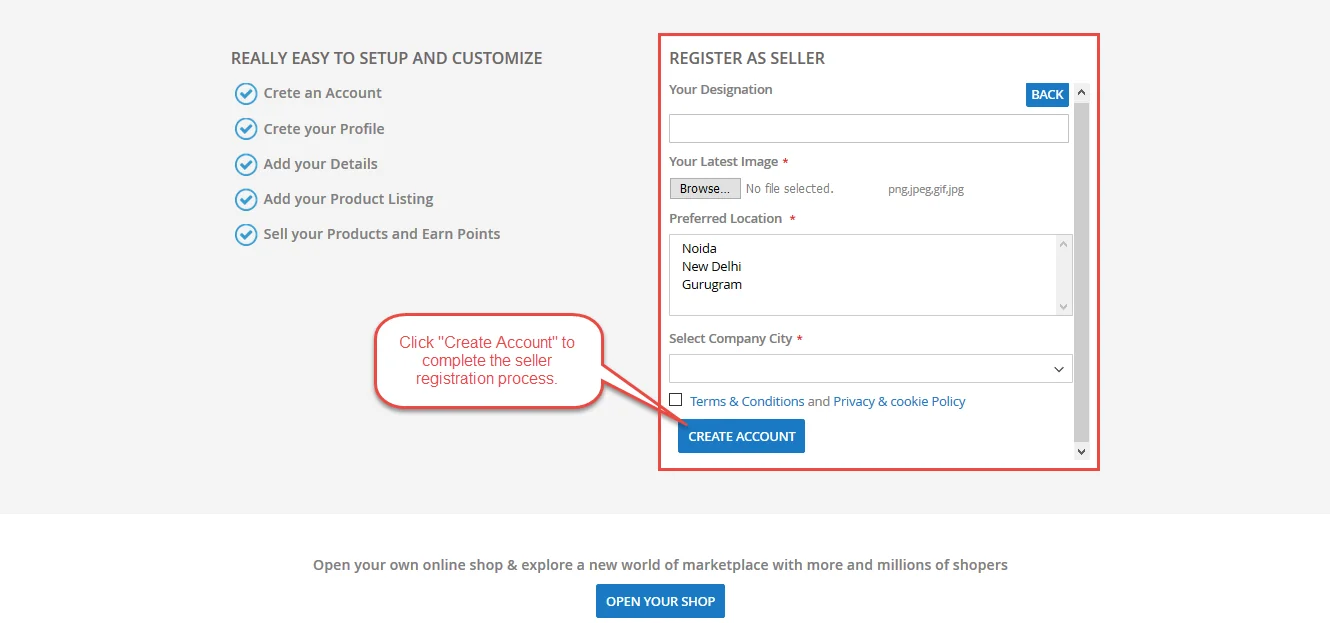
Clicking Create an Account submits the complete application for marketplace onboarding.
Case 2 — Multi-Step Onboarding with Layout 3
When Layout 3 is configured in Landing Page Settings:
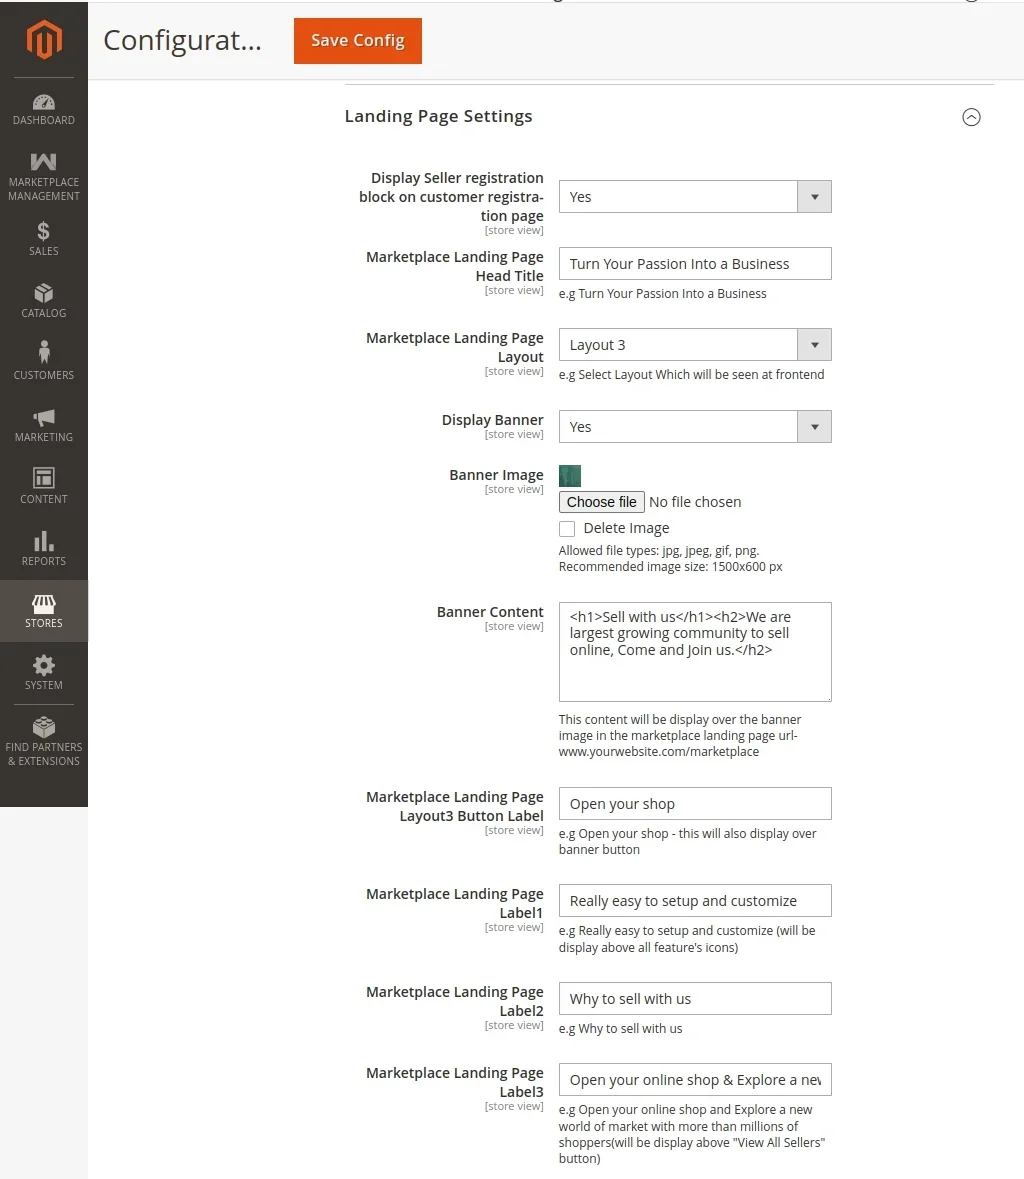
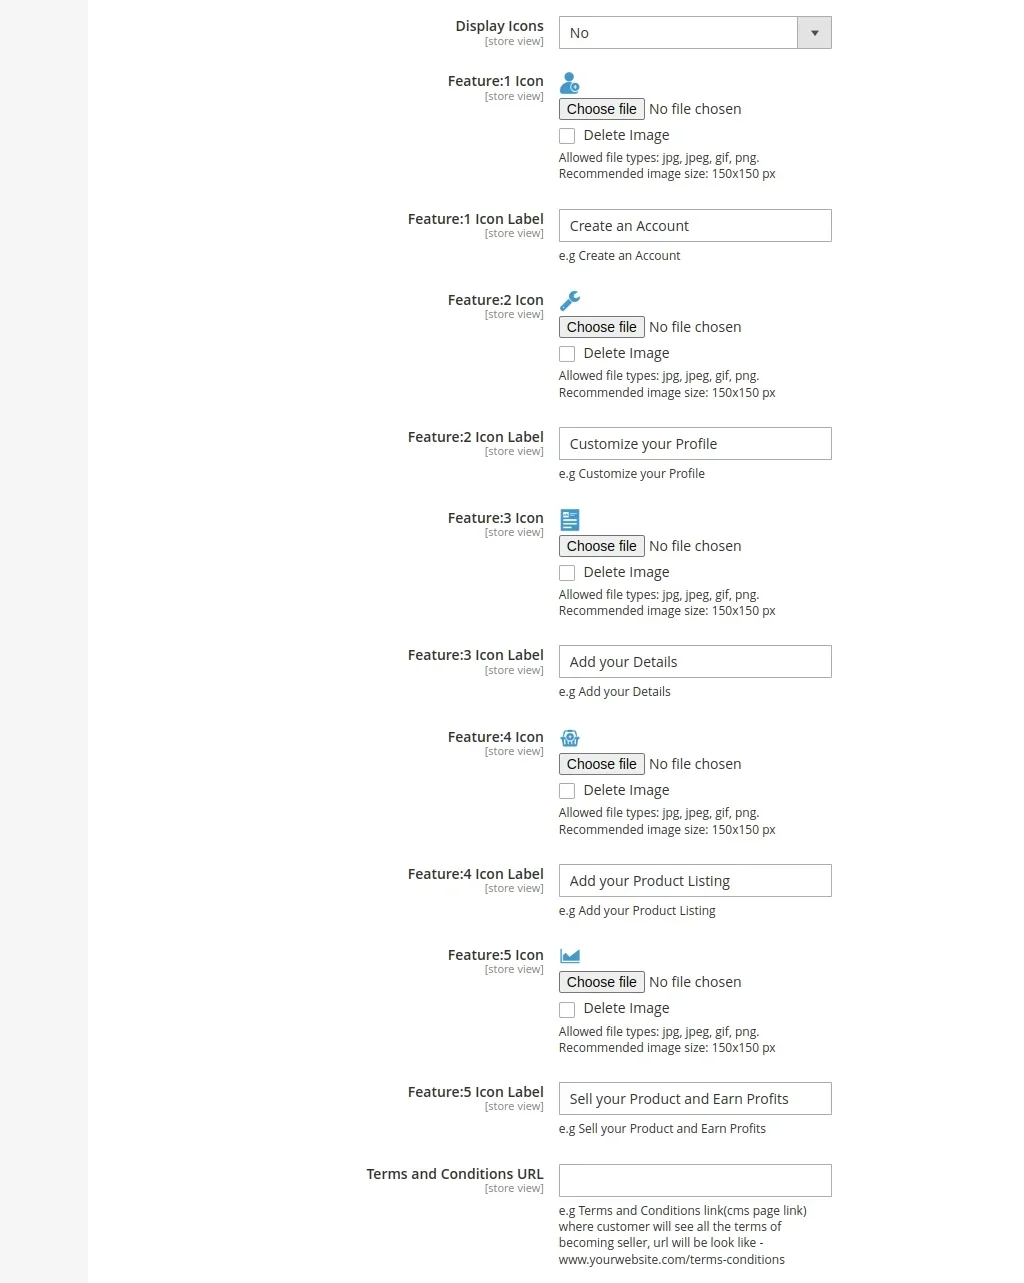
The onboarding wizard presents a modern, streamlined progression:
Step 1 — Initial Registration & Shop Details
The seller completes core identity information, email address, password, and custom shop handle.
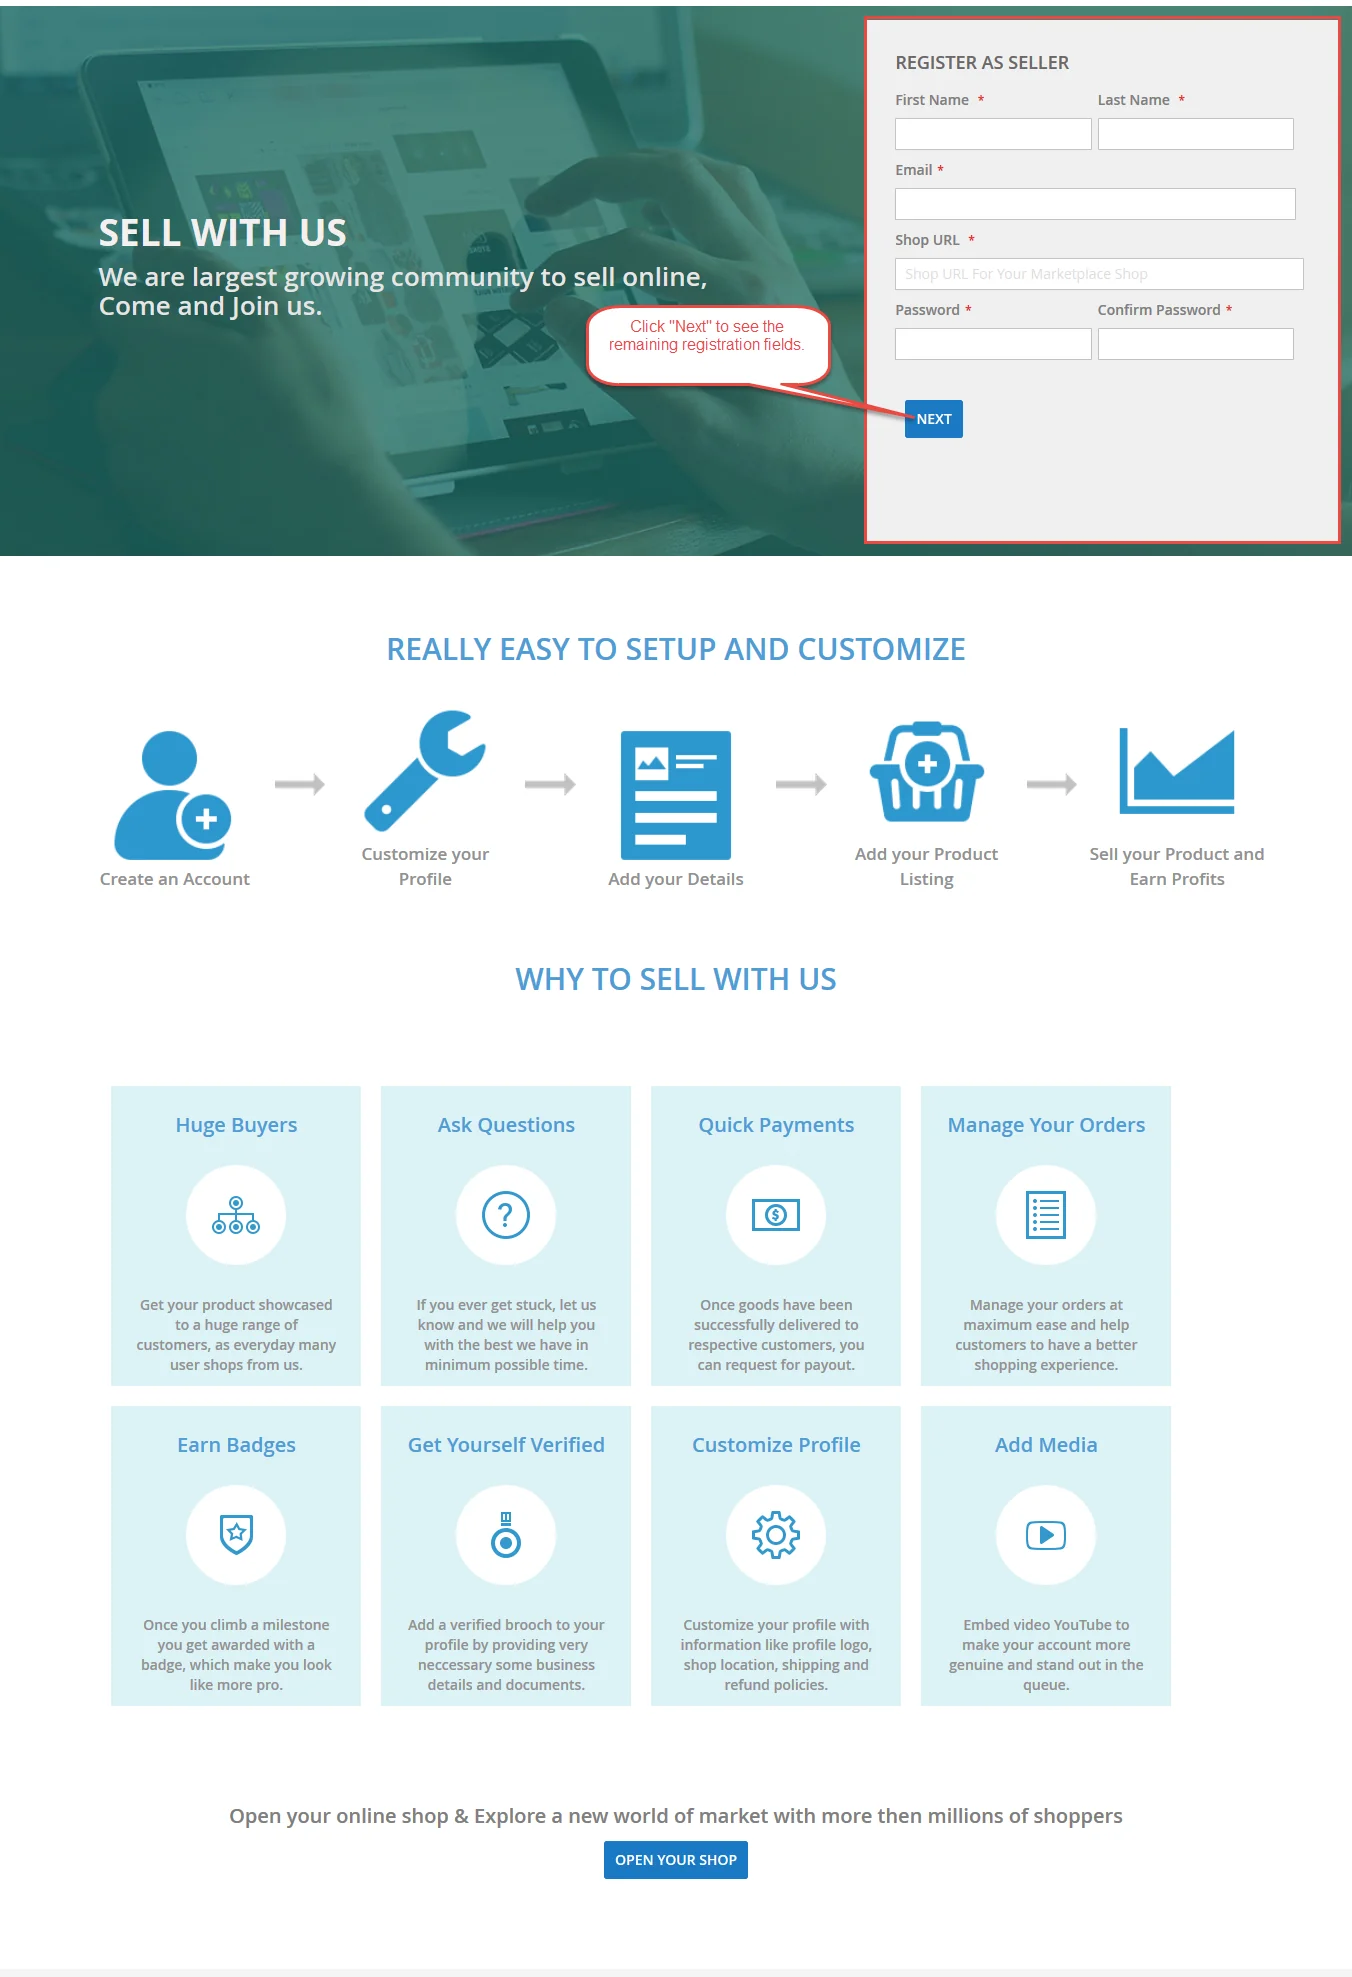
Step 2 — Custom Vendor Attribute Fields
The seller fills in required business attributes and questionnaire inputs.

Step 3 — Media Attachments & Legal Confirmation
The seller uploads credentials, specifies location metadata, reviews legal popups, and submits the registration.