Manage Attributes
The Manage Attribute section allows administrators to create, edit, filter, and delete custom attributes for marketplace sellers and customers.
Accessing the Attribute Management Grid
- In the Magento Admin sidebar, navigate to Marketplace Management.
- Under the Attribute Manager section, select Manage Attribute.
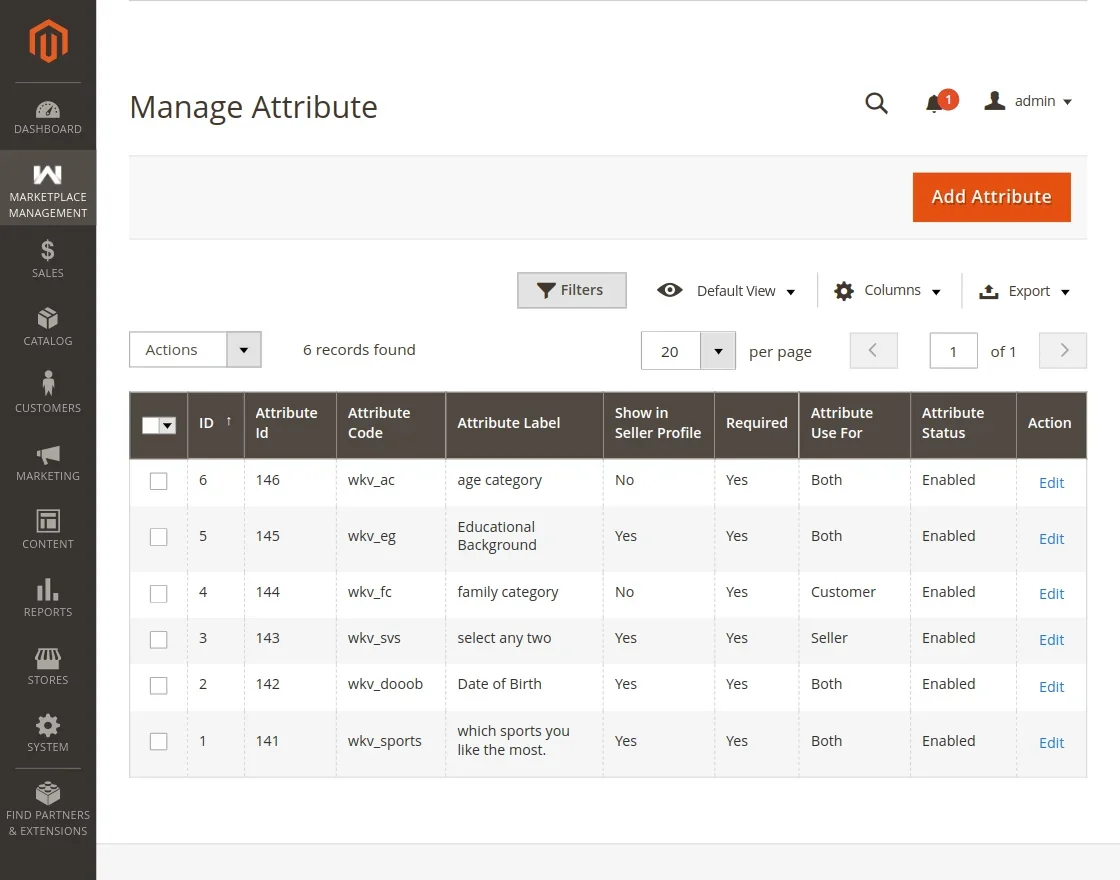
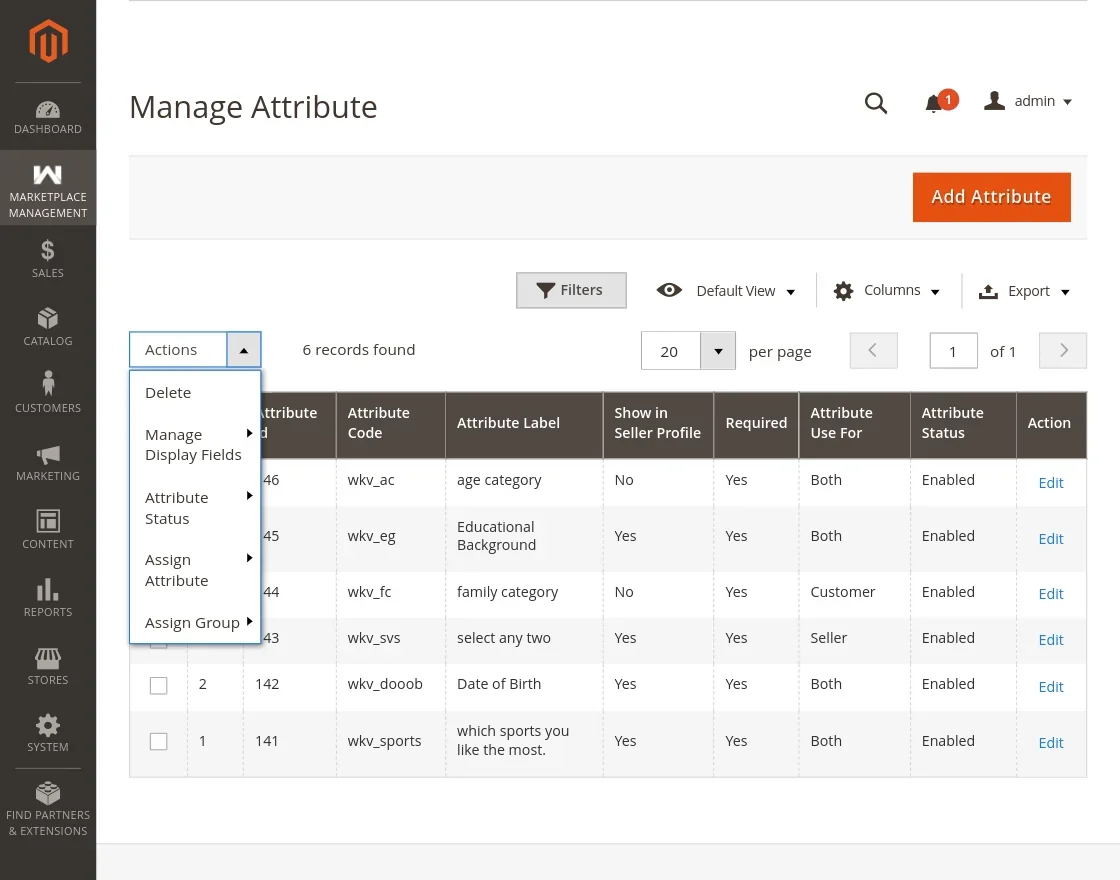
The grid displays all created custom attributes with the following information:
- Attribute Code: Internal machine-readable code identifier.
- Attribute Label: Display label shown to administrators and users.
- Type: Input type used by this attribute.
- Required: Indicates whether the attribute is mandatory (
Yes/No). - Status: Current operational status (
Enabled/Disabled). - Sort Order: Numerical sort priority on forms and profiles.
- Action: Quick action links to Edit the attribute.
Creating a New Attribute
Click the Add New Attribute button at the top-right corner of the grid to open the attribute creation form.
1. Attribute Properties Tab
Configure the foundational behavior and validation rules for the attribute:
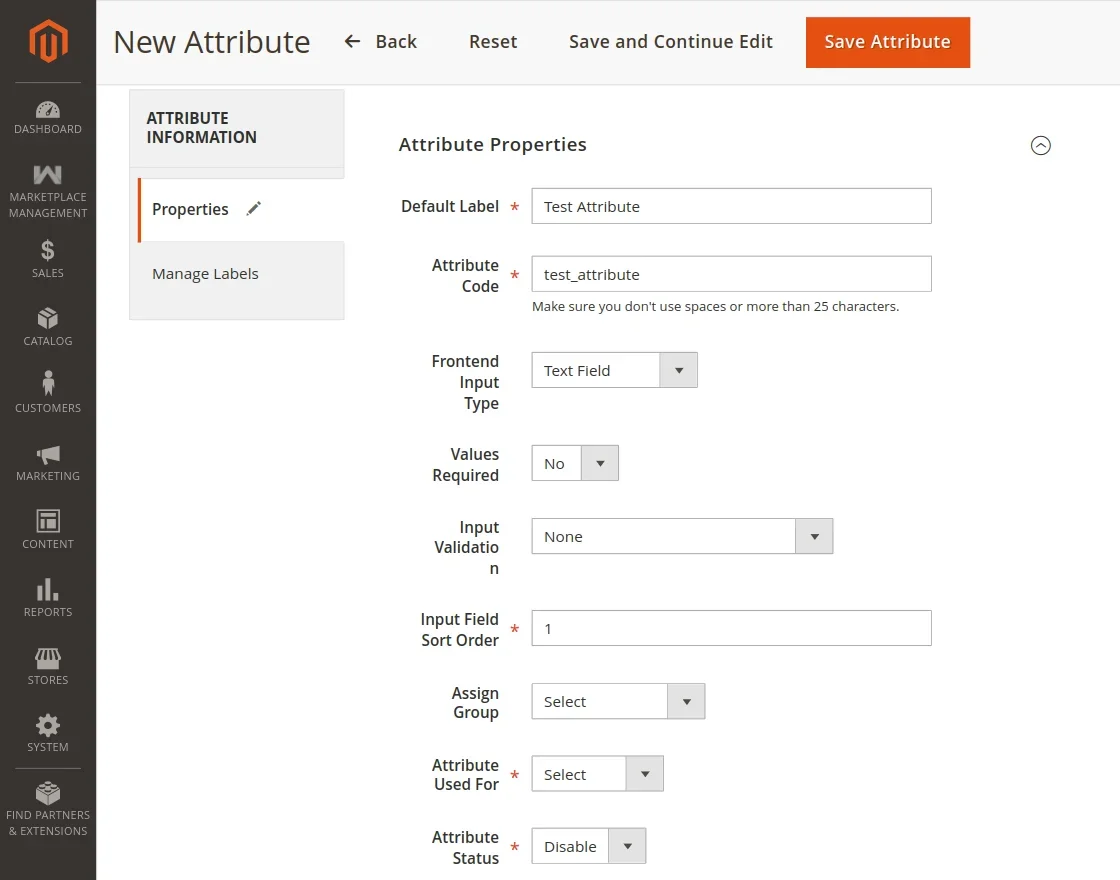
- Attribute Code: A unique alphanumeric identifier in lowercase with underscores (e.g.,
company_tax_id,vendor_license_doc). Cannot be changed once saved. - Attribute Label: The label displayed on storefront forms and admin panels.
- Default Value: Pre-filled default text or value when the form loads.
- Input Type: Select one of 8 supported input types:
Text Field: Single-line text input.Text Area: Multi-line text block for extended descriptions.Date: Interactive date picker component.Yes/No: Boolean toggle dropdown.Dropdown: Single-select list from predefined choices.Multiple Select: Multi-select list allowing multiple choices.Media Image: File uploader restricted to configured image formats (e.g. JPG, PNG).File: File uploader for documents and attachments (e.g. PDF, DOCX).
- Input Validation: Enforce strict data format validation on text inputs:
NoneAlphanumeric(letters and numbers only)Numeric Digits(numbers only)URL(valid web address)Email(valid email address)Letters(alphabetical characters only)
- Values Required: Specify whether users must fill this attribute before submitting the form.
2. Manage Label / Options Tab
Manage multi-store view labels and configure options for selectable input types:
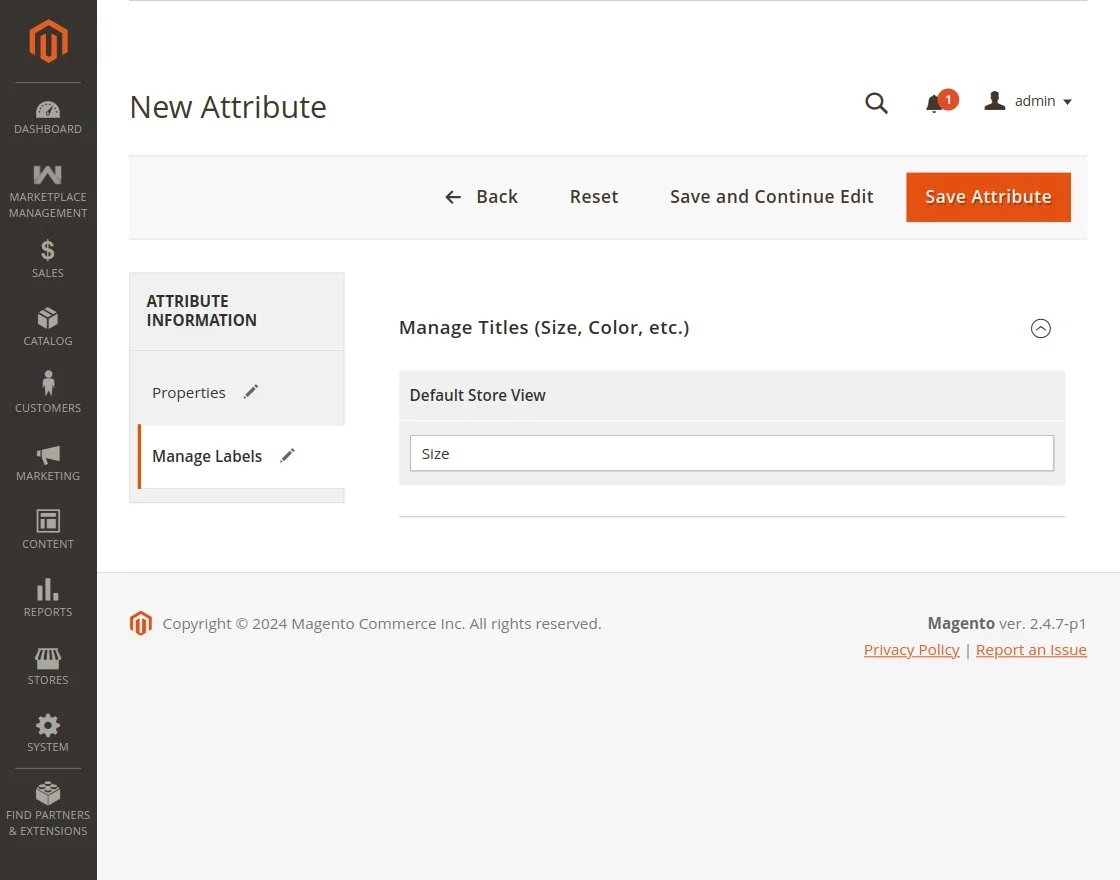
- Store View Labels: Specify translations or custom labels for each active store view.
- Options Table (Dropdown & Multiselect only):
- Click Add Option to add choice entries.
- Provide option labels for the Default store view and specific store views.
- Set the sort order and select an option as the default value if desired.
Editing an Existing Attribute
To modify an attribute, click Edit in the Action column of the attribute grid:
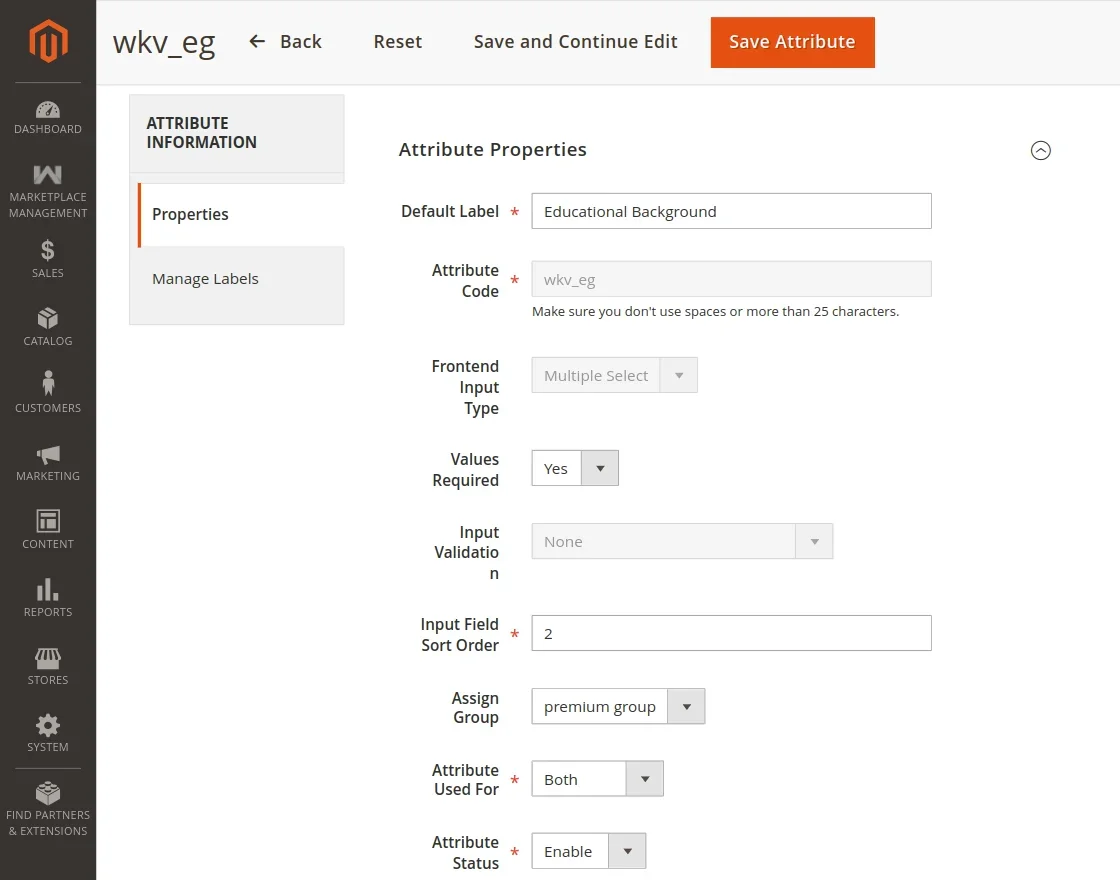
You can update the attribute label, default value, validation rules, status, and option entries. Note that the Attribute Code and Input Type are locked once created to preserve database integrity.
Mass Actions on Attributes
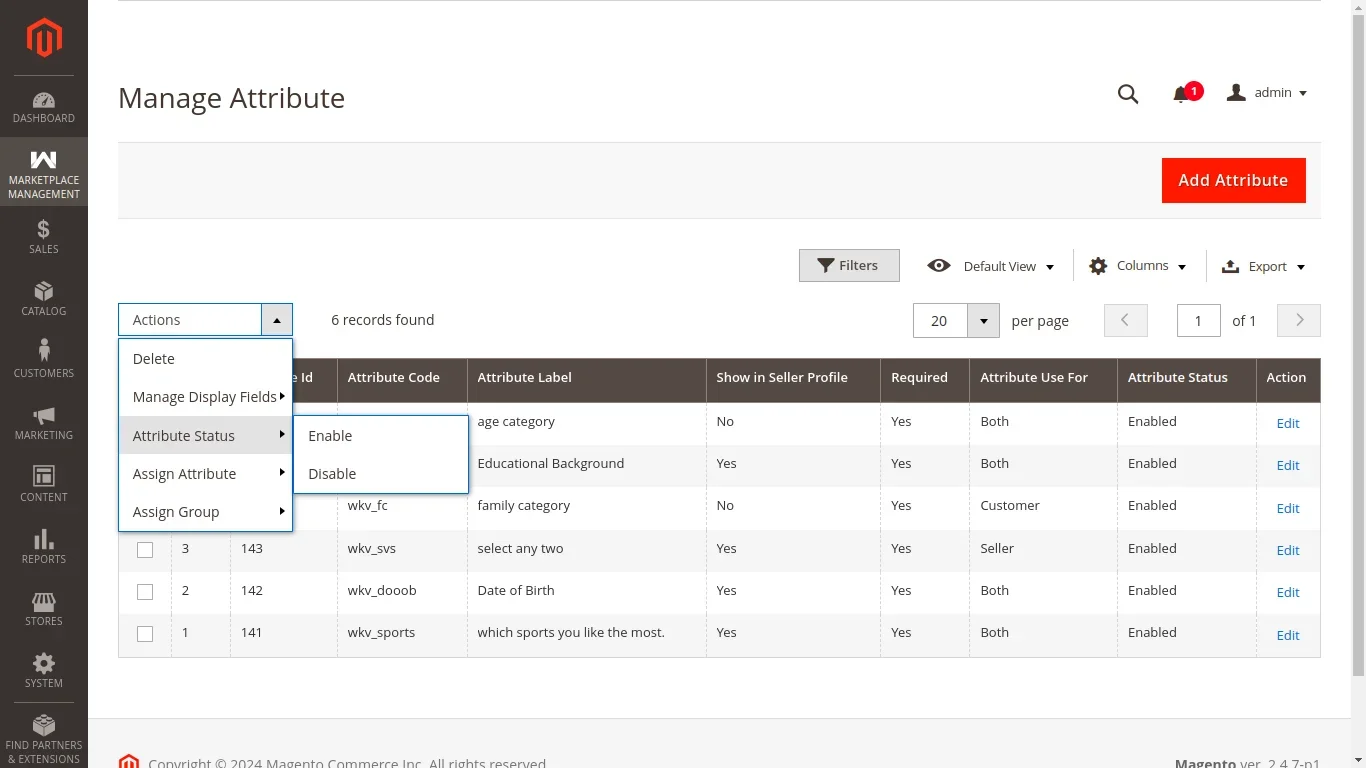
The attribute grid provides bulk operational actions:
Bulk Delete
Select the checkboxes next to the desired attributes, choose Delete from the Actions dropdown menu, and confirm the prompt to permanently remove selected attributes.
Bulk Status Update
Select multiple attributes and use the Update Status action to quickly switch attributes between Enable and Disable states.