
Installation & Deployment
Follow the step-by-step instructions below to install the Hipercalzado Connector for Magento 2 extension on your store server.
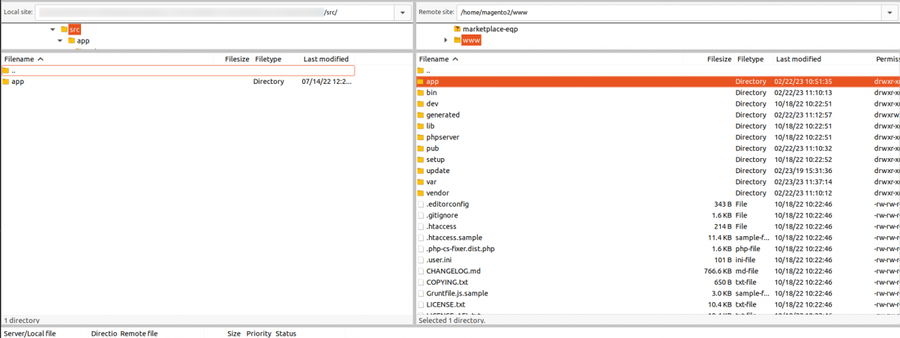
Step 1: Upload Extension Files
- Extract the provided ZIP package downloaded from the Webkul Store.
- Locate the
appdirectory inside the extracted archive. - Upload the
appdirectory to your Magento 2 root directory using SSH, SFTP, or FTP.
Step 2: Run Deployment Commands
Open your terminal, connect to your server, navigate to the Magento 2 root directory, and execute the following deployment sequence:
# 1. Enable module & upgrade database schema
php bin/magento setup:upgrade

# 2. Compile Dependency Injection classes
php bin/magento setup:di:compile

# 3. Deploy static view files for storefront and adminhtml
php bin/magento setup:static-content:deploy -f

# 4. Reindex search and catalog indexers
php bin/magento indexer:reindex

# 5. Flush Magento cache storage
php bin/magento cache:flush
Step 3: Verify Installation
Log in to your Magento Admin Panel and verify that Hipercalzado Connector appears under the left navigation sidebar and under Stores → Configuration → Webkul → Hipercalzado Connect.