
Installation Guide
Follow these steps to install and activate the Akeneo Connector for Magento 2 on your Magento instance.
Step 1: File Transfer
- Download the connector zip archive provided by Webkul and extract its contents to your local workstation.
- Inside the unzipped directory, you will locate an
srcdirectory containing anappfolder. - Transfer or upload the
appfolder into your Magento 2 root directory (<magento-root>/) via SSH, SFTP, or your deployment pipeline:
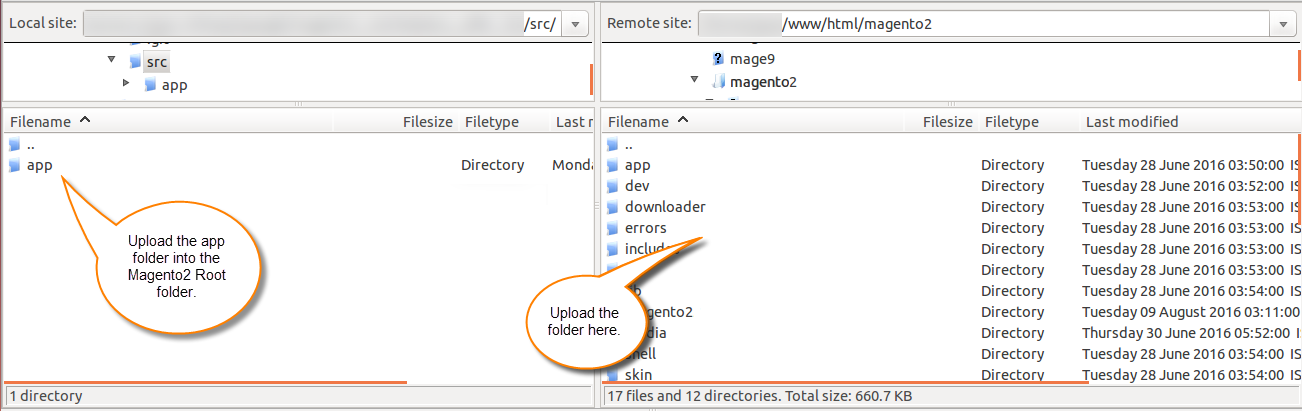
Target Location
The module files must reside in the directory: <magento-root>/app/code/Webkul/AkeneoConnector/
Step 2: Run Magento Deployment Commands
Execute the standard Magento deployment sequence to register the module schema, compile code, and generate frontend assets:
# 1. Enable module and update database schema
php bin/magento setup:upgrade

# 2. Enable Webkul Akeneo Connector if not automatically enabled
php bin/magento module:enable Webkul_AkeneoConnector

# 3. Compile dependency injection and code generators
php bin/magento setup:di:compile

# 4. Deploy static view assets
php bin/magento setup:static-content:deploy -f

# 5. Reindex catalog and search indexers
php bin/magento indexer:reindex

# 6. Flush cache storage
php bin/magento cache:flush
Step 3: Verify Module Status
To verify that the module is successfully installed and active:
Run the module status check via terminal:
php bin/magento module:status Webkul_AkeneoConnectorThe output should confirm:
Module is enabled.Log in to your Magento 2 Admin Panel.
Confirm that the main navigation now contains the Akeneo Connector menu (offering Import, Export, Import Log, and Export Log), and that Stores → Configuration → Webkul includes Akeneo Connector.