
Installation
This guide walks you through installing the Webkul Magento 2 Marketplace Seller Subdomain extension using manual zip extraction or Composer, followed by the essential web server and DNS wildcard configurations.
Option A — Install from Zip Package
Use this method if you downloaded the module archive directly from the Webkul Store.
1. Download the Module Archive
Log in to your Webkul Store account, navigate to My Account > My Purchased Products, and download the extension archive for Webkul_SellerSubDomain.
2. Extract & Upload Files
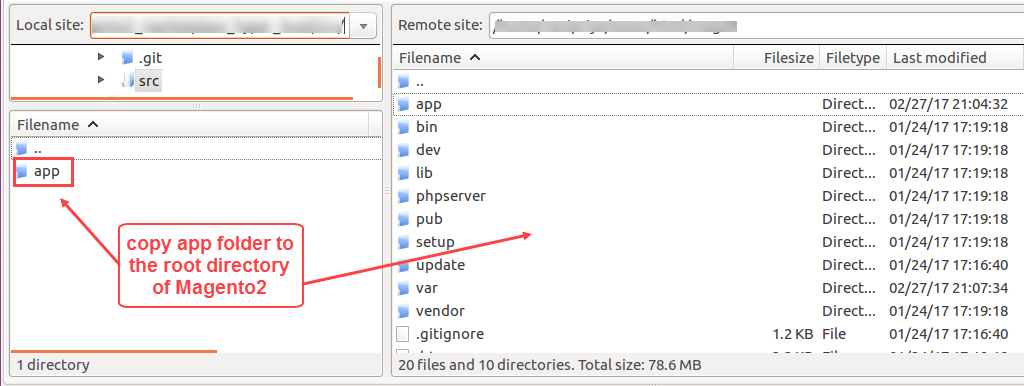
Extract the zip archive on your computer. Inside the extracted directory, locate the src/app folder. Using SSH, SFTP, or your hosting control panel, copy the contents into your Magento 2 root directory so that the module files reside under: app/code/Webkul/SellerSubDomain/
3. Run Installation Commands
Open your terminal, navigate to your Magento 2 root directory, and execute the following commands sequentially:
php bin/magento setup:upgrade
php bin/magento setup:di:compile
php bin/magento setup:static-content:deploy
php bin/magento indexer:reindex
php bin/magento cache:flush
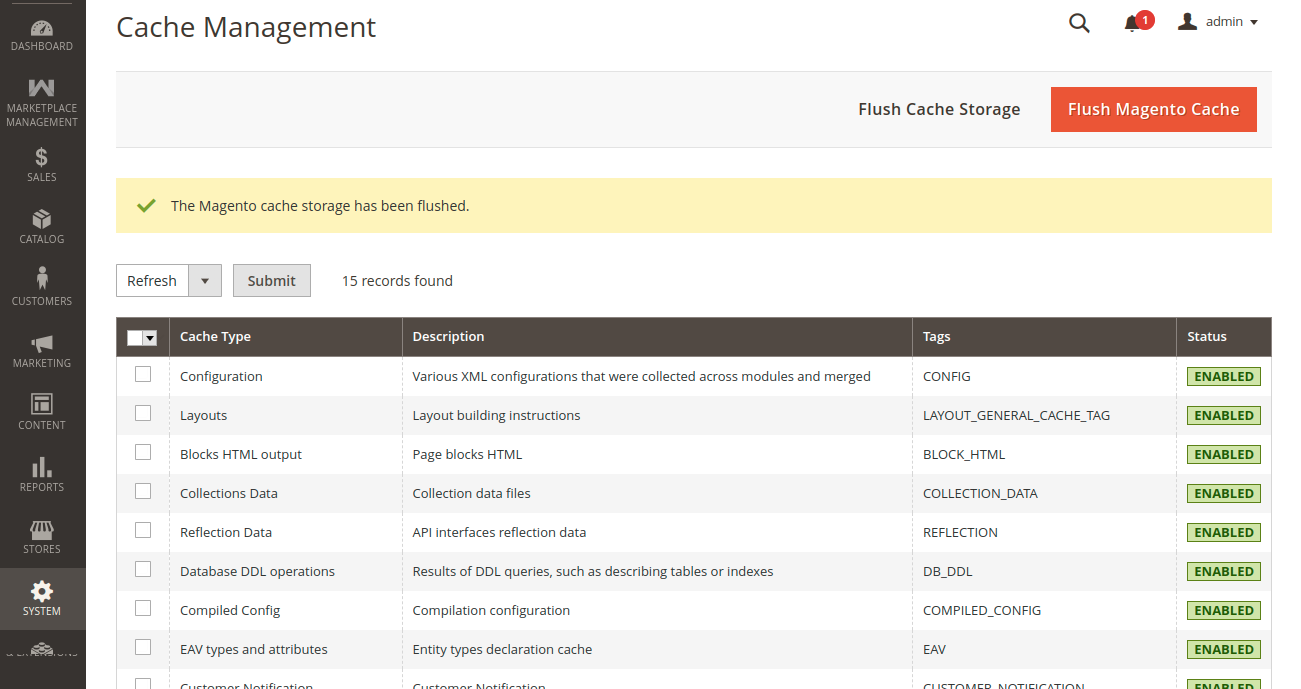
You can also flush caches directly from the Magento Admin Panel by navigating to System > Tools > Cache Management and clicking Flush Magento Cache.
Option B — Install with Composer
Use this method if your organization manages dependencies via Composer repositories.
- Add your Webkul Composer repository credentials to your server environment.
- Run the Composer command to install the module:
composer require webkul/vendor-sub-domain
If your store uses the Hyvä Theme, also install the official Hyvä compatibility companion module:
composer require webkul/vendor-sub-domain-hyva
- Execute the standard deployment commands listed in Option A > 3. Run Installation Commands.
Web Server & DNS Configuration
To enable Magento 2 to dynamically serve multiple seller subdomains under a single codebase, you must set up Wildcard DNS and configure your web server (Apache or Nginx).
1. Wildcard DNS Entry
In your domain's DNS manager (e.g., Cloudflare, Route 53, cPanel DNS, GoDaddy):
- Add an A Record pointing your base domain to your server's public IP address:
- Host:
@(orexample.com) → Points to:Your_Server_IP
- Host:
- Add a Wildcard A Record to capture all dynamic seller subdomains:
- Host:
*(or*.example.com) → Points to:Your_Server_IP
- Host:
2. Apache Web Server Configuration
If you are running Apache, edit your VirtualHost configuration file (e.g., /etc/apache2/sites-available/magento.conf or 000-default.conf):
<VirtualHost *:80>
    ServerName example.com
    ServerAlias *.example.com
    ServerAdmin webmaster@localhost
    DocumentRoot /var/www/html/pub

    <Directory /var/www/html/pub>
        Options Indexes FollowSymLinks
        AllowOverride All
        Require all granted
    </Directory>

    ErrorLog ${APACHE_LOG_DIR}/magento_error.log
    CustomLog ${APACHE_LOG_DIR}/magento_access.log combined
</VirtualHost>
Add ServerAlias *.example.com beneath your primary ServerName. For HTTPS, ensure the same ServerAlias is included within the <VirtualHost *:443> block using your wildcard SSL certificate.
3. Nginx Web Server Configuration
If you are running Nginx, update your server block definition (e.g., /etc/nginx/sites-available/magento.conf):
server {
    listen 80;
    listen [::]:80;
    server_name example.com *.example.com;

    set $MAGE_ROOT /var/www/html;
    include /var/www/html/nginx.conf.sample;
}
Replace the placeholder server_name with yourdomain.com *.yourdomain.com; so that Nginx routes all subdomain traffic directly to the Magento application entry point.
Reload your web server after updating configuration:
sudo systemctl reload nginx   # For Nginx
sudo systemctl reload apache2 # For Apache
Language & Locale Translation
The extension supports internationalization and multiple storefront locales:
Step 1: Change Storefront Locale
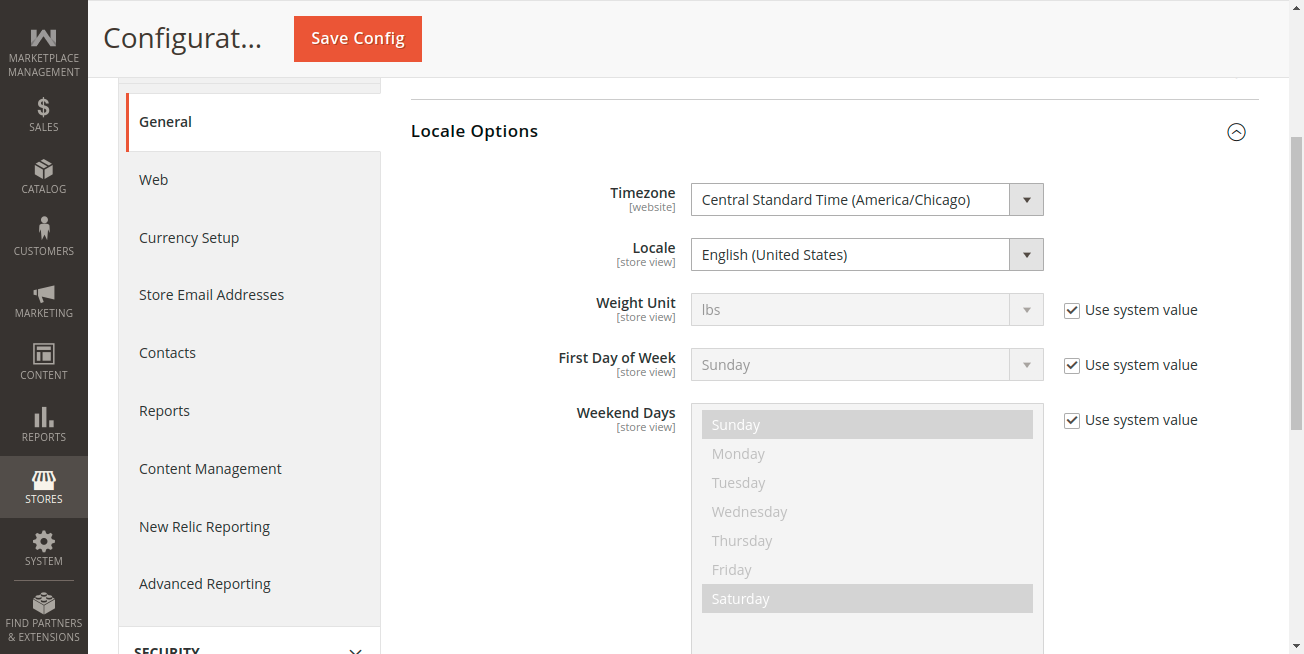
In your Magento Admin Panel, navigate to Stores > Configuration > General > General > Locale Options. Select your desired language from the Locale dropdown and save the configuration.
Step 2: Edit Translation CSV Dictionary
- Navigate to the module's translation folder:
app/code/Webkul/SellerSubDomain/i18n/.
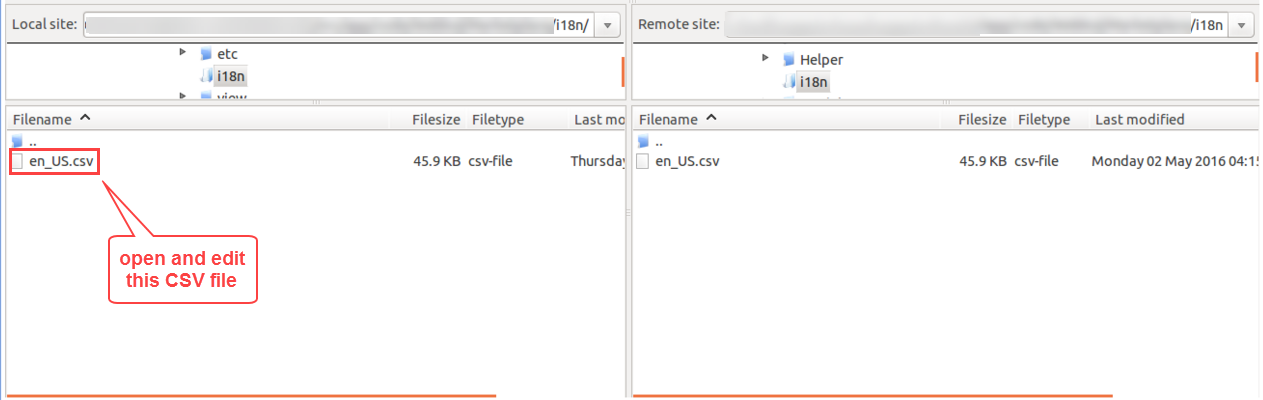
- Open
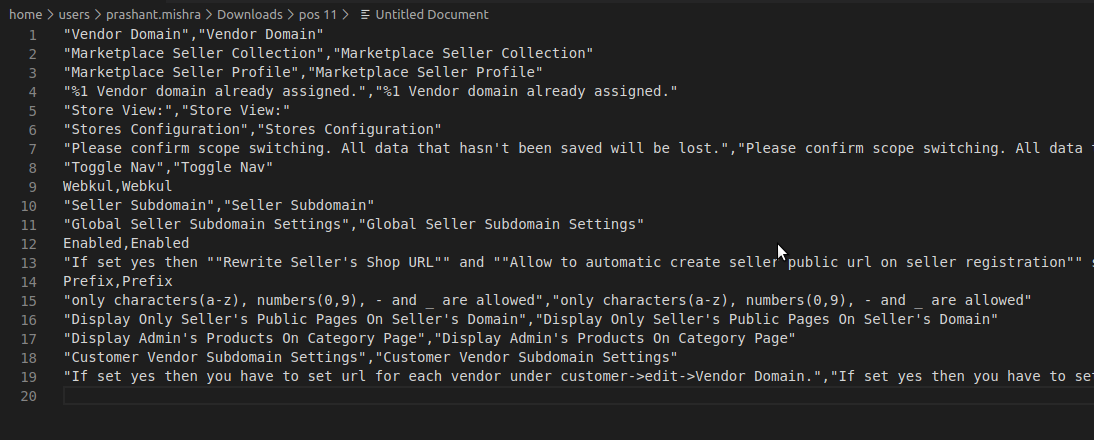
en_US.csvin a text editor. - Replace the translated text on the right side of the comma while keeping the original English string intact on the left.
- Save the file with your target locale code (e.g.,
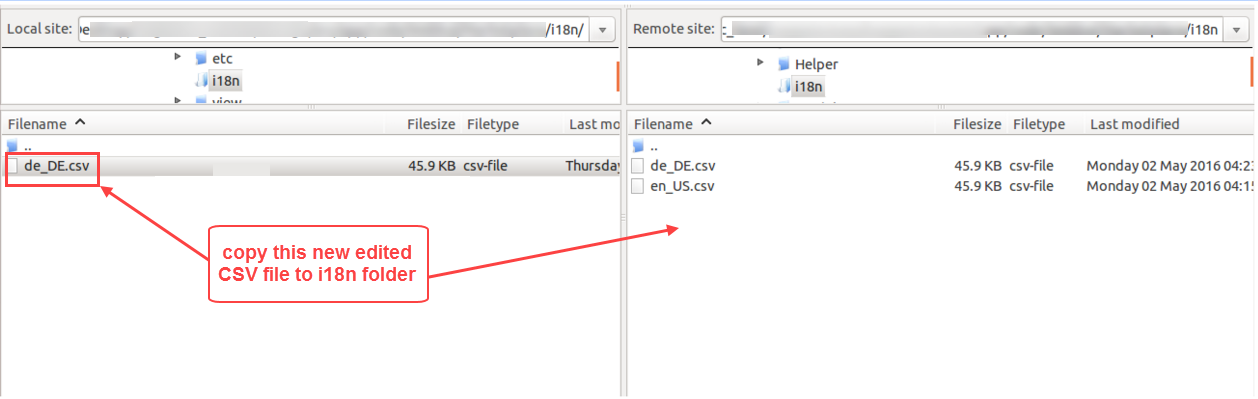
de_DE.csv,fr_FR.csv, ores_ES.csv) and upload it toapp/code/Webkul/SellerSubDomain/i18n/.
- Re-deploy static content and clear the Magento cache:
php bin/magento setup:static-content:deploy <locale_code>
php bin/magento cache:flush