
Customer Checkout Workflow
This guide details how customers experience Parcel Perfect Shipping on the storefront—from estimating shipping rates in the cart to completing checkout.
1. Estimate Shipping in Shopping Cart
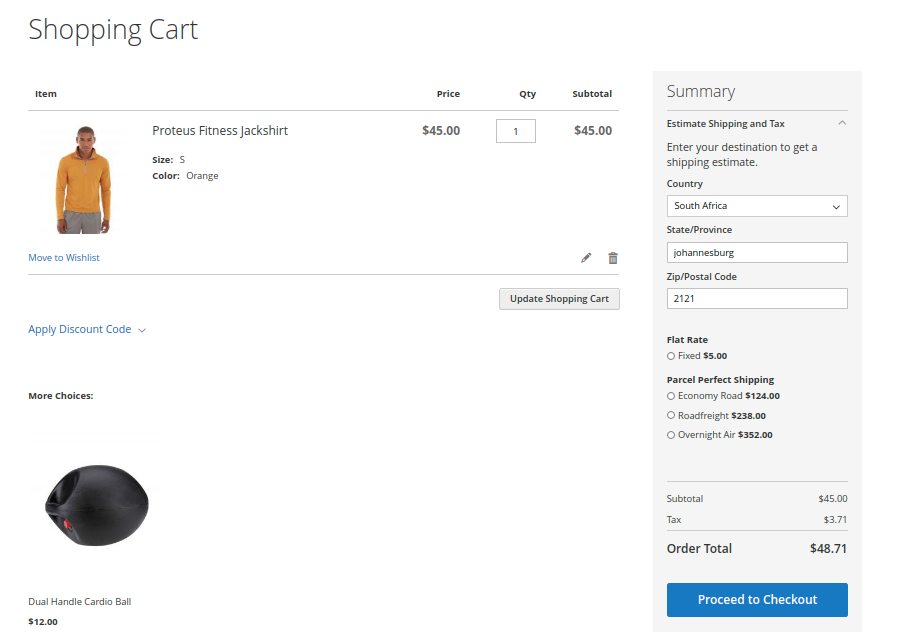
When a shopper adds products to the shopping cart, they can calculate shipping costs in real time before navigating to checkout:
- The customer opens the Shopping Cart page (
/checkout/cart/). - Under Estimate Shipping and Tax, the customer selects the destination Country, State/Province, and enters their Zip/Postal Code.
- The Parcel Perfect API calculates available courier rates dynamically and displays the shipping method along with the exact price.
2. Selecting Parcel Perfect at Checkout
When the customer proceeds to checkout:
- In the Shipping Address step, the customer fills in or confirms their delivery address.
- Under Shipping Methods, all eligible Parcel Perfect delivery options are listed with their corresponding prices and handling fees.
- The customer selects the desired Parcel Perfect shipping option.
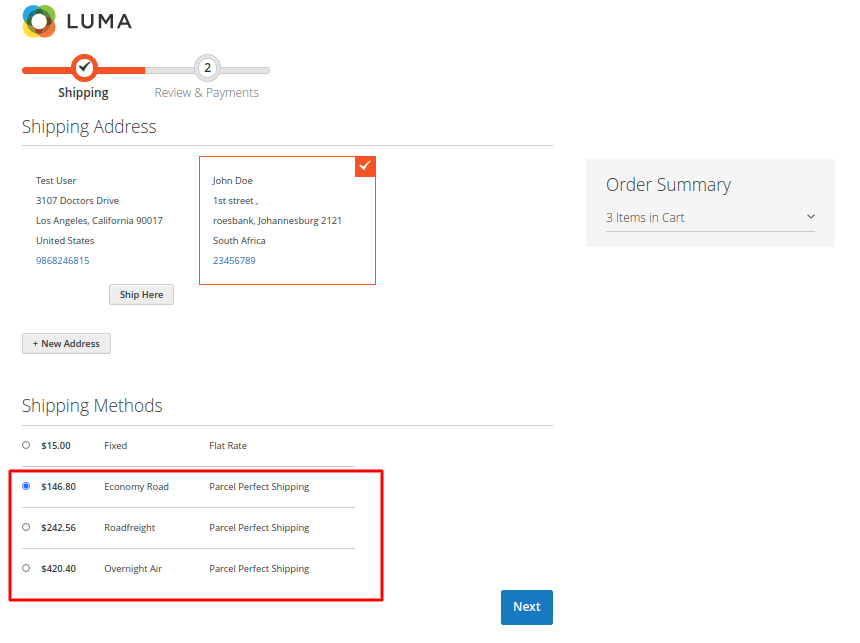
- The customer clicks Next to proceed to the payment step.
3. Order Review and Payment
On the Review & Payments step:
- The customer reviews the order summary, where the selected Parcel Perfect Shipping method and rate are itemized.
- The shipping address and shipping method details are clearly summarized on the right-hand panel.
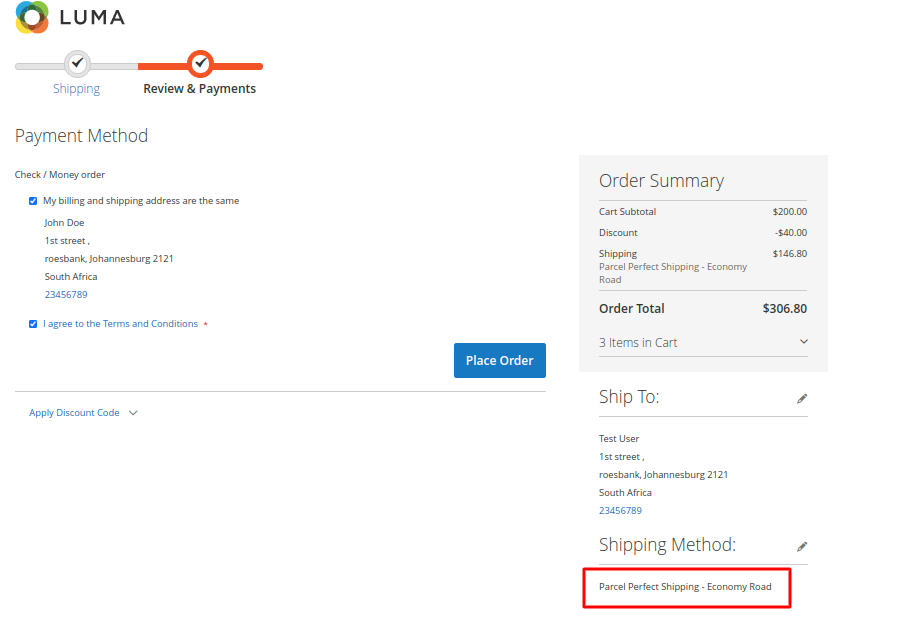
- The customer selects their payment method and clicks Place Order.
- An order confirmation page is displayed with the assigned Order ID.
Next Step
Learn how administrators process placed orders and generate invoices in Order & Invoice Management.